derekcohen
Member
- Joined
- Jun 22, 2008
- Messages
- 1,060
I was asked to explain how I go about sharpening my bandsaw blades, and finally got around to putting together a couple of photos.
Let me say first that I did not invent this method. It is widely used. I learned it on YouTube, that font of all important wisdom")
The fixture is new, and really thrown together in about 20 minutes. Before this, for a number of years, I would simply freehand this process. That worked well. Eventually .. recently .. I decided a fixture would offer more reliable results and less hand fatigue. Well, I think that this is so.
The main tool is a Dremel with a small diamond disk (the disks are available for pennies on eBay).
The blade here is bimetal 3 tpi 10mm wide. These are easy to sharpen. I use these blades for most everything except re-sawing wide boards.
I have also very successfully sharpened a 1.3 tpi 1" Lenox Woodmaster CT, which is a carbide tipped resaw blade.
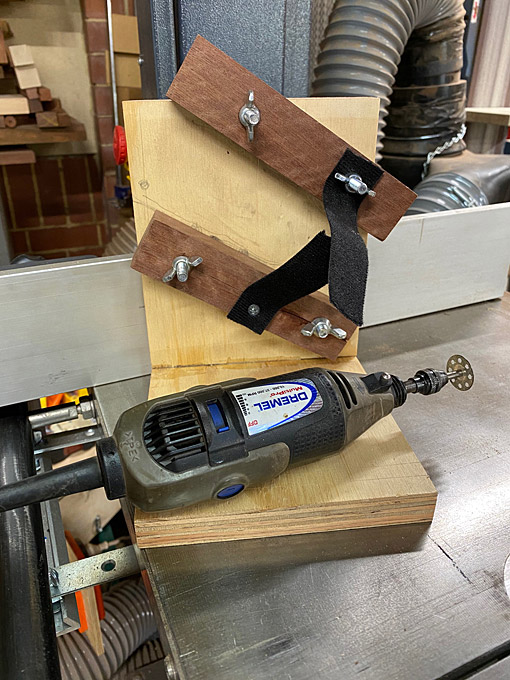
The set up ...

This is made of two pieces of ply, at 90 degrees, the Dremel is wedged between the brackets at the desired angle, and held on with velcro straps ..
The method ...
Simply "touch" the back of the tooth and grind a teensy weensy flat. Damn these technical terms - not too complex I hope? The angle I choose is in line with the back, but it is not critical. What I believe that the fixture does (better than freehanding) is keep the height of the teeth the same. That ensures that all teeth are cutting.
Step 1. Mark the start of the blade (blue tape).
Step 2. Set the fixture against the bandsaw fence to keep it tracking square.
Step 3. Simply push the wheel into the tooth.
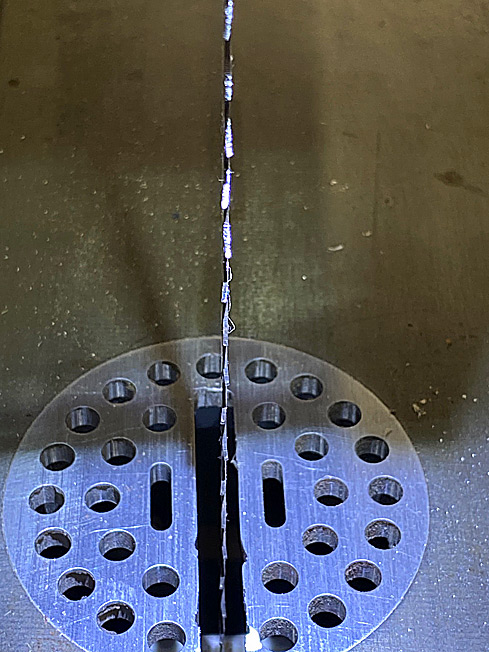
Below you can see (not too well, I'm afraid - the shiny spot looks the length of the tooth, which it is not) a tiny silver shine on the back of the teeth sharpened, and the absence of this on those unsharpened ... a better picture would resemble the sharpening of a backsaw ..
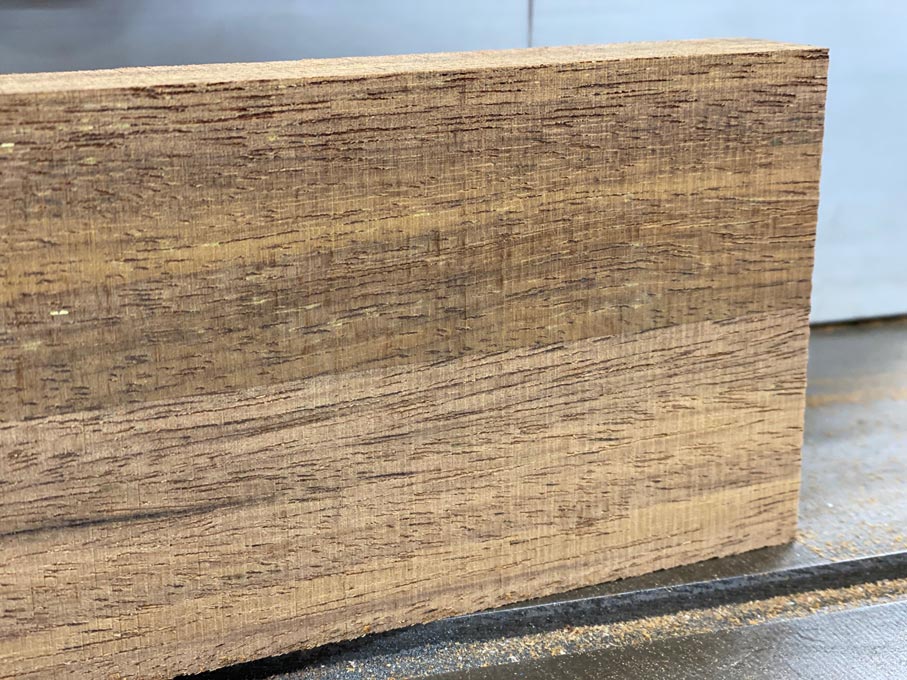
The result ...
The wood here is hard, dry Jarrah. The two sides are the result of cutting with a freshly sharpened blade.
Regards from Perth
Derek
Let me say first that I did not invent this method. It is widely used. I learned it on YouTube, that font of all important wisdom
The fixture is new, and really thrown together in about 20 minutes. Before this, for a number of years, I would simply freehand this process. That worked well. Eventually .. recently .. I decided a fixture would offer more reliable results and less hand fatigue. Well, I think that this is so.
The main tool is a Dremel with a small diamond disk (the disks are available for pennies on eBay).
The blade here is bimetal 3 tpi 10mm wide. These are easy to sharpen. I use these blades for most everything except re-sawing wide boards.
I have also very successfully sharpened a 1.3 tpi 1" Lenox Woodmaster CT, which is a carbide tipped resaw blade.
The set up ...
This is made of two pieces of ply, at 90 degrees, the Dremel is wedged between the brackets at the desired angle, and held on with velcro straps ..
The method ...
Simply "touch" the back of the tooth and grind a teensy weensy flat. Damn these technical terms - not too complex I hope? The angle I choose is in line with the back, but it is not critical. What I believe that the fixture does (better than freehanding) is keep the height of the teeth the same. That ensures that all teeth are cutting.
Step 1. Mark the start of the blade (blue tape).
Step 2. Set the fixture against the bandsaw fence to keep it tracking square.
Step 3. Simply push the wheel into the tooth.
Below you can see (not too well, I'm afraid - the shiny spot looks the length of the tooth, which it is not) a tiny silver shine on the back of the teeth sharpened, and the absence of this on those unsharpened ... a better picture would resemble the sharpening of a backsaw ..
The result ...
The wood here is hard, dry Jarrah. The two sides are the result of cutting with a freshly sharpened blade.
Regards from Perth
Derek