Some MFT Mods

Qwas

Retailer
Member
Joined
Sep 22, 2007
Messages
636
I'm going to start by posting a couple of overall views. Then I will post the modifications. There are 10 of them for right now. Some are real easy and cheap. They might not even count as a modification. But they make my use of the table easier so I'm going to throw them in here.

Most of these mods are very cheap and could be done better, but they are functional and I'm happy with what I have.

Lots of ideas for you to think about.
Feel free to ask any questions or give your critique.

[attachimg=1]

[attachimg=2]

[attachimg=3]
 

Attachments

  • MftMods1.jpg
    MftMods1.jpg
    123.3 KB · Views: 5,291
  • MftMods2.jpg
    MftMods2.jpg
    110.2 KB · Views: 4,879
  • MftMods3.jpg
    MftMods3.jpg
    118 KB · Views: 5,668
The Board Holder.

This one is simple and cheap. Most of you might already know it. It is a non-adhesive, non-slip shelf liner, aka Shelf Liner. It's original use was to keep dishes from sliding and banging around in kitchen cabinets. It can be picked up in the kitchen department of most stores for about $5 with enough material to last a lifetime. Just ask for shelf liner. It works like the rubber on the bottom of the guide rails. It is excellent for sanding boards without having to clamp the board. Simply put it on the table, put the board to be sanded on top of it, and start sanding. If you are trying to saw a stack of boards but the boards keep slipping between each other, throw in a piece of the shelf liner. This is a "must have" for any shop.

[attachimg=5]

Table Extension as long as you need.

Another simple one. The shelves on my shop walls are attached at MFT Table top height. When installing the shelves, I extended a long straight edge off of the MFT going to the wall. I butted the shelves to the bottom of the straight edge and screwed the shelves in. Need to support a 10 foot board? Clear off the shelf and move the table. Plop the board down on the table and shelf. Need some extra support in the middle? Use the Saw Horse Extension.

[attachimg=2]

Saw Horse Table Extension

This one had to be my second modification. I won this expensive saw horse for next to nothing on eBay. Actually it's made by Ikea as a computer table leg for college kids. It's height is adjustable and I set it to a height that was the same as the MFT.

I use it all the time to hold boards while sawing. I would suggest making a saw horse from scratch and making it the right height. I would also put a nice wide board on the top of the sawhorse.

The nice part, it allows me to move the guide towards the end of the table since the sawhorse holds the waste side of the boards.

[attachimg=3]

[attachimg=4]

Update

This saw horse has been replaced by a Ridgid FlipTop which are available through HomeDepot for around $30. I've been very pleased with it and it travels with my MFT.

[attachimg=6]

[attachimg=7]
 

Attachments

  • FlipTop Flip.jpg
    FlipTop Flip.jpg
    40.2 KB · Views: 4,651
  • FlipTop1.jpg
    FlipTop1.jpg
    51.2 KB · Views: 4,651
  • Brd Holder.jpg
    Brd Holder.jpg
    123.4 KB · Views: 4,648
  • MFT-SawHorse2.jpg
    MFT-SawHorse2.jpg
    124.5 KB · Views: 4,786
  • MFT-SawHorse1.jpg
    MFT-SawHorse1.jpg
    117 KB · Views: 4,650
  • MFT-Wall-Ext.jpg
    MFT-Wall-Ext.jpg
    112.5 KB · Views: 4,759
  • Qwas Keyboard Avatar.jpg
    Qwas Keyboard Avatar.jpg
    8.6 KB · Views: 3,176
I need one of those lawnmower wheels mounted on the corner of the table so I don't snag my shirt after Llap and I have internet based scotch tastings.

I like the shelves mounted at the right height too.
 
TS-55 and PS-300 Holder.

Okay, I copied this one from the FOG. I use my jigsaw quite often so I decided to add an extra shelf to hold the jigsaw. You could do the same for the router, domino or any other commonly used tool. I can see some woodworkers extending shelves down to the floor.

I don't think any details are necessary. Find the original posts for a TS-55 holder and go from there.

[attachimg=1]

[attachimg=2]
 

Attachments

  • MFT-Saw-Holder2.jpg
    MFT-Saw-Holder2.jpg
    120.5 KB · Views: 4,880
  • MFT-Saw-Holder1.jpg
    MFT-Saw-Holder1.jpg
    118.6 KB · Views: 4,715
The Wheel.

This was my first modification. When I bought the table, I didn't have my workshop. Every night the table was moved into the house and in the morning it was dragged out to the porch. There was days that it would get loaded into my truck and used in the field. In South Georgia that means nice soft sand.

So my answer was one 6 inch wheel mounted on the top of the side rail. The metal bracket was something I had laying around. A couple of 1/4-20 bolts and some wing nuts and it was mounted and easily removed for use. The wheel is from a lawn mower and can be found at any hardware store.

At night, I mount the wheel, turn the table up on its side with the wheel down, fold up the legs, and wheel it into the house. It moves much like a wheelbarrow. The first night I noticed by adding a 2x4 under the other side would allow me to store the table right on its side taking up less space. I grabbed a screw and put it through the extra hole where the table legs are mounted. I keep the screw a little loose so I can move the 2x4 during use. I also moved the guide rail so it would not hang below the 2x4.

When mounted, the 6 inch wheel makes a nice rest for the ETS 150 sander.

[attachimg=1]

[attachimg=2]

[attachimg=3]

[attachimg=4]

And here it is with the ETS-150 sander:

[attachimg=5]


Attachments

  • MFT-Wheel1.jpg
    MFT-Wheel1.jpg
    53.4 KB · Views: 4,652
  • MFT-Wheel2.jpg
    MFT-Wheel2.jpg
    60.8 KB · Views: 4,627
  • MFT-Wheel3.jpg
    MFT-Wheel3.jpg
    37.7 KB · Views: 4,612
  • MFT-Wheel4.jpg
    MFT-Wheel4.jpg
    74.7 KB · Views: 4,650
  • Wheel11.jpg
    Wheel11.jpg
    40.1 KB · Views: 4,650
The Rain Gutter Storage Bin.

This is a simple one. I bought a plastic rain gutter that goes around your house, cut it to length, and glued the end caps on. I drilled two 1/4 inch holes and put some 1/4-20 bolts with square nuts in them. I slide it into the side rail and finger tighten. Instant Storage Bin for rulers, squares, pencils, etc. I had a piece of aluminum lying around that used to be a door seal. I cut it to length and used it as the pencil tray.

I like and use this so often that I'm going to make a second one to put on the opposite side of the table.

The only trouble so far is that it collects sawdust and other table junk. Maybe a small slot cut on the bottom of the gutter, a screen glued onto the bottom, and a vacuum hose sealed at the end with a slot cut along its length to match the above slot and then glued or clamped in place.

[attachimg=1]

[attachimg=2]

[attachimg=3]

Update

This tray has been replaced by one you can buy in Walmart, kitchen department. This new one allows sawdust to fall through it. There are other threads concerning this tray.

[attachimg=4]

[attachimg=5]

[attachimg=6]
 

Attachments

  • New Tray 2screw.jpg
    New Tray 2screw.jpg
    97 KB · Views: 4,621
  • MFT Tray Walmart.jpg
    MFT Tray Walmart.jpg
    69.7 KB · Views: 4,583
  • MFT Tray Walmart2.jpg
    MFT Tray Walmart2.jpg
    96.5 KB · Views: 4,644
  • MFT-Tray1.jpg
    MFT-Tray1.jpg
    65.5 KB · Views: 5,262
  • MFT-Tray3.jpg
    MFT-Tray3.jpg
    38.4 KB · Views: 4,590
  • MFT-Tray2.jpg
    MFT-Tray2.jpg
    29.9 KB · Views: 4,595
Table Extension.

This one came out of necessity. I needed to glue up a cabinet that was longer than the table. I didn't want to wait for something to be shipped to me. So, I looked at my scrap wood pile and previous eBay winnings and came up with this. It is not as strong as the MFT but was strong enough for what I needed.
         
The top is 1/4 inch plywood, 15 x 28 inches. a 1x4 inch has been cut out on the top corner for the fence holder. Another 1/4 inch plywood was attached to the bottom and then sanded down to bring the top level with the MFT. My top had an aluminum J channel already glued on that fits the MFT slot. You could                      use some #12 metal screws run into the bottom of the top, 3/4 inch from the edge. Leave the screws sticking out 1/8 to 1/4 inch so the heads will ride inside the slot.

For me, in the field, it was important for the legs to be attached to the MFT. I decided to use the cross brace like Festool did for their extensions.
I used 2 2x4s 29 1/2 inches long. At the table top, it was cut at 70 degree angle to sit flush with the top. It was attached to the top using a hinge. This allows everything to fold up when not in use. The bottom of the 2x4s have a 1x1 inch rounded notch cut into them to fit on the MFT cross brace.

This extension has worked out so well that it stays on the table all the time. I made a second one (rarely used) that can attach to the other side of the table giving me a total of an extra 30 inches in length.

[attachimg=1]

[attachimg=2]

[attachimg=3]

[attachimg=4]
 

Attachments

  • MFT-Ext1.jpg
    MFT-Ext1.jpg
    117.7 KB · Views: 4,623
  • MFT-Ext2.jpg
    MFT-Ext2.jpg
    122.3 KB · Views: 4,556
  • MFT-Ext3.jpg
    MFT-Ext3.jpg
    121.1 KB · Views: 4,570
  • MFT-Ext4.jpg
    MFT-Ext4.jpg
    123.6 KB · Views: 4,574
Clamp Holders.

This is my latest one and it is too new to know if I'm 100 percent happy yet. But I will give some details in case any one has been thinking about something similar.

For the quick clamps and regular table clamps, I mounted a spare piece of aluminum bar (1/4 inches square) 19 inches long onto a U shape piece of scrap. This puts the aluminum bar about 2 1/2 inches off the wall. Simply rest the clamps on the aluminum bar.

I did the same for the "clamping elements" but made the bar sit 1 3/4 inches off the wall. To store the clamp, bring it between the wall and aluminum bar,  raise and twist it 90 degrees. To remove the clamp, twist 90 degrees and lower.

[attachimg=1]

[attachimg=2]
 

Attachments

  • MFT-Clamps2.jpg
    MFT-Clamps2.jpg
    117.6 KB · Views: 4,522
  • MFT-Clamps1.jpg
    MFT-Clamps1.jpg
    124.4 KB · Views: 4,601
Power Boom.

I've always believed in a power boom. It's just so much nicer to have power cords overhead rather than on the floor. Of course back then all my power cords were less than 6 feet long. These 16 foot power cords might have me rethinking this some day.

This Power Boom is a 3/4 inch pipe mounted in a steel beam clamp (got on eBay, can't tell you where to find them). This allows the Boom to swivel and get out of the way. The pipe union allows all the weight to rest on the clamp (secured to the wall with a small lag bolt for extra strength). The bolt in the clamp hitting the pipe is finger tight.  The pipe above the union is to keep my power strip cord covered and safe until it is above 8 feet. On this top pipe you will notice an oversize pipe holder/clamp. This was needed to allow the Boom to swivel easy. Eventually (when I feel everything is just right), the power strip cord will be run through the inside of the pipes. I also mounted the power strip on a 22 inch drawer slide. The drawer slide is handy when I stow the boom to the side or sometimes my table is close to the wall and sometimes not. I like the power strip to have an on/off switch so I can kill power to everything when leaving.

I use a Fein Turbo 1 dust collector and the hose fits nicely in a 2 inch PVC pipe. I cut the pipe slightly longer than the power strip and attached to the power strip (be careful that it does not interfere with the drawer slide). The hose is now up and out of your way but easily removed if needed elsewhere. The hose can be pulled through more if you need extra and pushed back through when no longer needed.

My power strip need to be replaced with one that has a longer cord. The new cord will run to the corner, down the wall and then to the vacuum/dust collector. I have the power strip but it has a different mounting method that needs some thought. Future project.

[attachimg=1]

[attachimg=2]

[attachimg=3]

[attachimg=4]
 

Attachments

  • MFT-Boom1.jpg
    MFT-Boom1.jpg
    118.6 KB · Views: 4,524
  • MFT-Boom2.jpg
    MFT-Boom2.jpg
    67.4 KB · Views: 4,500
  • MFT-Boom3.jpg
    MFT-Boom3.jpg
    118.8 KB · Views: 4,517
  • MFT-Boom4.jpg
    MFT-Boom4.jpg
    104.3 KB · Views: 4,515
Miter Jig.

My inspiration came from Jerry Work's article on the MFT. I have made his square jig but didn't like his setup for miters. I wanted something simpler. My MFT Fence edge stays about 8 inches away from the cutting edge of the guide rail. I cut things that are thinner than the fence rail so I don't like the fence sitting under the guide. So, my miter idea is to move the fence to the center of the table. I grabbed a scrap piece of 1/2 inch plywood, 2 foot square. Draw a line from corner to corner. Mark 8 inches on this line from the right corner. Make a cutout for the fence from the left corner to the 8 inch mark. Make a cutout for the miter head of the fence.

Now you are ready for use. Align the fence for 90 degrees from the guide rail. Put your plywood miter jig over the fence. Clamp the miter jig out on the left sides to keep it from sliding around. You want the right corner (that sits under the guide rail) to be right at the cutting edge. And you are ready to cut.

My plywood was a scrap piece and it was not exactly 2 foot on each side and my right corner is just slightly off from being 90 degrees. I built this today to test my idea and see if it would work. I'm happy enough with the results that I will go out and get a new piece of plywood this week.

[attachimg=1]


Attachments

  • Qwas Keyboard Avatar.jpg
    Qwas Keyboard Avatar.jpg
    8.6 KB · Views: 4,486
Qwas,

Very nice work and...
TwoThumbsUp.gif
;D

Dan.
 
Wow Qwas, a major post with lots of good stuff.

Two questions:

The Wheel:  Did you just happen to have a bracket that would work, or is there a bit of blacksmithing here?

The Miter Jig pics show your rail mounted at the extreme right of the MFT.  At first I thought you had slid the rail hardware in from the right rather than the left, but I tried that on mine.  No, you decided to move the factory register pins.  Now that you've tried it, what do you think of putting the rail in that position?

Your post needs to be on the short "Required Reading for MFT Owners List".

Ned
 
Qwas, thank you and I am definitely going to steal/use some of your ideas.  :D Please keep posting more like this. Fred
 
Definitely required reading and some great ideas. Am I understanding your mitre jig correctly in that the plywood piece rotates with the fence head?
 
Fantastic and informative post!  Great creative ideas for improving the MFT.  Keep em coming!

Thanks

Dave
 
Ned Young said:
Wow Qwas, a major post with lots of good stuff.

Two questions:

The Wheel:  Did you just happen to have a bracket that would work, or is there a bit of blacksmithing here?

The Miter Jig pics show your rail mounted at the extreme right of the MFT.  At first I thought you had slid the rail hardware in from the right rather than the left, but I tried that on mine.  No, you decided to move the factory register pins.  Now that you've tried it, what do you think of putting the rail in that position?

Your post needs to be on the short "Required Reading for MFT Owners List".

Ned

NO, I had that piece of metal sitting around. I had another one that  let the tire sit 4 inches away from the table, but that made the table harder to control when moving. Also, my wheel doesn't work when the Rain Gutter Storage Bin is attached. It has to be removed before wheeling the table away.

I didn't move the factory pins (but I see no reason not to). Instead of installing the rail holders from the left, I installed them from the right side.

I love having the guide close to the edge. At first, I was too close at about an inch away. Now I think it is about 6 inches away. With the sawhorse, no need to worry about boards dropping or pinching. And it keeps more of my tabletop in pristine shape for glueing and clamping.
 
neoshed said:
Definitely required reading and some great ideas. Am I understanding your mitre jig correctly in that the plywood piece rotates with the fence head?

The plywood could rotate with the fence, but there is no need to rotate the fence. When the plywood is in place, you have 2 45 degree straightedges (the plywood) sitting right under your guide rail. And each 45 degree edge is exactly 90 degree from the other assuring a perfect miter.

The fence is merely used to register the plywood corner right to the edge of the guide rail and to keep the 45 degree edges at a true 45 degrees.
 
John Stevens said:
Great ideas, thanks for sharing.

Regards,

John

Ditto/ditto/ditto

I have been working (in my head and on paper) some ideas that have been gleaned from other posts here on the FOG.  you have really put a lot of expertise into your ideas.  I hope you don't mind being copied, and copied, and copied 

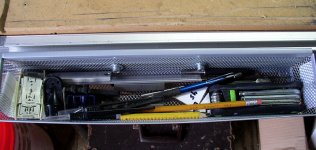
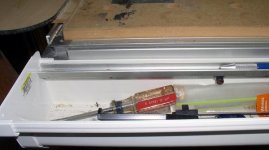
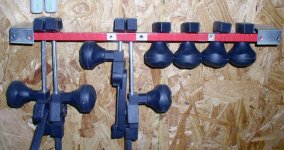
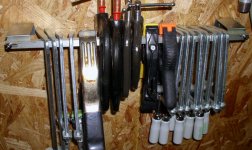
I liked, especially, your idea for setting all of your shelves at table height.  Unfortunately, my floor is like the waves of the ocean so I have all of my off table supports adjustable and use lots of roller stands.  For my little Festool angle and quick clamps, I have made a shelf from 2x6 with 1/2" holes drilled into the edge.  Since i know how many holes vs clamps, i always know whether all clamps are accounted for.  Left over holes accomdate pencils and screwdrivers.

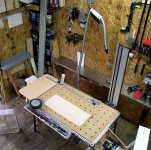
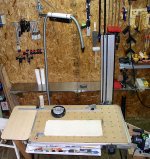
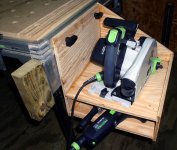
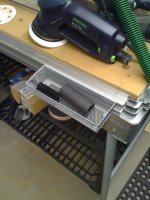
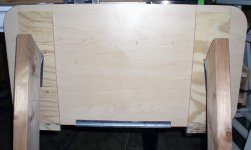
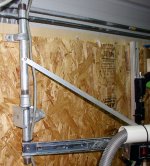
i used to put my ATF 55 and other tools onto the top of my CT 33, but with rearranging of my shop, i have placed the CT with boom into possition to work other areas of the shop.  i tried making a small shelf to attach to the end of MFT, but opted for a small, two level rolling shelf large enough to hold several power tools and maybe a hand plane or two.  I find the ability to move my tray around to different locations in my shop to be handier for me.  Also, i do not have to remove the shelf from the MFT whenever i need to add clamping to the off feed end. 

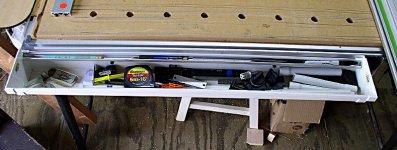
I like the rain gutter idea.  I will use that to put tool shelf at back side of MFT.  I don't like to add tool boxes and shelves to the front (working) side as i do a lot of moving of clamps and even removing the guide support to give larger flat working area.  I do like all of your ideas as others have also commented.

It has always been my contention that the uses for the MFT are limited only by one's immaginaion.  you are drastically stetttccchhhhhiiiing those limits.  Much appreciated.
Tinker
 
Hey guys and gals,

For those of you in the USA, the malleable iron beam clamp Steve mentions in his power strip boom are available at any electrical, mechanical or industrial supply house.  They are available in sizes from 8-32 to 1/2-13 thread IIRC to fit 1/4 to 2" flange.  The 1/4" we always referred to as "telephone clamps" as that was the size Ma Bell (prior to her untimely demise) used to use for stringing cables above hung ceilings in industrial/commercial buildings.  OZ Gedney was manufacturer I remember, but there could be others out there.

If I had a nickle for every one I installed over 38 years as an electrician, I could buy a LOT more (Fes)tools.

 
Back
Top