Speaker build in progress

Nestor

Member
Joined
May 25, 2008
Messages
32
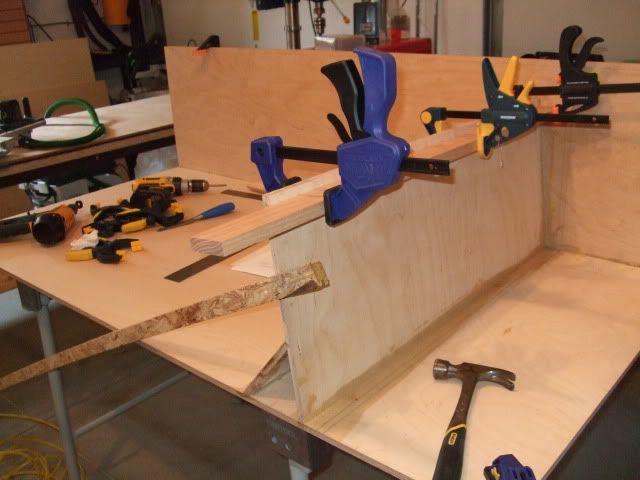
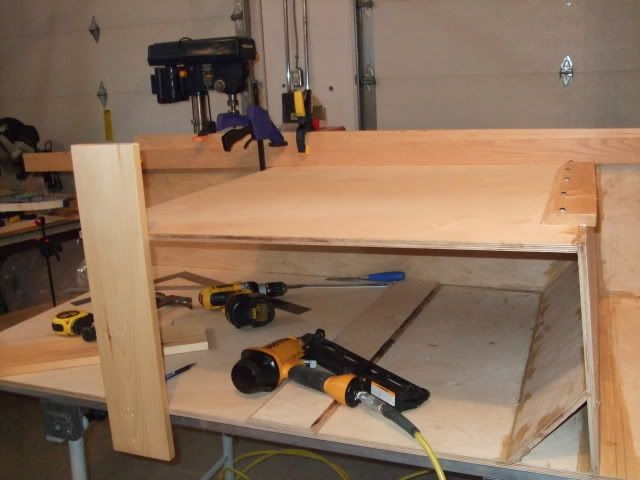
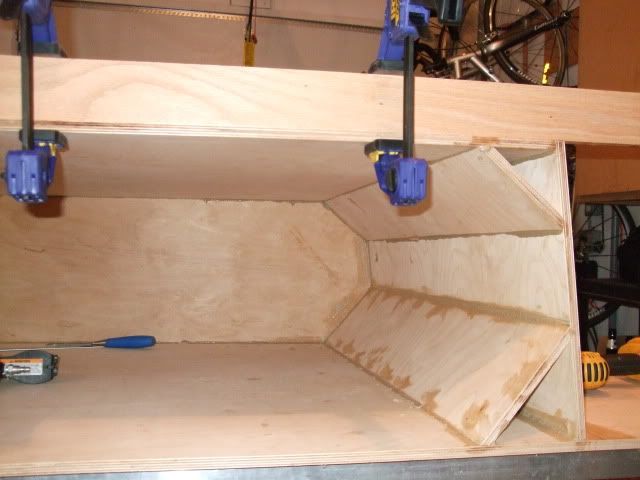
After months of getting settled in to my (almost) new home, and getting insulation blown into my garage so that I'm not heating the neighborhood, I finally get to start a project that's been floundering for about a year: A pair of folded-horn subwoofers for my home theater.

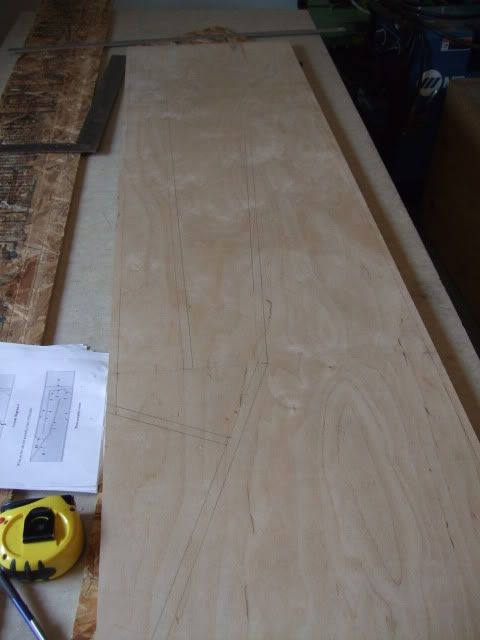
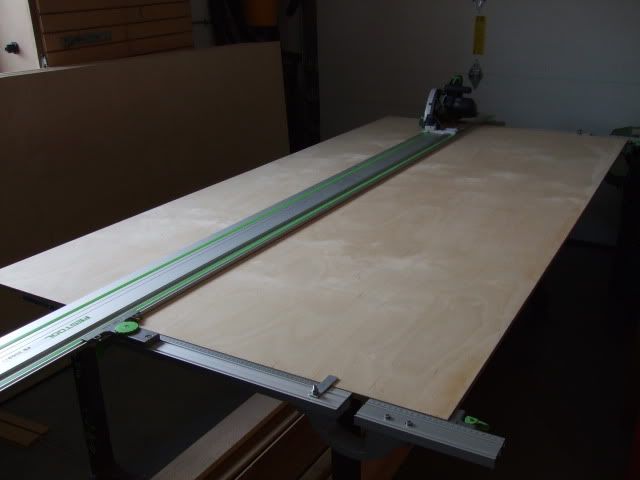
The TS55 will come in handy with so many sheets of 1/2" baltic birch plywood to rip...

001-1.jpg


004-3.jpg


I've yet to see a finish on baltic birch that I like, so veneer is in order. I fell in love with Zebrawood, but at 250.00 / 4X8 sheet ,  [eek]
and needing 4 sheets just to finish three sides of both cabinets, I reluctantly settled on a more sanely-priced rift-cut red oak.

003-3.jpg


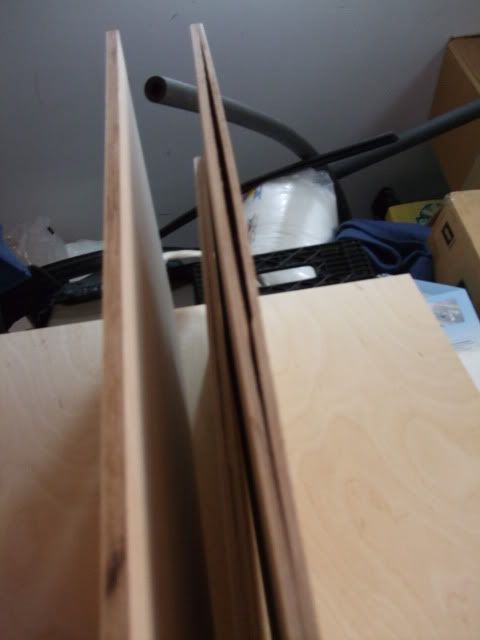
I recently purchased a set of parallel guide rails, but after fiddling with them last summer, I set them aside in frustration. This time, I really wanted to make use of them. I found in Brice Burrell's parallel guide review a couple of modifications that allow cuts up to 37" from the adjustable stops.

005-2.jpg


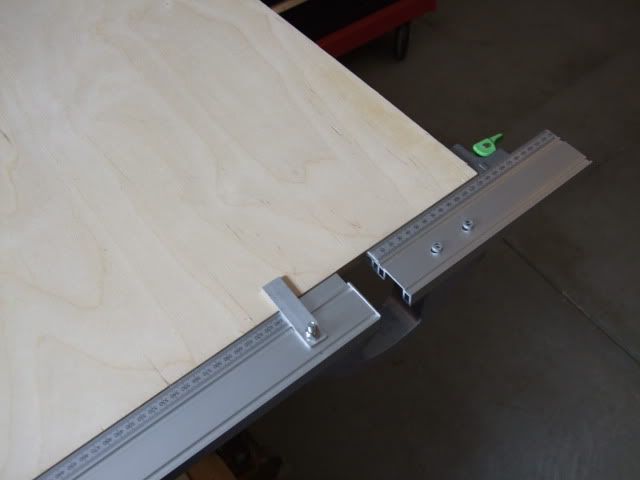
With eight rip cuts of 35" wide, it worked well. Better than manhandling full sheets on a table saw!

To be continued...

 
What drivers are you putting in these puppies? Love to see some lose component "before" shots  [smile]
 
This is going to be a fun one to watch develop. Do you have any pictures of the plan you are going to do? Also what drivers are you using, and are they going to active or passive?
 
Each cabinet will contain a 15" Dayton RSS390 HF-4 driver....

011.jpg


And each will be driven by a Bash 300W plate amp....

010.jpg


I downloaded the plans from billfitzmaurice.net/. This particular design is called the "Tuba Home Theater - Low Profile" or THTLP for short. Dimensions are 18X72X15 to 36 (depending on budget, driver size, budget, waf, etc). Cabinet can be laid on it's side for "low profile" or standing tall at 72".

The more popular design, the THT, is more cube-like: 36X36X18-36. Both cabinets have the same performance, but with all dimensions at 36", the THT is tough to get into most houses, including mine. The larger the cabinet, the better the low frequency extension.

Here's the room they are going in...

007-1.jpg


With ample space, I have the opportunity to lay them down or stand them up to find the best room response. This will also determine how I finish them. Many THT/THTLP's are simply painted or stained as is. I don't really want a couple of monoliths a la "2001:Space Odyssey" in my room so I was thinking of adding some fake rails and stiles to give them an armoire or maybe bench look, depending on orientation. I'm open to suggestions!

Drawing from designer's site:

thtlp.jpg


More sheet cutting today!
 
I'm looking forward to following your progress! One of my favorite subs is from a pro-audio company, Danley Sound Labs.

http://www.danleysoundlabs.com/tapped_horn.asp?MODEL=DTS%2020

It's not much to look at, but the specifications are pretty stunning. It's really big, I have a picture from a trade show of someone standing next to it. I'll try and find it.

Speaking of Zebrawood... I sadly sold a pair of Zebrawood speakers. I regret getting rid of them, as they were stunning to look at. Oh yeah, they sounded really good too.


The Danley tapped horn is another popular cabinet in the a/v forums. I considered both and decided on the Tuba. I think the Danley is a little more compact, though.
 
woodie said:
I'm looking forward to following your progress! One of my favorite subs is from a pro-audio company, Danley Sound Labs.

http://www.danleysoundlabs.com/tapped_horn.asp?MODEL=DTS%2020

It's not much to look at, but the specifications are pretty stunning. It's really big, I have a picture from a trade show of someone standing next to it. I'll try and find it.

Speaking of Zebrawood... I sadly sold a pair of Zebrawood speakers. I regret getting rid of them, as they were stunning to look at. Oh yeah, they sounded really good too.


Very nice! If I didn't decide to stay in some sort of budget, I would have gone full-zebra!  [big grin]
 
The Thigpen Rotary subwoofers are pretty amazing. Upper end of the output range is about 20Hz, and they are used at theme parks etc. to get to the 1 Hz range.

image003.jpg
 
Apparently, not all baltic birch plywood is "void free".    [mad]  After making a mistake, I cut into my contingency sheet and found this...

001-Copy.jpg


The de-lamination was big enough to render the sheet unusable, and the supplier is 2 1/2 hrs away.  [mad]

Not a showstopper though, since I am making two of these cabs and won't have the room for concurrent assembly anyways.

After cutting the side pieces, the layout is penciled onto one sheet...

004-Copy.jpg


Then the opposite side is sandwiched together and guide holes are drilled through both. This will assist when lining and nailing the panels, and will be a necessity since the opposite panel is also the last to be glued...

005-3.jpg


After testing my clamping scheme with two squares and a length of aluminum rect. tubing, a bead of PL-premium is run and the first two panels are clamped and nailed.

012.jpg


Think I'll let this cure so I can regain use of my squares.  [smile]

 
Progress!

005-4.jpg


Panels 2 & 3...

005-4.jpg


Diagrams in the plans show where to use the guides, depending on how warped your panels are. Strongly suggest using them. In an effort to minimize nail/screw holes, I tried skipping some of the guides, and ended up with a panel shifting during the glue-up. Glue all over the place! :o

The small angled panel is important, as it also straightens out the larger panel it's bracing. Instructions say to draw some lines extending from the layout panel to help with alignment. It's not critical that the panel be on the lines, only that it is parallel. As an added measure, I clamped my aluminum guide underneath then added a small brace after measuring the distance at the layout panel to mouth of the cabinet as a reference.

006-1.jpg


Lousy with a tape measure, but great moral support:

007-2.jpg


Panel 4...

010-2.jpg


And panel 5. Long reach into the cabinet!

013.jpg


Festool challenge of the day was to figure out how to make a 52 degree bevel cut with the TS55. Ended up placing a 1X2 underneath the saw guide, measuring the angle, and subtracting that from 52. In my case, the tilt measured 8 degrees, so I clamped it down and set the saw to 44 degrees. Only solution I could think of without having to break out the table saw. Anyone have a different method?

Done for today. Time for a beer!
 
After finding some separation in the laminations in a piece, are you concerned with more separations from vibrations after it's assembled? I know nothing about building speakers. I'm just curious.
 
I realise you're working to a plan.

My approach would have been to design the internal sections and then assemble the box panels around them ... assisting with squareness.

Not being critical - just immediate thinking on what I've seen so far and how I would have gone from a zero start.
 
Kev said:
I realise you're working to a plan.

My approach would have been to design the internal sections and then assemble the box panels around them ... assisting with squareness.

Not being critical - just immediate thinking on what I've seen so far and how I would have gone from a zero start.

The plan is quite thorough, and from questions posed on the designer's forum, they are almost always answered by referring back to the plan.

The plan was designed such that someone with limited carpentry experience and tools could pull off the build, and for a rock-bottom price. Bill even has instructions on how to build a zero-clearance guide for a circular saw.  [eek]

The last large panel I added is only internally suspended at one end, and would require the box assembly. This will probably be more evident when more panels are added and the flowpath is established.

 
kfitzsimons said:
After finding some separation in the laminations in a piece, are you concerned with more separations from vibrations after it's assembled? I know nothing about building speakers. I'm just curious.

It is a bit of a concern, but I think the one sheet was an anomaly. (I hope  [embarassed])

Vibration is actually low in this design, since it's mostly horn. In my pictures, the chamber for the driver is at the right end of the cabinet.
 
Now you've got me thinking about building some speakers for my living room. I'm using small Polk bookshelf speakers now and I have NHT surround speakers in my family room which I really like. I'd like to build two "full range" speakers (not using a sub-woofer), maximum height of about 18". Is there a web site you'd suggest for me to begin researching components and construction? For speakers that small, is it worth the trouble to make them? I'm not an audiophile, but I appreciate good sound.
 
kfitzsimons said:
Now you've got me thinking about building some speakers for my living room. I'm using small Polk bookshelf speakers now and I have NHT surround speakers in my family room which I really like. I'd like to build two "full range" speakers (not using a sub-woofer), maximum height of about 18". Is there a web site you'd suggest for me to begin researching components and construction? For speakers that small, is it worth the trouble to make them? I'm not an audiophile, but I appreciate good sound.

I tend to haunt this site:

http://www.avsforum.com/avs-vb/forumdisplay.php?f=155

Look for the gallery sticky thread featuring forum members' projects.

Bookshelf speakers should be fairly straightforward. I'd use MDF and veneer. Driver selection and crossover will be the most involving part. Is it worth it? Hard to answer. Having control over the design and construction is the main motivator for most.

Hope that helps!
 
I've never seen 1/2" bb plywood come in anything but 5 x 5' sheets.  And never a void near that big.  Are you sure it's baltic birch?
Looks like a great project, looking forward to seeing more pictures as it progresses!
 
Back
Top