Rob-GB
Member
- Joined
- Nov 7, 2009
- Messages
- 1,101
I needed to cut the handrails for the raking parts of the stair and fit them to the newel posts before installing the stair, as to attempt to fit them afterwards would be nigh on impossible.
I broke with tradition and used 10 x 50 domino’s which meant a quick and dirty jig making session, I tend to do a lot of those since getting a Domino!


I also made a small “L” shaped one to align the machine for the newel mortice. In the second pic’ you can see the trial fit to an off-cut of newel.
I would also need some oak dowel for the string to newel joints, you may remember the draw bored mortises and tenons shown in part 1, my preference is for making my own from off-cuts.
For many years this has been accomplished using a home made dowel plate, a 10mm thick steel plate with various size holes in it through which square sections of wood are hammered through to form a dowel. I use one of the Veritas dowel makers now as they are far more efficient and take less effort. The shavings from which also make good tinder for my Storm Kettle for brew ups on canoe or kayak trips.

With the cutter fixed to this jig a dowel up to 1mtr can be made before the oscillation of the dowel end gets too boisterous.
A longer jig with extra steadies would make for longer dowels, but will not fit in a systainer. The T15 has more than enough power to use this way.
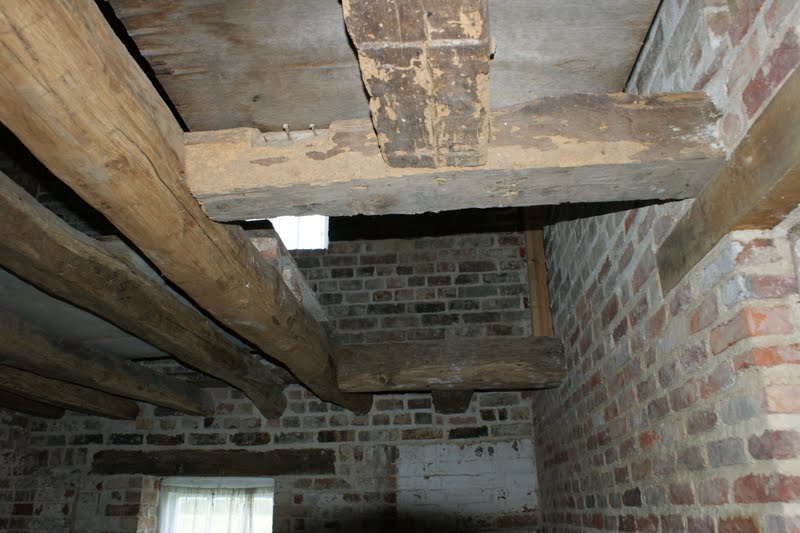
Scribing/fitting the top newels to the opening is not so difficult on most projects, this one is a touch more so.


More so when I realised that the floor had not been entirely levelled around the opening.

A bit of nail removal and wedging up the floorboards gave me a level playing field.
The string was joined to the top corner newel, riser 11 and tread 10 were pre-assembled glued and screwed before fitting then the top tread nosing was installed.
This nosing is secured with screws to a 25 x25mm oak batten fixed to the framing and glued in the tongue and groove joint.
The outer newel and string are then installed as a single piece and glued and wedged to the tread and riser.

At this point I had to install some temporary braces to stop the strings opening up before fitting the next newel and treads and risers, these are braced of the trimmer beam and outside wall.


The wall string and required treads and risers get installed with the wall string being screwed and plug to the wall ensuring the tread housings are level.
As each newel is fixed the raking handrail must be installed too. We continue down ensuring that the treads remain level between strings.
N.B. Due to the nature of timber and the machining process it will be rare to get every tread 100% level between strings, a small allowance must be made, rather oddly it is not uncommon for one to read out of level but the ones above and below to be “spot on” ! [huh]


Once we arrive at ground level, base rails and balustrades can be installed. Base rails are the moulded strips that the bottom of balustrades fit into, they are found on the top edges of strings and on the floor of the upper landing or hallway. Fitting to the strings is pretty straight forward but upstairs needed some extra attention.
To cover the 50 x 50mm battens that support the flooring and hide the plasterboard and under floor heating pipes the stair required some apron material and as the flooring had been cut in line with the beams a form of bracket support for the base rails. This was my solution.


The bottom right handrail needed installing against a rough brick wall, to be plastered later, I came up with this idea....

and scribed it using the newel width as the offset.

The last task was to fit the glue blocks to the underside of the stair. These are rubbed glue joint blocks to re-enforce the tongue and groove joints of the treads and risers.
In many workshops I have seen these both glued and pinned or stapled; this technique is about as bad as it gets. If the glue joint fails the blocks fall off, and you know it pretty quickly( they fall off ) and can re-do them, if the pins/staples are all that holds them the stair will have a greater chance of becoming a squeaky stair and you may well get a call back to sort it.
In my career I have never had a call back for such a problem.

Notice also that the risers are screwed into the back edge of the treads as well as being glued.
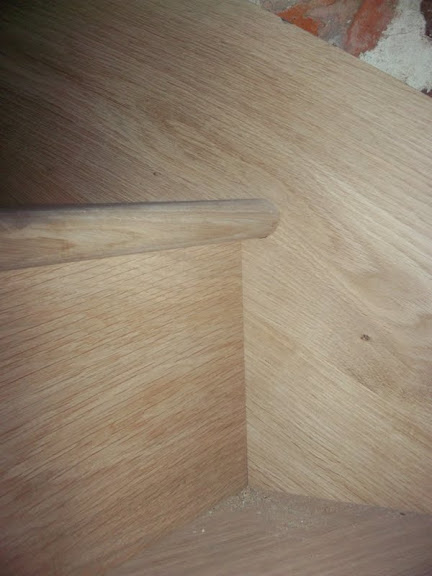
Finally a few pic’s of the tread and riser joints that are at an angle to the newel and strings to show how they should finish up and the stair from above.


Thanks for looking in and I hope it is of interest and maybe a help to some.
Rob.
I broke with tradition and used 10 x 50 domino’s which meant a quick and dirty jig making session, I tend to do a lot of those since getting a Domino!
I also made a small “L” shaped one to align the machine for the newel mortice. In the second pic’ you can see the trial fit to an off-cut of newel.
I would also need some oak dowel for the string to newel joints, you may remember the draw bored mortises and tenons shown in part 1, my preference is for making my own from off-cuts.
For many years this has been accomplished using a home made dowel plate, a 10mm thick steel plate with various size holes in it through which square sections of wood are hammered through to form a dowel. I use one of the Veritas dowel makers now as they are far more efficient and take less effort. The shavings from which also make good tinder for my Storm Kettle for brew ups on canoe or kayak trips.
With the cutter fixed to this jig a dowel up to 1mtr can be made before the oscillation of the dowel end gets too boisterous.
A longer jig with extra steadies would make for longer dowels, but will not fit in a systainer. The T15 has more than enough power to use this way.
Scribing/fitting the top newels to the opening is not so difficult on most projects, this one is a touch more so.
More so when I realised that the floor had not been entirely levelled around the opening.
A bit of nail removal and wedging up the floorboards gave me a level playing field.
The string was joined to the top corner newel, riser 11 and tread 10 were pre-assembled glued and screwed before fitting then the top tread nosing was installed.
This nosing is secured with screws to a 25 x25mm oak batten fixed to the framing and glued in the tongue and groove joint.
The outer newel and string are then installed as a single piece and glued and wedged to the tread and riser.
At this point I had to install some temporary braces to stop the strings opening up before fitting the next newel and treads and risers, these are braced of the trimmer beam and outside wall.
The wall string and required treads and risers get installed with the wall string being screwed and plug to the wall ensuring the tread housings are level.
As each newel is fixed the raking handrail must be installed too. We continue down ensuring that the treads remain level between strings.
N.B. Due to the nature of timber and the machining process it will be rare to get every tread 100% level between strings, a small allowance must be made, rather oddly it is not uncommon for one to read out of level but the ones above and below to be “spot on” ! [huh]
Once we arrive at ground level, base rails and balustrades can be installed. Base rails are the moulded strips that the bottom of balustrades fit into, they are found on the top edges of strings and on the floor of the upper landing or hallway. Fitting to the strings is pretty straight forward but upstairs needed some extra attention.
To cover the 50 x 50mm battens that support the flooring and hide the plasterboard and under floor heating pipes the stair required some apron material and as the flooring had been cut in line with the beams a form of bracket support for the base rails. This was my solution.
The bottom right handrail needed installing against a rough brick wall, to be plastered later, I came up with this idea....
and scribed it using the newel width as the offset.
The last task was to fit the glue blocks to the underside of the stair. These are rubbed glue joint blocks to re-enforce the tongue and groove joints of the treads and risers.
In many workshops I have seen these both glued and pinned or stapled; this technique is about as bad as it gets. If the glue joint fails the blocks fall off, and you know it pretty quickly( they fall off ) and can re-do them, if the pins/staples are all that holds them the stair will have a greater chance of becoming a squeaky stair and you may well get a call back to sort it.
In my career I have never had a call back for such a problem.
Notice also that the risers are screwed into the back edge of the treads as well as being glued.
Finally a few pic’s of the tread and riser joints that are at an angle to the newel and strings to show how they should finish up and the stair from above.
Thanks for looking in and I hope it is of interest and maybe a help to some.
Rob.