ear3
Member
- Joined
- Jul 24, 2014
- Messages
- 4,341
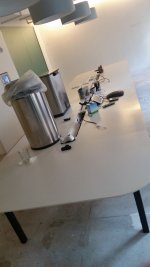
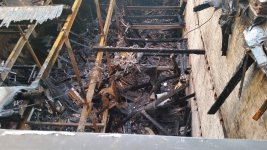
There was a fire in the building adjacent to the gallery where I did the art installation a few months back (if you live in the area, you can go see the burnt out building on 17th street b/w 7th and 8th, which is closed off to car traffic). There was no actual fire damage to the art installation, but there was a lot of water damage due to a combination of sprinklers and the firehouses to combat this five alarm fire. So I've been brought back by the gallery to help repair some of the damage. In addition, since insurance will be paying for it, the gallery is throwing in a bunch of additional work, and have asked if I'm interested.
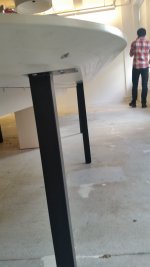
One thing they inquired about was a set of long tables, constructed out of Baltic Birch, whose tops are starting to lose their sprayed white lacquer finish. The question is whether they can all be stripped and recoated with a clear oil finish.
So I have two questions, as I've never stripped a lacquer finish from such a large surface area:
1) Is it a real chore to strip approximately 100 square feet of table top with the Rotex 150? And will there be problems -- given I'll have to start with an aggressive paper like a 40 grit -- with dishing and putting the surface out of level?
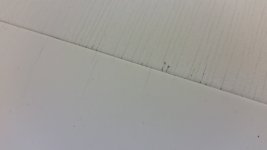
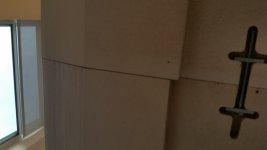
2) What are some options I could use to fill/build up some of the edges which have broken (an example of which is pictured below), keeping in mind that the new finish will be a clear coat? Would it be worth it instead just to cut the edge back 1/16" with the tracksaw -- which I could do, since the table is plywood -- and start with a fresh edge?
Thanks for any suggestions.
[attachimg=1]
One thing they inquired about was a set of long tables, constructed out of Baltic Birch, whose tops are starting to lose their sprayed white lacquer finish. The question is whether they can all be stripped and recoated with a clear oil finish.
So I have two questions, as I've never stripped a lacquer finish from such a large surface area:
1) Is it a real chore to strip approximately 100 square feet of table top with the Rotex 150? And will there be problems -- given I'll have to start with an aggressive paper like a 40 grit -- with dishing and putting the surface out of level?
2) What are some options I could use to fill/build up some of the edges which have broken (an example of which is pictured below), keeping in mind that the new finish will be a clear coat? Would it be worth it instead just to cut the edge back 1/16" with the tracksaw -- which I could do, since the table is plywood -- and start with a fresh edge?
Thanks for any suggestions.
[attachimg=1]
![20151028_091300[1].jpg](/data/attachments/22/22467-7ba7aa4584bd3aa65d69f728ea316887.jpg?hash=R0hliFuzzv)