Suggestions for gluing up a walnut table top

LloydM

Member
Joined
Jul 31, 2017
Messages
15
Hi All;

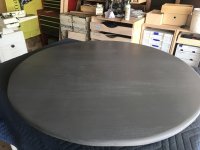
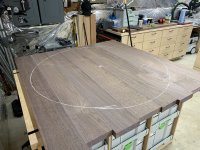
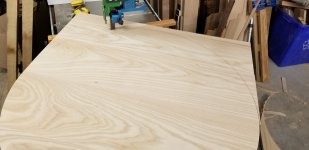
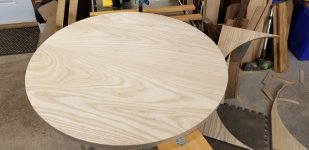
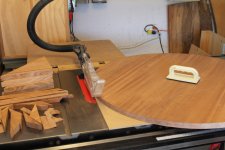
I wanted to seek the wisdom of the crowd on a project I'm working on. I'm using 12x100 Dominos to do a glue up on some 1 1/2 in thick walnut boards to make a 48" round kitchen table top. I'm starting out with 8, roughly 6-7" wide boards in a square. I'll use my OF1400 and the Rockler circle jig to cut it.

I've done this before but on a smaller scale. I was curious to know if you would do all the mortising and gluing up at one time, or split it into smaller pieces? As an example glue up 4 boards for each half on one day and then glue the two halves together the next day?
 
Its really all personal preference . The last time I did someting like that I did in 3 glues ups. one for one half, one for te other half then one glueing them together.

Only thing I would caution you on is the placement of the dominos. Make sure they are far enough away from the edges so when you cut out your top you wont expose the dominos.

dont ax me how I know that


Attachments

  • IMG_3261.JPG
    IMG_3261.JPG
    2 MB · Views: 425
  • IMG_3344.JPG
    IMG_3344.JPG
    1.9 MB · Views: 452
I always try to do the glue ups in incremental steps. That way, I lower my risk of a major screw up. It's also less stressful. I'd recommend drawing the outline of your tables circumference on the boards BEFORE drilling the mortises.

I also always do a dry fit using sanded tenons. I get two benefits. One, I know the pieces will fit. Two, I will know my step by step glue up  process will actually work.

Please post pictures of your project.
 
Thanks for the advice, I will post the pics as I go. I was planning on tracing the outline of the circle and then making sure the Dominos were well within the circle. I did make a smaller one last year out of wormy chestnut and one of the Dominos does show on the edge. That table is a bar top table, lots of character in it, bow ties etc so the exposure of the Domino looks kind of cool. But not on my wife's kitchen table!
 
I've laid out the boards and rough scribed the circle. I changed the layout of the boards after this pic was taken, so this isn't the final layout.

I'll be gluing them up today or tomorrow and will then cut the circle later in the week.[attachimg=1]
 

Attachments

  • IMG_0427.jpg
    IMG_0427.jpg
    6.9 MB · Views: 2,234
I always do glue-up in stages...less stressful and easier to fully remove any squeeze-out.

Beautiful lumber by the way.  [smile]
 
Hi,

Make sure you do the glue up before you cut the circle.  Don't ax me how I know.

I rough cut the circle on a 4 foot round table a few years ago before gluing up.  It seemed to make sense at the time.  It didn't make much sense when I tried to apply the clamps.

I did get a sticker for doing this.  Although it wasn't the kind of sticker we all covet.

Brian
 
Back when American Woodworker magazine was still alive, they featured a column about readers' goofs and blunders ($100 for each accepted story), yours would certainly qualify for one of their prizes! [big grin] (I hope you kept the offcuts for the glue-up.)
 
Thanks to all for your tips, advice and comments. I will post pics as I go. I like the idea of doing the glue ups in stages. I will do the cut after the glue up too.
 
Brian Livingstone said:
I rough cut the circle on a 4 foot round table a few years ago before gluing up.  It seemed to make sense at the time.  It didn't make much sense when I tried to apply the clamps.
You could rough cut without rounding and still successfully glue-up. Gives you the flexibility to incorporate shorter pieces. Even easier if you do it in sections starting from the middle. Always surprised me how much wood people waste  making round tables.[attachimg=1]
 

Attachments

  • round table.JPG
    round table.JPG
    101.5 KB · Views: 1,413
This extremely easy to do and low stress, in a single session using a slow cure West System epoxy and 5mm Dominos. The epoxy minimizes the reveal lines you get with typical water based PVA glues like Titebond products. I just did 2 44" x 1 1/4" white ash tables for a customer in an afternoon. When dry, the tops sanded with a ETS150/5 EC and were cut on a bandsaw with a 1" Lenox Woodmaster CT in a single rotation with an Aigner Circle Jig.

[attachimg=1]

[attachimg=2]

[attachimg=3]


Attachments

  • Ash top 2.jpg
    Ash top 2.jpg
    396.9 KB · Views: 1,442
  • Ash top1.jpg
    Ash top1.jpg
    643.3 KB · Views: 1,362
  • Ash top 3.jpg
    Ash top 3.jpg
    441 KB · Views: 1,408
Very impressive! I like the idea of the West Systems, I may try that next time. Do you put a roundover on the edge of your tables?
 
One other question for the group - I'm going to use my OF1400 router and a 1/2 Whiteside upcut bit to cut the circle (dont have a bandsaw) - would it be okay to use a 1/4 bit instead of the 1/2?

Wondering if a 1/4 bit is up to that much cutting in walnut?
 
I cut circles on the table saw. Do you have a jigsaw? 1/4 bit would work easier if you rough circle-cut your glue-up first.
 

Attachments

  • IMG_0506.JPG
    IMG_0506.JPG
    3.7 MB · Views: 319
LloydM said:
One other question for the group - I'm going to use my OF1400 router and a 1/2 Whiteside upcut bit to cut the circle (dont have a bandsaw) - would it be okay to use a 1/4 bit instead of the 1/2?

Wondering if a 1/4 bit is up to that much cutting in walnut?

I would use a 1/2" bit.  1/4" could work provided you rough cut pretty tight to the final line (1/8" or less) with a jigsaw.  The problem is the blade can drift or you might wander a little over the line trying to stay that tight.  I've made that mistake once (fortunately the final diameter wasn't critical) and now give myself a little extra clearance.  It's a little easier to stay 1/4" off the line (or more) and finish with the 1/2" bit.  Also, with 1 1/2" depth material I would want to go full depth.  A 1/2" shank bit is really better for this sort of thing. 
 
Yes, I have a Carvex and was thinking of getting the circle cutting guide. But I've used the router method before and it worked really well.
 
The 1/2 and 1/4 I was referring to was the cutting diameter. They're both 1/2 shank.  It just seemed to me that using a 1/4 cutting diameter would be removing less material therefore less dust, less stress etc. But I wasn't sure if a 1/4 CD bit was just to narrow for this sort of thing.
 
it would work, IMO, just have to take smaller cuts and adj yer speed to prevent burning
 
Back
Top