The next big reception desk Up-dated final

Crazyraceguy

Member
Joined
Oct 16, 2015
Messages
4,901
I have most of the inner core portion built. After all of the inner laminating is done, the entire outer area, including the coutertop area, will be clad in solid surface.  There are no overhangs anywhere, all waterfall edges. The upper section is a second color. Another one for the "stupid-heavy" category.
 

Attachments

  • Cahs.jpg
    Cahs.jpg
    346 KB · Views: 156
  • Cahs2.jpg
    Cahs2.jpg
    259.8 KB · Views: 147
  • Cahs3.jpg
    Cahs3.jpg
    303.2 KB · Views: 150
  • Cahs4.jpg
    Cahs4.jpg
    333.6 KB · Views: 147
  • Cahs5.jpg
    Cahs5.jpg
    333 KB · Views: 160
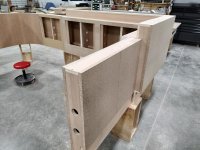
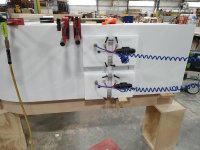
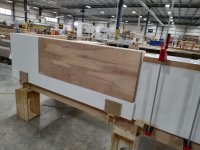
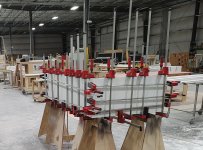
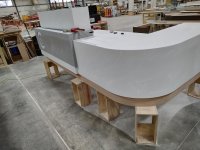
Yes [member=7239]RonMiller[/member], there are two separate rows of holes for wiring. Whether they both get used or not, we always run two rows to keep the line voltage wires away from the low-voltage (data) cables.

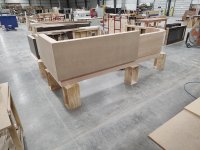
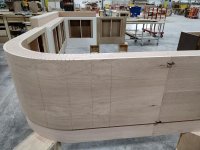
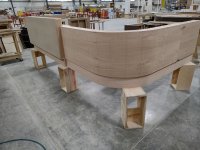
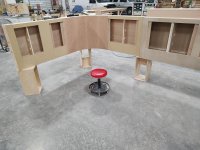
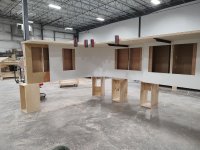
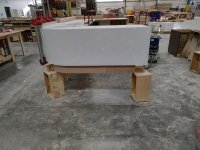
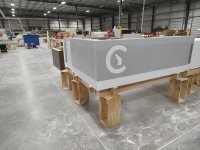
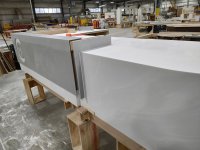
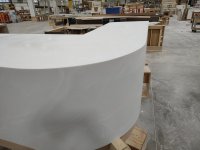
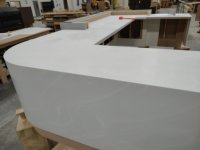
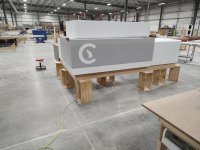
All of the laminating is done on the inside, sub-tops are all in place, and I got the curved outer skin done today.
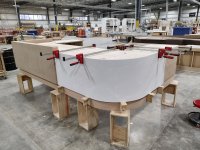
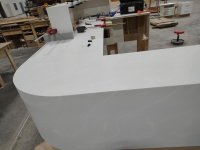
On curved sections, like this one, where there is no access panel, I pull strings through the holes before covering it up. This helps the installers, or at least their relationship with the electricians, on site.
You can probably see the string in the pics.
Some hospital jobs also get runs for oxygen or other gasses too. I have also done bars with water lines running through them, supply and drain.

That right-hand side is supposed to go all the way to the end, but I can't get more than 100" in the oven, so that will have to be seemed in tomorrow.
 

Attachments

  • Cahs7.jpg
    Cahs7.jpg
    362 KB · Views: 118
  • Cahs6.jpg
    Cahs6.jpg
    372.5 KB · Views: 105
A few more pics of the progress.
There is a lot more work to this than there would be with a more forgiving color.  Pretty much any particulate or solid color would be much easier. The directional swirling lines add to the complexity a lot.
You have to keep track of the parts and where they came from, so they go back as seamlessly as possible.
That one on the side went back as well as can ever be expected. If you didn't know it was there, you would never suspect, even enough to look for it. You absolutely can't see it on camera. I can find it in person, but I did it, so I know exactly what to look for.
When you have to go longer than a full sheet, is when the matching gets tough. You can get "sequence matched" sheets, but they are not perfect. There is a saw kerf width missing at a minimum, plus you have to straighten the edges at least a little. Plus, there is a premium cost for that, and you still have to check the orientation, to get them right.
I hope the rest goes this well.
 

Attachments

  • Cahs9.jpg
    Cahs9.jpg
    267.1 KB · Views: 108
  • Cahs10.jpg
    Cahs10.jpg
    332.6 KB · Views: 104
  • Cahs11.jpg
    Cahs11.jpg
    267 KB · Views: 102
  • Cahs12.jpg
    Cahs12.jpg
    259.3 KB · Views: 108
Decent progress today of the tedious fitting/trimming and refitting part of the job.
There is quite a bit more to this thing. This is just the "base" layer.


Attachments

  • Cahs14.jpg
    Cahs14.jpg
    170.9 KB · Views: 94
  • Cahs16.jpg
    Cahs16.jpg
    168.4 KB · Views: 93
  • Cahs15.jpg
    Cahs15.jpg
    244.1 KB · Views: 97
More pics, it's coming along. There is still quite a bit to do, so it probably won't be finished tomorrow?
It going to be a ridiculously heavy beast though, at least the center section. It comes apart into 3 sections.
 

Attachments

  • Cahs19.jpg
    Cahs19.jpg
    344.4 KB · Views: 79
  • Cahs20.jpg
    Cahs20.jpg
    249 KB · Views: 73
  • Cahs21.jpg
    Cahs21.jpg
    191.7 KB · Views: 81
  • Cahs22.jpg
    Cahs22.jpg
    90.2 KB · Views: 75
95% done. The gray end cap on the long end still needs finished,  a few interior edges, plus final sanding everywhere.


Attachments

  • Cahs23.jpg
    Cahs23.jpg
    283.7 KB · Views: 71
  • Cahs25.jpg
    Cahs25.jpg
    326.8 KB · Views: 76
  • Cahs29.jpg
    Cahs29.jpg
    129.3 KB · Views: 73
  • Cahs27.jpg
    Cahs27.jpg
    264.5 KB · Views: 81
Back
Top