Tired of sanding - plane recommendation for face frames?

LDBecker

Member
Joined
May 12, 2011
Messages
122
Just finishing the lower cabinet face frames and doors on my kitchen, using hard maple, and I am getting a little weary of sanding the rails and styles flush... I apparently suck at getting the router bits to line up (using the Sommerfeld Shaker set, plywood inserts), so I've always got a 1/32" or so lip to sand out. The stock is all planed at the same time, so it isn't a board thickness issue, and I am following Sommerfeld's recommendations of using the rubber grommet in the collet to maintain the bit height.

So my question - would a plane be a good thing to use to get the surfaces level, even with the grain changes? Right now I'm having to sand from 120/180/220 to get the surfaces even and ready for finish. My DeWalt 735 planer with helical head gives me a good enough surface on its own that I can get by with a quick 220 pass, so its annoying to have to knock the whole face/back down to 120 and bring it back up.

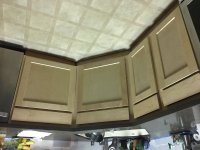
I have a Veritas Bevel-up Smoother (I assume this would be the choice?), a Lie Nielsen Bevel up jack, and a Veritas bevel up jointer. I'm using the Veritas jointer/fence on the edges and end grain with good results. I tried the Veritas BUS briefly and wasn't happy with what I was seeing... Attached is a pic of what I'm working on... (not sure why the preview is upside down, sorry)
 

Attachments

  • IMG_1841.JPG
    IMG_1841.JPG
    1.7 MB · Views: 625
Can't recommend a plane, but I will go over the set up procedure for the bit set.

If one face is off the other is also off?

To start with make sure all of the stock is the same thickness. Usually 3/4".

You should be doing the ends first. Remember, good face down.

Set the bit height, I believe the back haunch is 1/8". This number really does not matter, wet the height to your eye appeal. Set the router fence face even with the bearing, use a straight edge to align it.

Use a good sled (I use the sliding table on my CMS), back up board, hold the material down firmly, run the ends.

Install the profiling bit. It does not matter where it ends up, you'll be adjusting the height. (I know about the o-ring trick, only works if you tighten the collet exactly the same each time.)

Take one of the coped pieces. Adjust the height of the profile bit so the tongue inserts without dragging. You should be able to socket up the rail to the bit perfectly. If you cannot get it to socket up properly study the set up. There has to be something wrong with the bit spacers/shims. Take the bit apart and reset the spacers/shims.

Run a test piece (again good face down). The rail should insert and align on both faces.

Not sure how your sanding the face frame, have you tried the ETS-125? It should do this with no problem at all, use 180 Granat. (I use an RO 90 if the need arises).

Tom
 
Hi, Tom,

Stock is all planed at the same time, so it's the same. I use a digital DW 735, too - but I also run all the stock for the cabinet through in one session, working down to .75"

Sommerfeld sells a gauge that I use to do the initial setup on the rails, and he recommends NOT using a sled - just push the wood through with a push block attached to a piece of wood as a backup - this works surprisingly well avoiding tearout at the end. I have a Woodpecker's sled, but haven't used it for this task.

I've tried to be consistent on tightening the bit with the rubber grommet inserted, AND I do a test cut to check the fit, and it seems ok, but when I assemble things, most of the joints are just a bit off. I did a few doors without the rubber grommet, just trying to manually line things up - the results are about the same with or without the grommet. You would think that if the cuts line up in a test cut, it HAS to line up in the joint, but whatever error is effectively doubled as you put it together (I think). What I DIDN'T do, that you suggest, is doing a test joint fit with the stiles... I was just testing the way the bit lined up with the cut. Imadufus...

I suspect some of the issue also could be with my router table. I am using a Next Wave Ready-to-Rout/Ready-to-Lift CNC motor-powered router table/fence (with a digital height/distance input pad). While it's VERY cool and slick, and generally works really well, I am NOT impressed with the flimsy table inserts that go around the bit - they're thin metal, and the sizes aren't as good as I'm used to in my old Woodpecker table. There should be another insert that more closely matches the bit size - there's too much wide open space between the insert and the edge of the bit, and I wonder if that lack of support is causing some of my issue. I WAS able to fit a sliding sacrificial fence to support the bit profile on the fence, though. (I know - I'm sometimes too high-tech for my own good).

Sanding IS done with an ETS-125/3. If I really need to get feisty I can use my 150/5. I started with 180 Granat but found it was too fine for that much wood removal so I went down to 120 then worked back up to 220.

So, on my next doors, I'll cut the first parts, then more carefully test fit the matching styles with the rails...

Thanks!

Larry

 
A couple of things I do when making these types of joints are:-
1/ make a setup test piece for both male and female parts and keep them as setup patterns for the next time when they are spot on.
2/ Use a featherboard hold down on the fence to keep consistant downforce on the parts being machined

If the router table or fence has flexing issues use a 1/2" MDF supplemental baseboard and/or fence ( it is common practice on commercial spindle moulders/shapers as the tool opening is often very large and can cause problems). That will negate any flex issue.
I think the issue with using a sled is that dust from machining could get under it and cause variations.
To align joints exactly where I want them (in distance apart and flush face to face) I use a Domino, saves a lot of sanding and or plane work.

DSC01359.JPG


Hope that is of some help.
Rob.

 
Larry,

Speculation on my part---I believe Sommerfeld does not want you to use a sled because it negates the o-ring use. The thickness of the sled screws up the dimensions.

As Rob pointed out, backup boards are not uncommon. The sled is acting as a backup board to get you past the opening.

Good point on the feather boards, I believe the WP sled has a toggle clamp.

Good luck.

Tom

 
I used to have the same problem. After set up I would run some test boards and they would fit perfectly.
When I ran my actual boards some would be like yours. It came down to consistent feed and pressure.
I'm not a hobbyist, so I invested in a power feeder and no more problems.
 
I tried the Veritas BUS briefly and wasn't happy with what I was seeing..

What bevel angle are you using? Too low and the wood may tear out. The plane blade comes with a 25 degree primary bevel. You need to add a 50 degree secondary bevel. The result should then be spectacular.

Regards from Perth

Derek
 
Mr. Cohen - thanks for responding all the way from down under!  Your review of the Veritas BUS was one of the things that sold me on that plane...

I wondered about the bevel. I was indeed using the stock 25deg blade with a 2deg bevel - not nearly enough, I guess.

I also bought a couple of extra blades for the BUS and the Veritas bevel-jointer: a 38deg blade and the 50deg blade, all in the PM-V11 steel. I was assuming they would be a bit extreme for most things, and hadn't tried them yet. I purchased them originally for use in the jointer, but the two planes share the same blade.

I note that my Veritas shooting board plane (used with a Tico Vogt shooting board) also shares the same blade in 25deg.. Nice that they do that. It's great fun getting to know the planes and their personalities with the different blades.

Thanks for sharing your wisdom on this!

Larry (from Los Angeles)
 
Rob-GB said:
A couple of things I do when making these types of joints are:-
1/ make a setup test piece for both male and female parts and keep them as setup patterns for the next time when they are spot on.
2/ Use a featherboard hold down on the fence to keep consistant downforce on the parts being machined

If the router table or fence has flexing issues use a 1/2" MDF supplemental baseboard and/or fence ( it is common practice on commercial spindle moulders/shapers as the tool opening is often very large and can cause problems). That will negate any flex issue.
I think the issue with using a sled is that dust from machining could get under it and cause variations.
To align joints exactly where I want them (in distance apart and flush face to face) I use a Domino, saves a lot of sanding and or plane work.

DSC01359.JPG


Hope that is of some help.
Rob.
Interesting you use a Domino AND the matching joint profiles... I have some issues getting Domino surfaces lined up correctly as well - I started doing my face frames with the Domino and found similar mis-alignment issues, so I went with the Kreg clamp system and it's better - AND you don't have to wait for the Domino glue to dry in clamps.

I think, though, that the flexing issue is part of my problem. The rings provided for the Ready-to-Lift router table would be ok if there was an intermediate size hole that could provide more support. It goes from an almost completely wide open insert at 3 5/8" to 1 5/8" and 1" - The bits I'm using are about 1 3/4", so there's a lot of wide open space unsupported with the 3 5/8" plate.

The shape is very similar, as far as I can see on-line,  to the inserts that Incra's Magna Lock table uses - and the diameter seems correct, and the shape looks right - I might order a set and see if it fits. The Ready-to-Lift looks kind of like a knock-off of the Incra's set.

Larry
 
Getmaverick said:
I used to have the same problem. After set up I would run some test boards and they would fit perfectly.
When I ran my actual boards some would be like yours. It came down to consistent feed and pressure.
I'm not a hobbyist, so I invested in a power feeder and no more problems.
I've considered a power feeder... but I AM an amateur, and have another full-time job... not really a necessity, I imagine.

I am pretty good at sensing the appropriate feed rates for router bits, and have been surprised with these how easy it is to get tearout in the MIDDLE of the cut - almost like chatter - and feed-rate doesn't seem to be the culprit. I've ruined a couple of stiles because of it. That's kind of what's leading me to think it's at least partly an issue with the work piece being unsupported near the bit.

Larry
 
LDBecker said:
Interesting you use a Domino AND the matching joint profiles... I have some issues getting Domino surfaces lined up correctly as well - I started doing my face frames with the Domino and found similar mis-alignment issues, so I went with the Kreg clamp system and it's better - AND you don't have to wait for the Domino glue to dry in clamps.

I just don't entirely trust the profile joint on it's own for my clients and for the little extra time it takes I get the rail alignment spot on each time and the frame ends up exactly square without having to tap parts sideways into place which could damage them.
This also allows me to grain match the meeting stiles like on the project I took that photo from. Here

Rob.
 
I think you fare really well with a basic Japanese plane. Setup has a learning curve, but the results are spectacular. (My reasoning: face frames are not very wide — pushing a plane over them (as in Western style plane) is harder than pulling (as in Japanese plane), the latter giving you more control.)

Watch Ishitani's video's over on YouTube; that should give you an impression of what is achievable.
 
Tried the planes (I have way to many). Finally decided on RO 90. I found it the best solution.

Bill
 
Rob-GB said:
LDBecker said:
Interesting you use a Domino AND the matching joint profiles... I have some issues getting Domino surfaces lined up correctly as well - I started doing my face frames with the Domino and found similar mis-alignment issues, so I went with the Kreg clamp system and it's better - AND you don't have to wait for the Domino glue to dry in clamps.

I just don't entirely trust the profile joint on it's own for my clients and for the little extra time it takes I get the rail alignment spot on each time and the frame ends up exactly square without having to tap parts sideways into place which could damage them.
This also allows me to grain match the meeting stiles like on the project I took that photo from. Here

Rob.

I think you're right - I need to spend more time doing a test fit rather than just trusting the bit alignment.  I've been trying to do some grain matching but I don't have enough wood to work with. I DO use pieces from the same board for each door, but the actual grain variations are pretty wide on the maple I'm using. Luckily, it isn't as noticeable on maple as it would be on oak, and I'm using just a clear finish (spraying General Finishes Top Coat satin water-based).

Larry
 
If doing a project like this I would be inclined to set up 2 router tables for the duration of the job.

I pocket screwed  frames using a Kreg jig for awhile but the planing and sanding out misalignments of the corners annoyed me so much I now prefer doweling. 


I'm lucky to have room for ONE router table - and it's in the extension table of my table saw...

I got FAIRLY good with the Kreg pocket screws, but I ended up getting Kreg's clamping table top. That helped a LOT because it helps keep the frame square and you can clamp down on the actual joints. With the hard maple, though, I sometimes found the screws pulling things a hair out of alignment, even while clamped.

I actually started the faceframe part of the project using a Domino 500, but I was getting some misalignment there as well, and you had to leave them in the clamps for so long, it was so much quicker and easier to go with the Kreg jig for that part of the project. I've got all the lower cabinets and face frames done - next is the glass tile backsplash, then the upper cabinets... My wife is saying that she's keeping me around until I finish the project - I'm thinking another 20 years... [wink]
 
Bert Vanderveen said:
I think you fare really well with a basic Japanese plane. Setup has a learning curve, but the results are spectacular. (My reasoning: face frames are not very wide — pushing a plane over them (as in Western style plane) is harder than pulling (as in Japanese plane), the latter giving you more control.)

Watch Ishitani's video's over on YouTube; that should give you an impression of what is achievable.
Hi, Bert,

I had not seen any of Ishitani's videos in a while - they're just hypnotic, aren't they? Beautifully filmed and wonderful craftsmanship. I really wasn't familiar with what a Japanese plane was - pretty interesting and different concept. Which plane would you recommend? I was looking at the Japan Woodworker (connected with Woodcraft over here) - they sell Tsunesaburo planes that are in the Lie Nielsen/Veritas price range or even higher...https://www.japanwoodworker.com/pro...3197617070231a00002d,58923197617070231a00003c  - Ouch... I would think that a bevel-up smoothing plane, with a high angled blade (as Mr. Cohen suggests earlier in the thread) would be worth a try. That's my next attempt...

Thanks!

Larry
 
Back
Top