Hi there,
i'm new to woodworking etc. and wanted to do alot of work for myself, mostly cabinets made out of melamine plates.
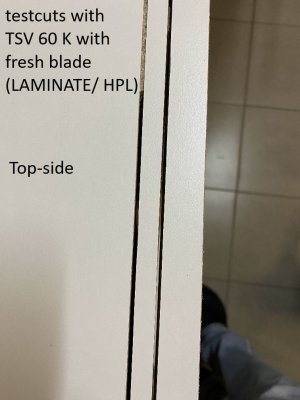
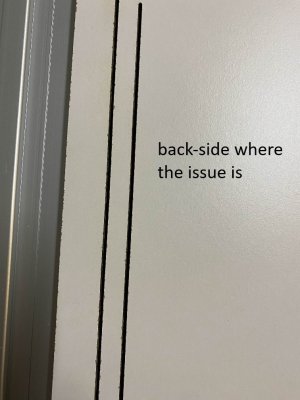
i bought this one to get clean cuts, topside is great but backside (bottom) has alot of chipouts, i've seen another topic here
with some solutions, i cut on a insulation panel (also tried on another piece of wood underneath, that's actually the cuts on picture),
the depth is set at 25 (material is 18) i also bought the melamine cutting blade from festool (same issue as with the original fine cut it came with)
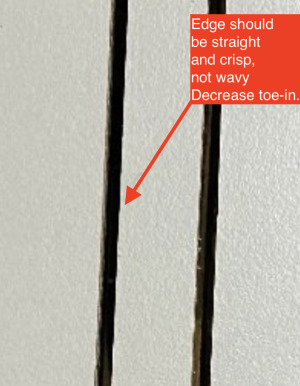
but what i didn't see in the posts is about the 'toe-out', so i follow a video on YT, where in front a standard business card can't get between the blade
and the wood, and on the back side i can slide it barely in when i let it go it sticks behind, doesn't fall out.
There's also zero movement on the rail (adjusted that aswell with the tension thingy's) so it's not that it's moving around sideways.
So i'm out of solutions, hence why i'm reaching out here..
I'm from Belgium so there could be grammar faults here, i do hope i make sense")
i'm new to woodworking etc. and wanted to do alot of work for myself, mostly cabinets made out of melamine plates.
i bought this one to get clean cuts, topside is great but backside (bottom) has alot of chipouts, i've seen another topic here
with some solutions, i cut on a insulation panel (also tried on another piece of wood underneath, that's actually the cuts on picture),
the depth is set at 25 (material is 18) i also bought the melamine cutting blade from festool (same issue as with the original fine cut it came with)
but what i didn't see in the posts is about the 'toe-out', so i follow a video on YT, where in front a standard business card can't get between the blade
and the wood, and on the back side i can slide it barely in when i let it go it sticks behind, doesn't fall out.
There's also zero movement on the rail (adjusted that aswell with the tension thingy's) so it's not that it's moving around sideways.
So i'm out of solutions, hence why i'm reaching out here..
I'm from Belgium so there could be grammar faults here, i do hope i make sense