Uneven Planing with the HL 850 E

onocoffee

Member
Joined
Sep 23, 2024
Messages
308
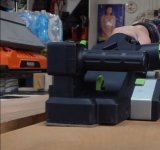
Awhile ago, I mentioned that I had met a guy selling his used HL 850 E planer for a very good price - but because, as he described "it was off on one side by just under 1/32 of an inch". After thinking about it for a couple months, I decided to go for it and picked up a couple weekends ago.

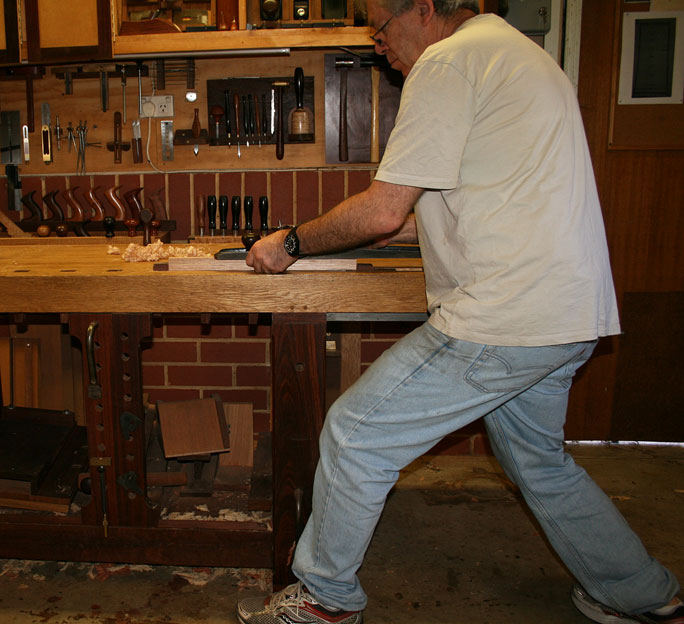
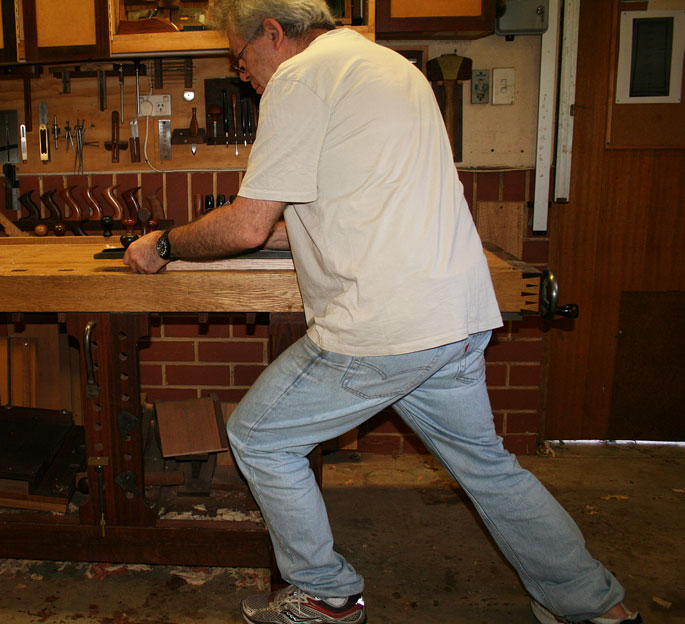
Picked up some rough sawn cherry for a table project today and thought it would be a good reason to give the 850 a go and to see the grain, so I made a couple of passes and it does look uneven to me.

Preface: This is my first power planer and my first time using a power planer, so I'm not sure if I'm even doing it correctly. But I did shoot video of the planing and the results and perhaps your seasoned eyes will see what I am unable. Is this actually a problem? I'm thinking yes because of the distinct lines left after each pass. Do you notice a reason why this problem exists? And, is there a way to correct the issue?

I've made a video that I put on YouTube for easier access. If you might have a look and lend me your thoughts, I'd be very grateful.

Thanks!
 
onocoffee said:
I've made a video that I put on YouTube for easier access. If you might have a look and lend me your thoughts, I'd be very grateful.

Thanks!


To embed a Youtube video, you need to put the full link; the youtu.be link may show a video on mobile, but on laptops/desktops, it will just show a blank section.
 
First off the holding technique isn't quite right, this planer will happily cut full 3.5mm depth on hardwood without issue, but the handle grip and timber being secure is crucial.

As seen by the pic of the 1st pass, you're actually pulling to the left which is lifting the right hand side.

Best results will be obtained using both hands securely gripping the handles. While moving forward push down on the rear handle keeping the weight on the rear plate which is the reference part for the cut, while holding the front handle keeping more pressure to the right to keep it stable and help stop tipping and wobbling.

While the cut is started with the pressure on the front plate, it's essential to keep that rear pressure all the way through the cut.

Also, check the bases are level relative to each other, and that the sole or front plate isn't warped.
[attachimg=1]
 

Attachments

  • hl850.JPG
    hl850.JPG
    42.1 KB · Views: 311
I feel that, for woodworkers who build furniture, cabinets, and other similar pieces, the best use for a planer like the HL850 is to knock off high points on rough cut lumber. For example, if a board is cupped or warped, using the HL 850 to knock off the high edges and corners, would be a great way to get the board in condition to more easily run through a jointer to do final flattening of one side or even through a planer. While I'm sure the HL850 has a number of other uses in the shop, that is the reason I would get one.

If you are trying to flatten one entire side of a rough cut board, it seems that there is a high likelihood that the board will end up with an inconsistent thickness side to side. There is just no way to easily avoid that. In fact, that is even true on a jointer when flattening a board on the first side.

I feel that power hand planers like the HL850 don't function well for flattening whole sides, but are more suited to spot planing to get a board in condition for cutting on a table saw, with a track saw, or flattening one side on a jointer.
 
You forgot about these:
https://www.festool.com/accessory/planing/planer-heads

If there ever was a hand planer with its place in cabinetry, it is the HL 850 E.

A huge shame is the original "jointing" stand accessory is no longer available. The HL 850 with jointing stand and the custom heads does for some nice "shaper-style" use cases...
 
[member=19734]grbmds[/member] Assuming the base plates are co-planar and it's just the technique that's wrong, once you get the technique and handling down pat on the 850 it's a seriously amazing planer.

You can easily and accurately flatten panels, create tapers, do unlimited depth rebates, etc, and even free form shape timber, for example doing a massive roundover for the base of a ramp.

And adding the spiral insert head just makes it even more of an awesome beast!
 
I'm sure that, if I invested the large sum of money that the HL850 costs, I would probably find all kinds of uses for it. However, I have an 8" jointer for flattening the first side and edge on a rough board, a drum sander for flattening joints on glued up boards or ecabinet doors, a planer for thicknessing boards, and a Domino so that, when gluing up boards, the result is an essentially perfect joint. Therefore, the HL850 would be a nice tool for me for various miscellaneous tasks but, at $750, it doesn't seem necessary taken in the context of what I do and the tools I already own.

I would imagine that, if I were a contractor doing remodeling or installing onsite, the 850 would come in real handy but, I'm a woodworker (hobbyist I suppose is the right word) who really would mainly use the 850 to rough flatten boards to run through my planer, jointer, or sander, which, in my opinion, are all better choices for flattening, thicknessing, and jointing. But that's just me... It would be a cool tool to have, but I don't need it.
 
[member=75933]luvmytoolz[/member] Thanks for the tips. I didn't use two hands in the video because I was trying to make sure I was getting the shot and since I'm using the 27mm hose, it doesn't quite seat securely. But point taken and I use both hands in the next test passes. I will be checking the bases to see how level they are relative to each other on Monday (I forgot earlier today).

[member=19734]grbmds[/member] Just to note, my plan is not to plane the board flat. I thought I would use the HL850 because the previous owner said it was a little skewed (and I wanted to see how true that is) and to reveal the grain of the board. The board is for a side table build I'm doing and this particular piece will be for the top. I plan on ripping it down to 6" so it will fit on my jointer and then into the planer.

[member=61254]mino[/member] I was thinking about those heads, but I want to make sure I sort out any of these level issues first. But a guy I know on the west coast had bought out a retiring Festool rep and had a few of those heads for sale, but this was before I knew I was going to get the 850 and when I had reached out to him last week, he had already sold them. He was selling them for about half msrp.

Thanks All, I appreciate the consideration. I turned the cherry board over and did a couple more passes. Perhaps my technique is still weak but it seems like there's a bit of unevenness. I stayed with the depth setting of 0,2mm. If you don't mind having another look and letting me know what you think, I'd be grateful. Thanks!
 
It's really hard to tell from that second video, but it definitely looked to me like the front plate on the far side was occasionally lifting up a bit. It doesn't help that the timber is warped and not held securely.

I'm still thinking if the bottom plates aren't co-planar we would see a uniform difference between the close and far side results, but the depth is varying which I tend to think is likely due to technique.

Do you have a 75-80mm wide piece of timber you know is square, that you can do a single pass on and put a right angle on it?

Secondly, are the blades sharp or dull as that can make a difference in how it skips over certain spots.
 
I don't even know how to comment on this. That is not how I was taught to use a plane whatsoever. I'm confused what this is going to accomplish running lengths like that

I would stronly recommend getting a second hand stanley smoothing plane like a number 4 and learning some basics. Make your first winding sticks and get some sweat in

The HL850 is an electric version of the same, it's not automated in any way so you need all the basics first

I know they are calling it a planer but to me it's an electric plane

 
I think I know what the problem may be.

I am a very long term user of hand planes (over 30 years), plus I have the Festool EHL 65, which is the smaller version of the HL850.

Using planes, whether powered or non-powered has a couple of common components. The first is that the blade must be set up square in the plane body. I rather doubt that this is the issue with your results, although I understand that you would go there first.

The second factor is body mechanics,  that is, how you hold the plane to the work piece. In this, your body needs to be over the plane, pressing it down and forward. This is best practice with a Stanley #7 jointer plane ...

VeritasCustomPlanes3_html_f46f12f.jpg


Linked this this last point is the height of your bench. Yours is too high for ideal body mechanics, and instead you are leaning upward and off balance. This is a the height for relaxed and controlled planing ...

VeritasCustomPlanes3_html_6ddc38fd.jpg


Regards from Perth

Derek
 
[member=4358]derekcohen[/member] Thanks for the thoughts. What would you say is the ideal height for the workbench top when planing. This bench is at 920mm (36").
 
onocoffee said:
[member=4358]derekcohen[/member] Thanks for the thoughts. What would you say is the ideal height for the workbench top when planing. This bench is at 920mm (36").

How tall are you? 36" would be very high for me, and I am 5'9". My bench is 32" high. This will give you an idea ...


If this appears low, what you need to realise is that we plane/push with our hips and bend the knees, which lowers our action height. A bench for planing is lower than a bench for sanding or routing, which is why I also have an MFT.

When planing, we start here (note the bent knees, dropping my body) ...


... and moving forward ...


Think of karate, where punching power comes from the hips, and tennis, where we drop our stance for balance and control.

Regards from Perth

Derek

 
From Derek....""I am a very long term user of hand planes (over 30 years)"".  And FULL of great information for those of us who don't do as much hand tool work as you do... [not worthy] [not worthy] [not worthy] [thumbs up] [thumbs up]
 
Back
Top