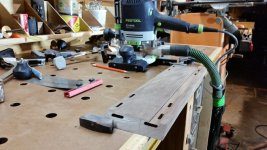
Using a router with a rail.

HarveyWildes

Member
Joined
May 3, 2016
Messages
984
I have a 2200 router and will have a 1400 in a couple of hours.  I will be using them freehand, not in a router table.

One of the uses I foresee is using them to route dados and rabbets in plywood panels for shop cabinets and fixtures.  I'm primarily looking to take advantage of the dust collection when routing freehand, but being able to easily set up the routers for use with my tracks would be a great additional feature.

When using track saws with tracks, you just set up the track on the line and cut.  How do you set up a router to use a track to cut  straight line?  Do you shoot for the same technique - set up the router to cut just on the zero clearance strip of the track?  If so, how do you get it spot-on aligned with the strip?  If you don't use that technique, how do you set it up?
 
Using the router you will align the center marks built into the bases for your alignment to cut line.
 
Peter Halle said:
Using the router you will align the center marks built into the bases for your alignment to cut line.

Is there a manual or other Festool document that describes the process in more detail?
 
You can use the edge guide on a rail. And there are supplemental manuals for the routers. It's not difficult to set up the router for the rail. Good luck!
 
charley1968 said:
But i was writing bullshit about the edge guide..

Oops, I meant finding the supplemental manuals was correct. Using the edge guide in conjunction with the guide rail -- once again, you are correct as this would be BS.  [wink] [big grin]
 
Although I may be the minority, I found that using the rail, rods, and the foot on my OF2000 router allowed it some movement leaving a not so perfect cut. Instead I like using the rails and their clamping abilities, so I flip the rails around and push the base against the rail. This runs smooth with no variations. Much of it came from the plastic track guide, and the rest of the movement came from the little foot deal. Are others finding the same thing?

This little foot could probably be replaced with a larger more stable one? Still wouldn't address the movement in the plastic guide rail attachment.
festool-438608-1.jpg


When pushing against the rail I also run a plate (Think router table plate) on the bottom of my router. This makes it easy to measure the distance from bit to edge, or center of router to edge, and provides a stable edge to run up against the guide rail. I honestly can't remember the last time I removed the plate, but I often use the router in a table setup.

Others experiences probably differ from mine...
 
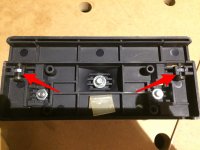
[member=62526]Peter C[/member] the little extendible foot on the router is on the small side can't help with that. The plastic guide plate on the raail that hold the rods is adjustable om the OF1010 and 1400. Dont have the 2200 but there should be something similar I think. The two screws on the bottom can be adjusted to the rail and eliminate sideward movement. Maybe this will help.


Attachments

  • IMG_4346.JPG
    IMG_4346.JPG
    2.3 MB · Views: 682
I have used both the OF1010 and the OF1400 to plow dados with the guide rails.  For the OF1400 the Guide Stop 492 601 precisely positions your router bit.  There are several YouTube tutorials showing how to use the router with the guide rail to cut rabbits and dados.

As noted by Peter C above the foot can be used to level the router if you position some of the router base on the guide rail.  You can move the base completely off the rail again using the Guide Stop, then use the Small Bore Accessory router base 492 574 added to the OF1400 to again level the router by compensating for the thickness of the Guide Rail.

I find using the router with the guide rail & CT dust extraction far superior to setting up a dado stack on my cabinet saw.

Hope this helps.  DrD
 
Ocram said:
The plastic guide plate on the raail that hold the rods is adjustable om the OF1010 and 1400. Dont have the 2200 but there should be something similar I think. The two screws on the bottom can be adjusted to the rail and eliminate sideward movement. Maybe this will help.
The theory of adjustment is sound, and I did tighten mine up before ever using it, still there is enough leverage when pushing a heavy router, with a dado sized bit, to cause irregularities. The further the router is moved away from the rail IE: off the rail, the more leverage that can be applied. I recently bought an OF1010 and will try it with the guide rail at some point. The LR32 type connection may well be superior, but I have not purchased a kit yet.

There is zero movement when the bit pulls the router towards the rail using a plate as I do now. When edging direction is not so important as you can make a couple of passes. Been using boards clamped up as guides and a router for cutting dados long before I ever knew Festool existed. *shrugs*
 
Set your router on the rail and using the rods slide the router away from the rail and it's strip by a good inch or more say, and use the centreline marked on the routers base to position where you wish the centre of the router bit to cut. Ensure the router bit is not cutting into the rail, so just slide it further away and set the cut line accordingly.
If you have the micro adjust additional piece that fits onto the rods/rail  you can easily dial it exact to your rabbet/dado line.
There is a good video on you tube showing a setup.....
 
I tried using my 2200 awhile back to trim a chipboard worktop end, using the rail attachment and special base. I found there was a lot of wobble, due to the weight of the 2200 hanging over the edge. I gave up in the end & did it another way.

Has anyone else noticed this ?

Also my guide bushes are a loose fit, when fitted you can wiggle them around a tenth of a millimetre side to side. There's no play in my 1400 ones.

Sent from my ALE-L21 using Tapatalk

 
joiner1970 said:
I tried using my 2200 awhile back to trim a chipboard worktop end, using the rail attachment and special base. I found there was a lot of wobble, due to the weight of the 2200 hanging over the edge. I gave up in the end & did it another way.

Has anyone else noticed this ?

Also my guide bushes are a loose fit, when fitted you can wiggle them around a tenth of a millimetre side to side. There's no play in my 1400 ones.

Sent from my ALE-L21 using Tapatalk

Anyone ??
 
It sounds easy and like "a system" no matter which manufacturer has the goodies.

In my experience getting the dado slight off and in the wrong spot is easy, and setup is time consuming.

How did you do it in the end?
 
[member=1584]joiner1970[/member]

When I do edge work on the 2200, I usually use the the edge guide.  One other advantage (which I also do on the 1400) is that you can actually use the rail attachment as a stabilizer when it's attached to the rods with the normal base and the edge guide (left hand on rail attachment, right hand on edge guide knob)  Is there a reason why you went rail on this?

Will have to check the fit of my guide bushing inserts -- i don't recall any play.

joiner1970 said:
joiner1970 said:
I tried using my 2200 awhile back to trim a chipboard worktop end, using the rail attachment and special base. I found there was a lot of wobble, due to the weight of the 2200 hanging over the edge. I gave up in the end & did it another way.

Has anyone else noticed this ?

Also my guide bushes are a loose fit, when fitted you can wiggle them around a tenth of a millimetre side to side. There's no play in my 1400 ones.

Sent from my ALE-L21 using Tapatalk

Anyone ??
 

Attachments

  • 20160117_174717.jpg
    20160117_174717.jpg
    3.7 MB · Views: 732
Edward A Reno III said:
When I do edge work on the 2200, I usually use the the edge guide. 
Except it won't work when you are edging the entire piece not doing a round over. IE: Solid surface after glue up, to true it up, and cut the overlap off.
 
Edward A Reno III said:
[member=1584]joiner1970[/member]

When I do edge work on the 2200, I usually use the the edge guide.  One other advantage (which I also do on the 1400) is that you can actually use the rail attachment as a stabilizer when it's attached to the rods with the normal base and the edge guide (left hand on rail attachment, right hand on edge guide knob)  Is there a reason why you went rail on this?

Will have to check the fit of my guide bushing inserts -- i don't recall any play.

joiner1970 said:
joiner1970 said:
I tried using my 2200 awhile back to trim a chipboard worktop end, using the rail attachment and special base. I found there was a lot of wobble, due to the weight of the 2200 hanging over the edge. I gave up in the end & did it another way.

Has anyone else noticed this ?

Also my guide bushes are a loose fit, when fitted you can wiggle them around a tenth of a millimetre side to side. There's no play in my 1400 ones.

Sent from my ALE-L21 using Tapatalk

Anyone ??
As Peter says above.

I'm not edging I'm trimming a straight edge onto a worktop end. Using the rail , but I've found with the router over the edge and no support that side it wobbles. Not easy to cut a clean square edge.

Also the thing about the guide bushes, has anyone else got a loose fitting one ?
I noticed it when I got the 2200 last year and I might have asked before on here. At the time I just stuck paper around it to wedge it in place. Since then I've looked at my of 1400 and there's no play whatsoever on that one.

Sent from my ALE-L21 using Tapatalk

 
DrD said:
As noted by Peter C above the foot can be used to level the router if you position some of the router base on the guide rail.  You can move the base completely off the rail again using the Guide Stop, then use the Small Bore Accessory router base 492 574 added to the OF1400 to again level the router by compensating for the thickness of the Guide Rail.

DrD, I am also looking to use the router off the rail as I have found the plastic foot can mark the workpiece.  Can you confirm that base part is the correct thickness - if so it is considerably cheaper than the other base which I know is the right size - 493233. 

PS: Initially, it looked too thin, but looking at it more closely I guess your part clips on and adds thickness, whereas mine is a replacement base?

 
Back
Top