Hey Everyone,
I recently decided I wanted to learn how to do crown molding. I had no tools, outside of a basic home wrench/socket set and no experience. After a couple months of research online I have compiled all the tools I THINK I need to get started on my project. Here is what I got so far. Please let me know if you think I am missing something.
#1- Gary Katz's Mastering Finish Carpentry #'s 1-2-5-6 (Mastering the Miter Saw and Conquering Crown Molding
Kapex
UG Stand and Extensions
CT Mini
Forrest Chopmaster 90T Signature 10" Kapex Blade
DeWalt DC618K 16ga Cordless Nailer
Stabila LD 300 Laser Measure
Stabila 24" contractor level
General 5" Digital Protractor
Ladder
Caulk gun- White Lightning 3006 Acrylic Latex caulk
Estwing 16oz. Rip Hammer-Leather Handle
Small pry bar set
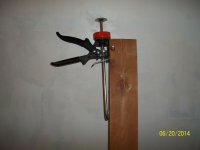
Irwin table clamps
Cedar Shims, 15ga Nails, DAP Latex spackle......
And I already have painting supplies.
Did I miss anything?
I recently decided I wanted to learn how to do crown molding. I had no tools, outside of a basic home wrench/socket set and no experience. After a couple months of research online I have compiled all the tools I THINK I need to get started on my project. Here is what I got so far. Please let me know if you think I am missing something.
#1- Gary Katz's Mastering Finish Carpentry #'s 1-2-5-6 (Mastering the Miter Saw and Conquering Crown Molding
Kapex
UG Stand and Extensions
CT Mini
Forrest Chopmaster 90T Signature 10" Kapex Blade
DeWalt DC618K 16ga Cordless Nailer
Stabila LD 300 Laser Measure
Stabila 24" contractor level
General 5" Digital Protractor
Ladder
Caulk gun- White Lightning 3006 Acrylic Latex caulk
Estwing 16oz. Rip Hammer-Leather Handle
Small pry bar set
Irwin table clamps
Cedar Shims, 15ga Nails, DAP Latex spackle......
And I already have painting supplies.
Did I miss anything?