What Kind Of Router Bit?

Staniam

Member
Joined
Nov 3, 2014
Messages
725
Hey guys, not sure if I posted this in the right category but oh well.

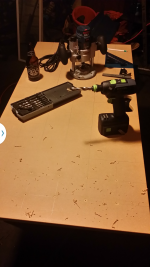
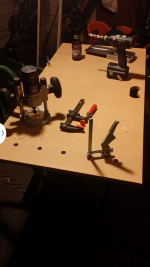
I'm about to start making the holes for my MDF worktops and I was wondering what kind of router bit to use. I've seen videos on people using drills and routers and figured I'd try both and go with whichever one seems to work best for me.

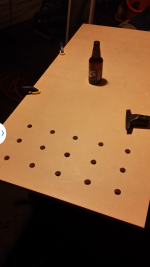
I'm making 3/4" holes but I'm wondering if I need a specific router bit or if a 3/4" straight bit is all I need.

Any opinions/suggestions welcome too.
 
davetink said:
I took Ron Paulk's advice and got a 3/4" spiral upcut bit from Lee Valley.

I'm new to routing so forgive me if this is a silly question but, what makes a bit an upcut? Is it as simple as the name?
 
I would go spiral bit -- upcut so the dust clears from the hole better.  Upcut means the shearing action is up from the cut, downcut the shearing action is downward.  Up makes for smoother cutting and dust clearance, down helps protect the surface better against chipping, which is very useful when doing veneered plywood.

Have you seen this article?

http://www.leevalley.com/us/newsletters/Woodworking/5/4/article3.htm

Lee Valley makes one for around $50, and MLCS for around $15.  I know some people trash them, but I really like my MLCS bits.
 
Gotcha. Thanks Edward for that article, tons of good info. I guess I'll grab a 3/4" straight bit if my local big box place doesn't have the upcut. Hopefully it does. First choice would be the Festool dealer near me but they're closed now.
 
BTW, there's some dispute over the value of HSS vs. Solid Carbide bits, and frequent complaints that the HSS ones can overheat quite easily, so if you look into further applications for spiral bits just be aware of the difference.  For whatever reason though, they only seem to make the 3/4 spiral bit in HSS rather than Carbide, perhaps because of the large size.

You should be fine with a straight bit on plunging, but just take it slow.  You probably will end up with more chipout on the underside of the holes, however, than you would with a spiral bit.

Can't wait to see pictures of what you come up with.

Staniam said:
Gotcha. Thanks Edward for that article, tons of good info. I guess I'll grab a 3/4" straight bit if my local big box place doesn't have the upcut. Hopefully it does. First choice would be the Festool dealer near me but they're closed now.
 
One other thing. If you go with 20mm rather than 3/4 you can start building your dog inventory, clamping elements, etc with stuff you can use on a MFT if you go that route later.
 
Edward A Reno III said:
You should be fine with a straight bit on plunging, but just take it slow.  You probably will end up with more chipout on the underside of the holes, however, than you would with a spiral bit.

Can't wait to see pictures of what you come up with.

Staniam said:
Gotcha. Thanks Edward for that article, tons of good info. I guess I'll grab a 3/4" straight bit if my local big box place doesn't have the upcut. Hopefully it does. First choice would be the Festool dealer near me but they're closed now.

I'll be sure to post pictures for sure. Just hoping their stock is correct right now.
 
davetink said:
One other thing. If you go with 20mm rather than 3/4 you can start building your dog inventory, clamping elements, etc with stuff you can use on a MFT if you go that route later.

I was thinking about that but I decided to just go with my own DIY MDF tops. I'm sure the MFT tables are awesome but I can't quite wrap my head around spending that amount of money on a table.
 
My next question is how far apart do you guys recommend I make the holes? There are varying answers online.
 
What he is saying is if you bore 20mm holes instead of 3/4" then you will be able to use all of the accessories (dogs and clamps) that work for the mft tables. Consider it since the only difference is the size of bit you buy.
 
I imagine the quick clamp would work either way right? That's really the only clamp I'll be using. I'm going to make my own accessories for the table. Mostly out of scrap wood and some metal.
 
Stan

I'd suggest 20mm holes on 96mm centers.  That's the standard for the MFT tables.  If you go that route, any clamping elements or dogs you buy are 'forward compatible' if you end up going with an MFT in the future.

Alternatively, you can go with 3/4" and just go with dogs from Lee Valley or others.   

In either case, you could also go on 96mm centers and that would let you start with 3/4 for now and if you decide to, later enlarge to 20mm if you go that route in the future and carry the top forward to be compatible.

As for the bit, I'd suggest either the spiral uncut bit or a mortising bit.  Rockler and Woodcraft both stock the spiral bits and mortising bits in 3/4.  Might have to order the 20mm from either or from Amazon, Festool dealer, or Rockler.  Woodcraft carries Festool and they may have a 20mm.  You can also get them from Lee Valley.

A mortising bit will clear the chips a little better than a standard straight cut bit as they have clearance at the bottom for easier plunging.

Home Depot also stocks a 3/4 mortising bit.

Good luck!

neil
 
Staniam said:
I imagine the quick clamp would work either way right? That's really the only clamp I'll be using. I'm going to make my own accessories for the table. Mostly out of scrap wood and some metal.

Drill a test hole - 3/4 is slightly smaller than 20mm and it might be tight to get the quick clamps through them.  You could drill them and then round over on the bottom side to accommodate the clamp turning into the hole with tight clearance.

neil
 
Neil,

I decided that since I bought two 2'×4' MDF sheets, I'll go ahead and try 3/4" with one and 20mm with the other. If anything, like you guys said I can always widen the 3/4" holes to 20mm. I've already started on the 3/4" sheet since that's the size bit I bought. I'll order a 20mm Festool bit.

On a side note, I really wish I could rig up a way to attach my router to my Festool guide rails. It'd make things a lot easier. I'll have to look into the dimensions of the guide rail adapter for Festool and see if I can rig it to this Bosch.
 
You can make a 3/4" thick sled with a mortise cut in it to fit the guide rail and then mount the router to the sled.  Start with a piece of ply about 1' square and then route down one side with a groove the width of the guide rail - about 1/2 to 5/8" +/-.  Drill a hole to accommodate the bit / collet as needed.  Trace around the router base and then route an inset for the router to sit into.  Screw Bessey hold down clamps to clamp the router in the inset and you are good to go.

There is a company that makes a universal sled for the Festool rails.  I remember seeing it on FOG.  Perhaps someone will see this and knows of the brand.

neil
 
Thanks for that Neil, this is why I love the FOG. Here's a picture of what I've done with what I have avaliable. ..
 

Attachments

  • Screenshot_2015-01-17-18-48-22.png
    Screenshot_2015-01-17-18-48-22.png
    1.8 MB · Views: 429
  • Screenshot_2015-01-17-18-48-28.png
    Screenshot_2015-01-17-18-48-28.png
    1.7 MB · Views: 474
First 3 holes came out funky but once I started using the Quick Clamp to hold the router down I got much better holes.
 

Attachments

  • Screenshot_2015-01-17-21-15-17.png
    Screenshot_2015-01-17-21-15-17.png
    1.3 MB · Views: 391
Looking good. 

How is tear out on the bottom with the routed holes?  And what bit did you end up with?
 
Back
Top