Whiteside 9500 Router Inlay Kit

Stone Message

Magazine/Blog Author
Member
Joined
Apr 13, 2011
Messages
4,550
Hi everyone

There was a lot of discussion about the Whiteside 9500 inlay kit on another thread and so I said that I would do something for the FOG.

I contacted Router Cutter UK and they kindly supplied a Whiteside 9500 set for me and I have produced the video. I have done a lot of inlay work in the past using my old Stanley industrial router but the combination of the Whiteside kit and my (superb) OF 1010 makes the whole process a dream

I made a minor error at the start and I have left that in the video to help others avoid the mistake that I made.

Here is the link:


Peter
 
I love using inlays.  I had the same problem with the threads fitting into the Festool template adapter for the 1400, and performed the same machining of the threads.  It is a bit more worrisome for the 1400 since there is no way to control the centration other than the placement of the bushing, so I had to take the threads down a bit more than "just fitting in".

Has anyone here looked at Multi Layer Inlay System?  It looks to be a great way to actually get sharp corners.  Some great art pieces there too.  I am hesitant because of the recent explosion in home CNC, where for almost the same amount as a complete set you can make your own system.
 
Peter

I think the other reason that you cut the first piece wrong was that it appears, for only a brief period in your video, that you were cutting in an anticlockwise direction. It is important that when cutting a hole using a template that all cuts are in a clockwise direction as this uses the cutting action to hold the router hard against the template. I think that you need to use a template that is thicker than the height of the copy ring to ensure that there is an escape path for any trapped dust.

The drilling of the dust holes in the copy ring is an excellent solution and I would actually make those holes even larger.

Once again an excellent video despite your script writer's inability to differentiate between 1/4" and 1/8".
 
Bohdan said:
Peter

I think the other reason that you cut the first piece wrong was that it appears, for only a brief period in your video, that you were cutting in an anticlockwise direction. It is important that when cutting a hole using a template that all cuts are in a clockwise direction as this uses the cutting action to hold the router hard against the template. I think that you need to use a template that is thicker than the height of the copy ring to ensure that there is an escape path for any trapped dust.

The drilling of the dust holes in the copy ring is an excellent solution and I would actually make those holes even larger.

Once again an excellent video despite your script writer's inability to differentiate between 1/4" and 1/8".

I did do the work in a clockwise direction but the clip shows the last "random moves" to get the odd bit out that I had missed. Thank you for raising the point as I should have mentioned it in the video.

I think that I may make the dust holes slightly larger. Anyone doing this must ensure that they do not hit any of the "superstructure" of that brass piece.

As for the script writer...

Have you ever watched the credits after a film with "Best Boy", "Grip", "Wardrobe Artist" and so on - well I am all of those and it never ceases to amaze me how I manage to get any woodwork done - there never seems to be a carpenter in the credits.

Cheers.

Peter
 
I think I'll be looking into the Whiteside 9500 Router Inlay Kit. Seems like a useful and efficient work flow for small intricate inlays..

Thanks Peter for doing the research, making and sharing the video.. 
 
Just to clarify, doenst the OF 1010 in the US come with a guide bushing adapter plate? If so the Leigh 704R wouldnt be needed correct?
 
[member=58821]ben_r_[/member]  The current USA scope of delivery includes a bushing adapter.

I think there have been several scopes over the years though. Mine from 4-5 years ago didn't include one. 

That said, it's plastic and not very good in my opinion. It's not sized to really allow for any centering like Peter showed in his video.  FT should be ashamed for charging $26 for it considering the one from Leigh in Peter's great video is metal and costs about the same.
 
antss said:
[member=58821]ben_r_[/member]  The current USA scope of delivery includes a bushing adapter.

I think there have been several scopes over the years though. Mine from 4-5 years ago didn't include one. 

That said, it's plastic and not very good in my opinion. It's not sized to really allow for any centering like Peter showed in his video.  FT should be ashamed for charging $26 for it considering the one from Leigh in Peter's great video is metal and costs about the same.
Gotcha. My imperial OF 1010 is on its way. If it end up still coming with the plastic version I will probably order the Leigh.
 
I ordered one of these based on how easy the video made it look and it arrived today. Looks like were going to get snowed in this weekend so it looks like I'll have some time to play with it. Looking forward to see what I can do.
 
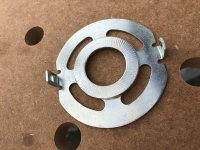
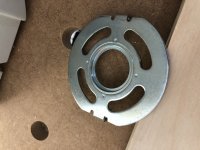
Excellent video, thanks much. I’ve got a 1400 and using a metal adapter seems the way to go.  While your video has an “aftermarket” metal adapter on a 1010, is there an equivalent for the 1400? I’ve got this adapter included with the router:
 

Attachments

  • C89F4609-5C93-4B71-91E5-5C37182F5CD6.jpeg
    C89F4609-5C93-4B71-91E5-5C37182F5CD6.jpeg
    3.3 MB · Views: 349
  • 433039A0-4A0E-462D-B095-B3B98CF80C72.jpeg
    433039A0-4A0E-462D-B095-B3B98CF80C72.jpeg
    2.4 MB · Views: 379
Got a beginner inlay question for this group. With the 9500 kit, what is a good wood thickness for the inlay stock? Will 1/8” (3mm) be suitable?
 
CBRacerX said:
Got a beginner inlay question for this group. With the 9500 kit, what is a good wood thickness for the inlay stock? Will 1/8” (3mm) be suitable?

It helpsif the inlay is thick enough to create in the shape that you want and not be too fragile. 1/8" is certainly fine. I would work in the range of 1 mm to 6 mm.

Peter
 
Back
Top