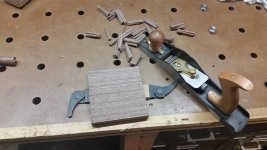
Finished the slightly more ambitious rattle this morning. Trying as much as possible to integrate more hand tools in my work, so rather than run a long board through my planer, I cut the middle walnut board to size and simply planed it down to thickness.
View attachment 1
As with the other rattles, I drilled a hole in the walnut for the noise makers. This time I used small ball bearings. I had gone to home depot to pick up a bag, but discovering they don't keep them in stock, and being impatient, I swiped the bearings from an odd caster I had lying around, which I had to cut open with the angle grinder.
After glue up I also used the jack plane to take the laminate to rough thickness.
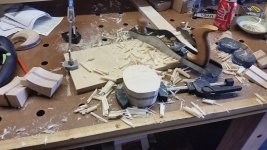
View attachment 2
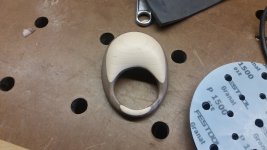
Jigsawed the rough shape and put a hole for the handle with a forstner bit (bled out on the top of the block -- neglected to clamp it down tight enough so it went flying halfway through the drilling and the the wayward bit gashed the top of my thumb -- luckily no stitches)
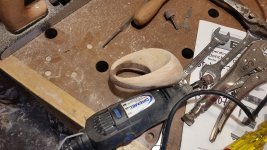
View attachment 3
Did some more rough shaping using a combination of rasps, the RAS, the jack plane, and the OSS to widen the center hole:
View attachment 4
It was slow going with the rasps on the inside curve, so I decided to speed it up with the sandpaper drum on my dremel:
View attachment 5
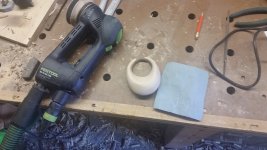
After I had achieved the shape, I used the RO90 and interface pad (for the outside), and the granat foam sheets and the 150mm interface pad by hand (for the inside) to finish sand it to 1500 grit
View attachment 6
View attachment 7
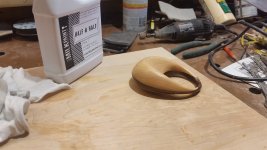
Applied a finish of the Real Milk Paint co.'s Half-and Half (half tung oil half citric something or other), which I ordered specifically for this project. Will probably seal it with beeswax when the oil is dry:
View attachment 8
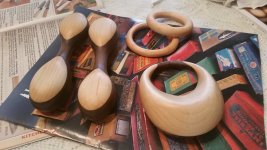
So here are the toys I've got going thus far:
View attachment 9