Birdhunter
Member
- Joined
- Jun 16, 2012
- Messages
- 4,111
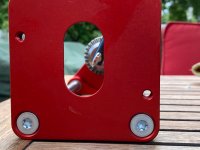
I received my Woodpeckers Auto-Line drill guide yesterday and have been playing with it.
Overall, it is well made and functions smoothly. Locating hole positions relies on lining up cross hairs on the base with the intended position. Works well.
The depth positioning stop is rock solid. I did recommend to Woodpeckers that they etch graduation markers on the stop rod.
The fence is also rock solid and can be positioned in a wide variety of useful ways.
The guide can be tippy with a drill mounted. I used a CSX so the tool was not as tippy as it would have been with a heavy drill.
I tried drilling a hole through a dowel. Perfect center!
My test drills were only 1/8". If I was using a big bit or a Forstner, I'd find a way to clamp the tool to the wood.
I ordered the base model and subsequently ordered the extra rods and flip stops. I can now see how useful they would be in making repeated holes.
I wish they had offered a fitted Sustainer for the tool.
Bottom line, the tool is expensive, but is well made and functions beautifully.