clutzer
Member
- Joined
- Dec 24, 2014
- Messages
- 37
Hey all, I saw this excellent post on creating your own MFT top using the LR-32 system and I had to try it out.
http://festoolownersgroup.com/festool-jigs-tool-enhancements/make-a-perfect-'mft'-with-qwas-raildogs
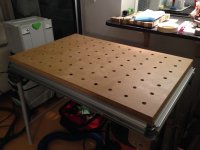
Ultimately I'm going to use this top in my MIRT project (MFT Incra Router Table) which is why I used 1" thick MDF and finished it with Shellac, but 3/4" would be perfect for a simple MFT/3 replacement project. I don't have any innovation to add over and above the original post above, but I do provide some convenient dimensions of how to start things off which may make it easier to bang this out quickly--especially if you have a 4x4' sheet of MDF lying around.
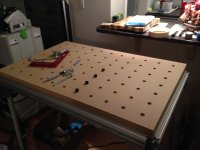
Step 1: go and get a 4' by 4' sheet of 1" thick MDF. (You can get a smaller sheet, but obviously this size is convenient because it's likely your lumber store will have it lying around--mine did.)
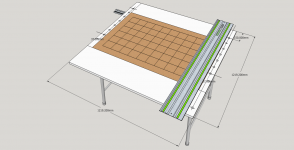
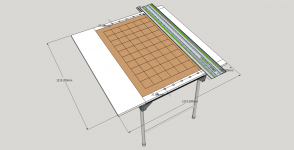
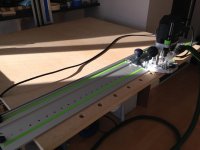
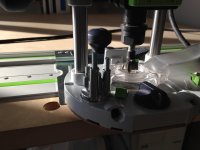
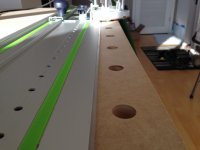
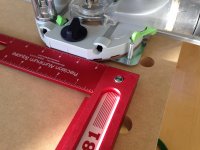
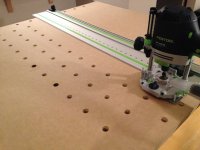
Step 2: layout the guide holes 37mm from the edge using the LR-32 rail. The first guide hole can start roughly 150mm away from the perpendicular edge. Route out 7 guide holes using the LR-32 rail, skipping two holes for hole you drill. Every 3 holes is the magical 96mm you are looking for. To make things square I chose the best factory edge to be the perpendicular edge to the rail and used my square to position it. I used the LR-32 kit rail stop with 16 facing up. Do this on both edges of the sheet.
Step 3: using rail dogs, come in about 3 3/4" in from the guide holes and route 11 dog holes. Rinse and repeat this procedure for the remaining 6 guide hole pairs.
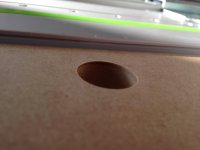
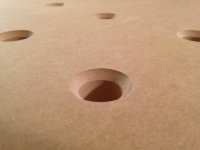
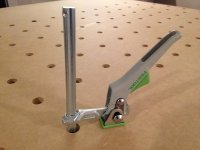
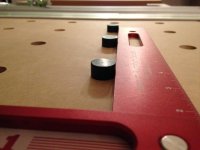
Step 4: flip the table over and chamfer the holes a 1/4" deep. This allows the Festool clamps to be used and not bind on the hole.
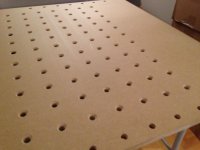
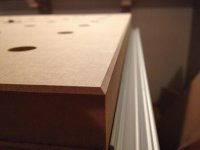
Step 5: route an edge treatment on the top side.
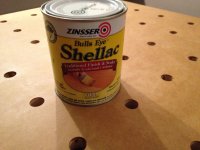
Step 6: (optional) I'm using this as a router table top so I Shellac'd it and sanded it with 220 to get a nice smooth finish.
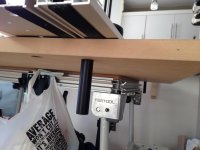
Note: the finished top as it stands right now is 33 pounds. I will admit working with a full 4'x4' sheet of 1" thick MDF was a workout.
http://festoolownersgroup.com/festool-jigs-tool-enhancements/make-a-perfect-'mft'-with-qwas-raildogs
Ultimately I'm going to use this top in my MIRT project (MFT Incra Router Table) which is why I used 1" thick MDF and finished it with Shellac, but 3/4" would be perfect for a simple MFT/3 replacement project. I don't have any innovation to add over and above the original post above, but I do provide some convenient dimensions of how to start things off which may make it easier to bang this out quickly--especially if you have a 4x4' sheet of MDF lying around.
Step 1: go and get a 4' by 4' sheet of 1" thick MDF. (You can get a smaller sheet, but obviously this size is convenient because it's likely your lumber store will have it lying around--mine did.)
Step 2: layout the guide holes 37mm from the edge using the LR-32 rail. The first guide hole can start roughly 150mm away from the perpendicular edge. Route out 7 guide holes using the LR-32 rail, skipping two holes for hole you drill. Every 3 holes is the magical 96mm you are looking for. To make things square I chose the best factory edge to be the perpendicular edge to the rail and used my square to position it. I used the LR-32 kit rail stop with 16 facing up. Do this on both edges of the sheet.
Step 3: using rail dogs, come in about 3 3/4" in from the guide holes and route 11 dog holes. Rinse and repeat this procedure for the remaining 6 guide hole pairs.
Step 4: flip the table over and chamfer the holes a 1/4" deep. This allows the Festool clamps to be used and not bind on the hole.
Step 5: route an edge treatment on the top side.
Step 6: (optional) I'm using this as a router table top so I Shellac'd it and sanded it with 220 to get a nice smooth finish.
Note: the finished top as it stands right now is 33 pounds. I will admit working with a full 4'x4' sheet of 1" thick MDF was a workout.
Attachments
-
 MIRT_Step_3.png225.4 KB · Views: 1,139
 -
 MIRT_Step_1.png242.3 KB · Views: 870
 -
 MIRT_Step_2.png233.5 KB · Views: 808
 -
 IMG_0949.JPG544.4 KB · Views: 1,051
 -
 IMG_0950.JPG571.9 KB · Views: 861
 -
 IMG_0951.JPG485.7 KB · Views: 857
 -
 IMG_0952.JPG462.1 KB · Views: 839
 -
 IMG_0957.JPG799 KB · Views: 935
 -
 IMG_0959.JPG666.1 KB · Views: 877
 -
 IMG_0961.JPG522.9 KB · Views: 929
 -
 IMG_0962.JPG810 KB · Views: 818
 -
 IMG_0965.JPG786.2 KB · Views: 902
 -
 IMG_0966.JPG798.2 KB · Views: 841
 -
 IMG_0969.JPG666.7 KB · Views: 757
 -
 IMG_0970.JPG812.9 KB · Views: 838
 -
 IMG_0972.JPG815.3 KB · Views: 802
 -
 IMG_0973.JPG818.8 KB · Views: 791
 -
 IMG_0975.JPG730.2 KB · Views: 755
 -
 IMG_0976.JPG742.8 KB · Views: 823
 -
 IMG_0979.JPG744.8 KB · Views: 866
 -
 IMG_0980.JPG596.4 KB · Views: 856
 -
 IMG_0981.JPG660.1 KB · Views: 714
 -
 IMG_0982.JPG807.2 KB · Views: 840
 -
 IMG_0984.JPG615.6 KB · Views: 1,264

