RobBob -
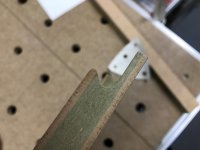
No ... I used 3/4" Birch Plywood sides, top, and bottom, 1/4" MDF back. Edge band with hot melt adhesive backed banding on exposed edges. My reason for choosing plywood was I wanted extra holding power for the slide screws. I used 6 screws for each slide into the cabinet walls and the same number into the draw sides. The slides are full extension with a 100# rating.
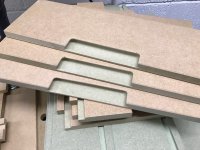
(A little heads up: the ratings giving by the manufacturers I looked into were: 100# at 18" extension.) The drawers where made with 1/2" Poplar sides and back, 3/4 Poplar fronts, 1/2" plywood bottoms. I also ran a "divider" from side to side to add stiffness and extra bottom support. Drawer bottoms were routed, with 4 depressions, to capture the feet under the systainer boxes; that keeps them from moving around and also minimizes the height of the cabinet.
mddharma-
I left my LR32 in its box this time. I've used it before and love it, however for this build, to minimize clearance between systainer tops and tray bottoms, the slides were space to achieve minimum clearance. But your right about using additional slide support. I used 6 screws for each slide into the cabinet and 6 screws into each drawer side.
nelic-
If I had used a common wall for side by side systainers that would have been a concern.
Billedis-
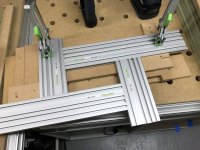
Just hand sketches. I can pull together the overall dimension. Most dimensions were based on the size of the MFT and the number of systainers I needed to store, and an acceptable top height. I wanted a slightly higher work surface then my MFT so this arrangement suited my work habits and maximized storage ... but I'll get them up on the board ASAP. Thanks for asking
") ScotF-
ScotF-
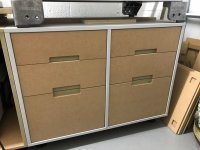
Same as above as far as plans. The casters are from Lee Valley H-D Polyurethane Swivel Caster w/Brake 2" x 2-1/2" item #00K2121. I used 4 under each storage column for a total of 8 casters. Their rated at appx 90# each so that gave me plenty margin. They make it easy enough to move the cabinet around, and I rarely use the brakes, the weight of the cabinet keeps it in position ... and Thank you.
Vondawg-
Very nice!
Agree, you have to play with the spacing a little to be sure you can open the front most systainer lid, but there is room, especially with the 28" full extension slides. I've left all my green handles on but I'm playing with the idea of just taking off the handles on the rear systainers an storing them behind the box ... but for now I'm twisting handles to open the systainers
")
Thanks all for comments and interest ... I'll get dimensions up here ASAP