42 mortise and loose tenon joints in this table

bill-e

Member
Joined
Jan 20, 2007
Messages
504
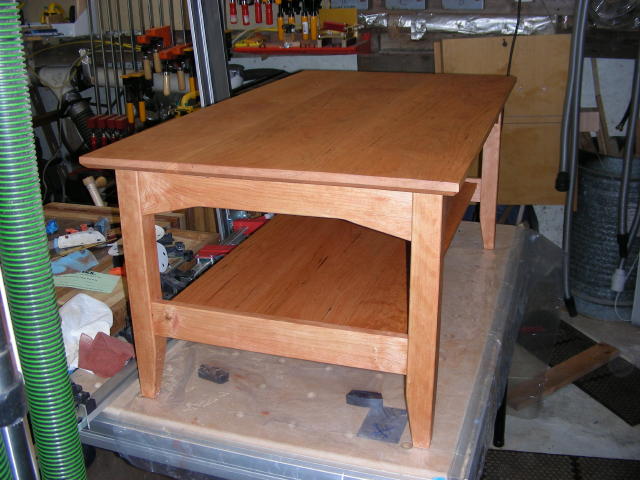
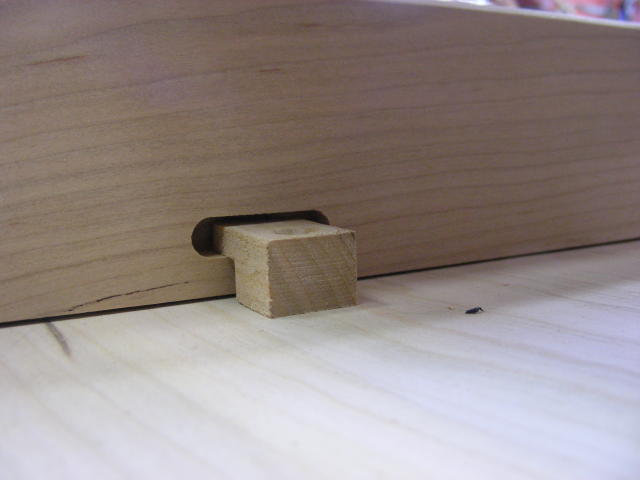
Plus another 20 in the table top and shelf. More pics in the Domino review but here's a a dry fit of the table constructed while evaluating the Domino.  Still needs glue and finish which I'll have time to do now that the review is finished....got to read it another couple of dozen times before I publish it though :)

dryfit4.jpg
 
Your table "Looks great Bill !!!"

Can't wait to read your review.

One thing that amazes me in your picture above.... And in pictures others have posted like our lucky FOG member Mike Warden, or Rich Christopherson, or "Rocker" & many others on the site "Down Under"..... is the Dry Fit pictures....  :o 
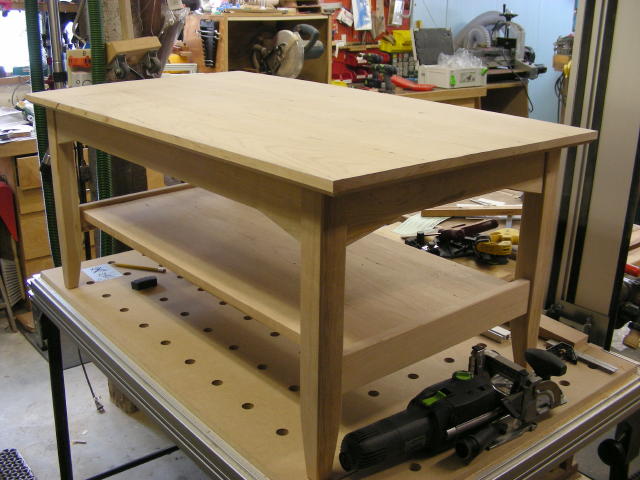
The dam things sit there looking square & ready for finish!!! 

Simply amazing...

jim
 
Jim,

Thanks.  That's the beauty of the Domino, no need for a shoulder plane to fine tune the joints.  As long as you crosscut everything square and to the right length...or should I say equal lengths, it will be square.  I used to have to "tune" my integral M&T joints with a plane which worked well, and if I was retired with loads of time on my hands I might even enjoy that, but I'm basically only home on the weekends and don't have any time.
 
Bill,
Excellent work!

Sorry if I missed this, but did you say that you put Dominoes in the table top?  Do you mean for the long-edge joints?

Thanks for posting!!

Matthew
 
Matthew, yes, edge joining the boards for the top an shelf with 5x30mm Domino tenons.
 
Bill
nice table! I have just read your review which is excellent, you are right about the alignment pins, they do sometimes catch and throw the alignment off especially if the machine is on between making cuts. I find that if  i power off between plunges it is not such an issue.
 
OK, I know I'm slow but in my defense I'm not home during the week.  Here's the table with it's color and oil.  Next is many coats of a wipe on poly.

For color I rub on and then immediately off a lightly dampened rag of Watco Cherry to give it some color and even out any sapwood.  Right after the color I rub on a heavy coat of Watco Natural.  This allows me to further spread and dilute the color from the previous step.  Next weekend when I get home I'll start the poly coats.  I like 3 on the apron/legs and 6-8 on the top.  I would have used Waterlox but the other two pieces in the set were finished this way so I have to match them.

firstoil.jpg
 
Hey, I've got a silly newbie question: When you've got a base joined to a top like that, how and where do you join it so that the cross grain expansion doesn't tear the top off the substructure? Dowels or dominoes in the middle and the sides float, or do you just domino that sucker all the way around and not worry about expansion differences?

This has immediate application in an upcoming table project, so large pieces of wood do hinge on your answer ;D

Thanks. And nice work!
 
I use what I call table buttons.  I used the Domino to make mortises in the apron around the apron (2nd pic), then I made the buttons and screwed them in to hold down the top but allow for movement

tablebutton.jpg


dryfit_top_mortise.jpg
 
Back
Top