A coffee table for my nephew

Thanks for those details! 

Order of Assembly!  I've had that issue as well!

Nice save on getting it to work out with glue drying.  Going to be a beautiful table.

 
We are at the stage where the base - rail with tapered and splayed legs - is to be done next. This is the photo of the model ...

Davids-table1.jpg


I like this base, and have chosen to replicate it. The two relevant items are the angle of the splay (which I estimated as 10 degrees), and the positioning of the ends of the legs (these appear to end in line with the carcase).

I get my Jarrah these days from an urban salvage yard, but some of it is ex-roofing beams, like this ...

1a.jpg


It is a wonderful moment when it comes out the other end ...

2a.jpg


I planed up a couple of these to find 4 blanks that would make the legs. Each is 450mm long. The legs will taper in the round from 40mm at the top to 25mm at the bottom.

The mortices were marked out ...

3a.jpg


... and routed out (I have a great jig for this - just made for hard, hard woods) ..

22a.jpg


.. leaving ...

4a.jpg


The ends of the mortices are squared up ...

5a.jpg


.. and then onto the lathe ...

6a.jpg


A little tinted epoxy is needed to repair some of the resin holes ...

7a.jpg


8a.jpg


Next step is to determine the length of the rails. This is a no-math process that simply involves laying out the parts, with the legs at 10 degrees ...

10a.jpg


8-1a.jpg


Sawing the tenons is easy enough. The rails are 19mm (3/4") and the tenon/mortice is 1/4" wide ..

9a.jpg


The tenon shoulder needs to be fitted flush with the leg ...

11a.jpg


The easiest way is to use blue tape to mark the shoulders ...

12a.jpg


13a.jpg


The shoulder of the mortice is levelled with a chisel and rasp ..

15a.jpg


... until each is a good fit ..

16a.jpg


Finally, the glue up begins ...

18a.jpg


20a.jpg


I pulled off the clamps a short while ago ...

21a.jpg


I'll clean it up in the morning.

Regards from Perth

Derek
 
Like the way you insert the shoulder cuts in the legs.  I was thinking you would do the reverse, but that is much easier.
 
Finishing the base ..

Splayed legs leave their tops angled with the rails, and they need to be flushed ...

5a.jpg


... to be coplanar on both sides ...

7a.jpg


8a.jpg


The next step was to add corner reinforcing blocks. These were glued and screwed ...

9a.jpg


You can see they follow the angled rails (created by the splayed legs).

The under side ..

10a.jpg


The final stage was to level the legs. Measure the height at each corner, and use wedges under each leg until the height is the same for all ...

11a.jpg


12a.jpg


13a.jpg


Hot glue the wedges so they do not move ...

14a.jpg


Once done, scribe the bottom of each leg ...

15a.jpg


Electrician's tape is great for marking at an angle ...

17a.jpg


Saw off the waste, and we are done ...

19a.jpg


I checked the result with a digital angle box. All good. Sanded to 240 grit ...

20a.jpg


The drawer and finishing is left to do.

Regards from Perth

Derek
 
It is now beginning to look like something familiar ....

1a.jpg


The legs appear pretty strong and solid. No flex.

Regards from Perth

Derek
 
Very nice and inspirational.

I recently made a cabinet from MDF with curved corners. I used the same technique for the inner radius, but I cheated and used the router with a massive roundover bit for the outside radius! I first tried a hand plane but my skills just aren't up to your level.  Guess they never will be if I don't persist and just crack out the power tools everytime :)
 
Last time the base was completed, and we had a quick look at the parts together. It is not fully sanded yet, and no finish obviously. It feels very solid in the legs - I know there were some that were concerned about the 10 degree splay ....

1a.jpg


The - almost - last lap is here, the building of the drawer. I do not want to bore the pants off all with yet another dovetailing, so rather here are some pictures of the decisions and tasks that need to take place for a well-fitted drawer.

The first decision was to choose the wood for the drawer front, and the panel at the other side (the drawer will open on one side of the coffee table, and the other side will be a fixed panel similar to the drawer front).

There is just enough of the Fiddleback Jarrah for these panels. The orientation of the figure needs to be chosen, otherwise it will look like a dog's breakfast ...

3a.jpg


4a.jpg


It is beautiful wood, but very interlocked. The double iron works its wonders ..

7a.jpg


The length is short enough to joint on a shooting board ..

11a.jpg


Mark the width ..

9a.jpg


... and shoot to the line.

The ends are squared ...

8a.jpg


I frequently read how important it is to have a backing board when shooting end grain to prevent spelching. This is not important at all. The best strategy is to score the line you will plane to, and then add a chamfer at the end. Use the shooting plane for this ...

8-2a.jpg


Now plane until the chamfer disappears ...

8-1a.jpg


No spelching ...

8-3a.jpg


The fitted drawer front ...

13a.jpg


... is tight to the sides and has about 1mm gap at the top.

The back board of the drawer, and the rear panel ...

14a.jpg


These are the drawer parts: the front is 19mm thick, the quarter sawn Tasmanian Oak sides are 10mm (slightly thicker than my usual 8mm as it needs to be a little beefier) and the rear is 12mm ...

15a.jpg


A peek at the drawer ...

1a.jpg


All the details in the last chapter next time.

Regards from Perth

Derek

 
Derek, you are a surgeon right? I would gladly let you cut into me, seeing how you handle wood. (Says the guy who had an operation less than 4 months ago — fractured humerus, done by a trauma guy; I think they are referred to as ‘cowboys’ in the trade…)

[wink]
 
Thanks Bert. I am not a surgeon but a shrink. Perhaps a reason I cut up wood is because I am not permitted to cut up people .... :)

Regards from Perth

Derek
 
Superb Derek, looking forward to your next post

Bert Vanderveen said:
I think they are referred to as ‘cowboys’ in the trade…

[member=5467]Bert Vanderveen[/member] , from a fact I know they are, you could/should have asked for an orthopidic surgeon. Hopefully there won’t be a next time, but just in case there is know that you are intitled to ask for a specialist.
 
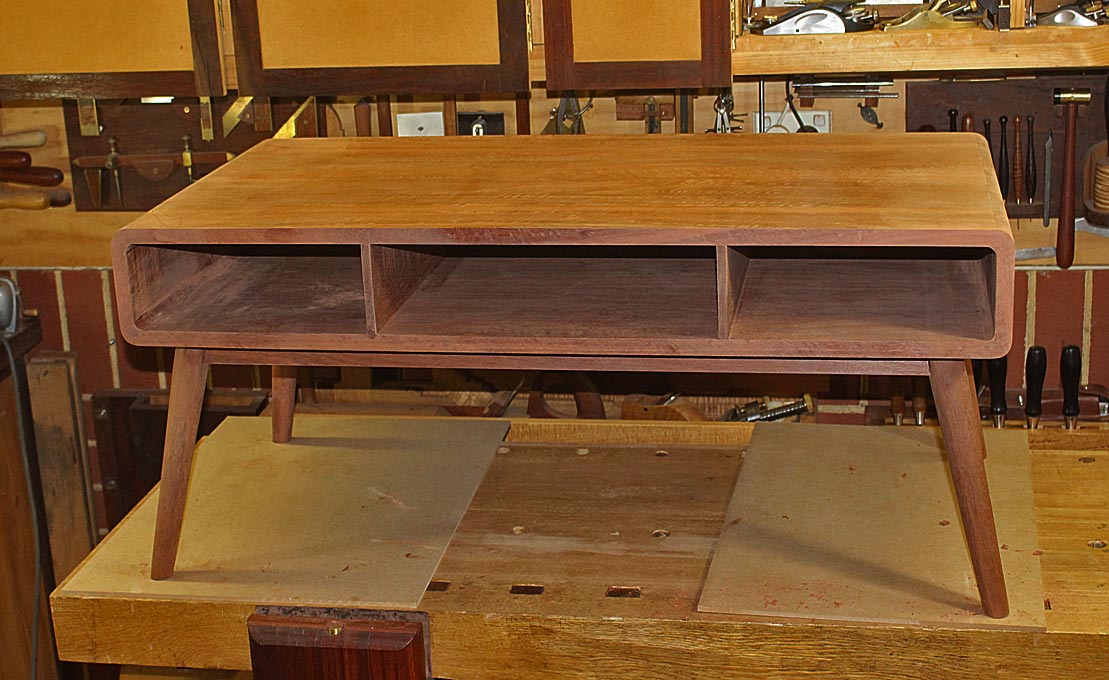
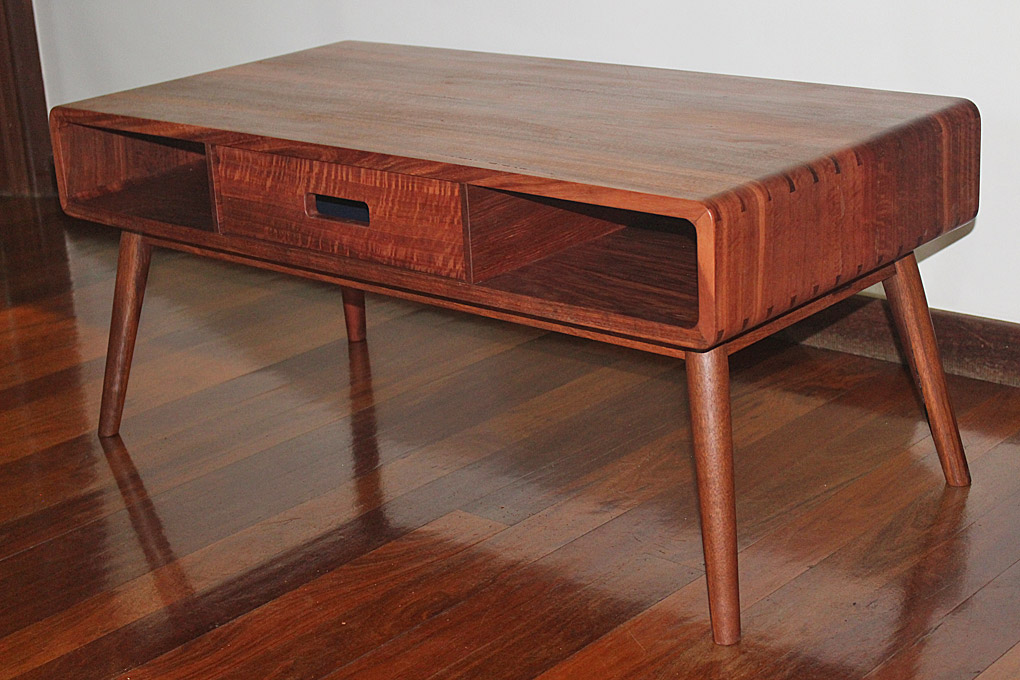
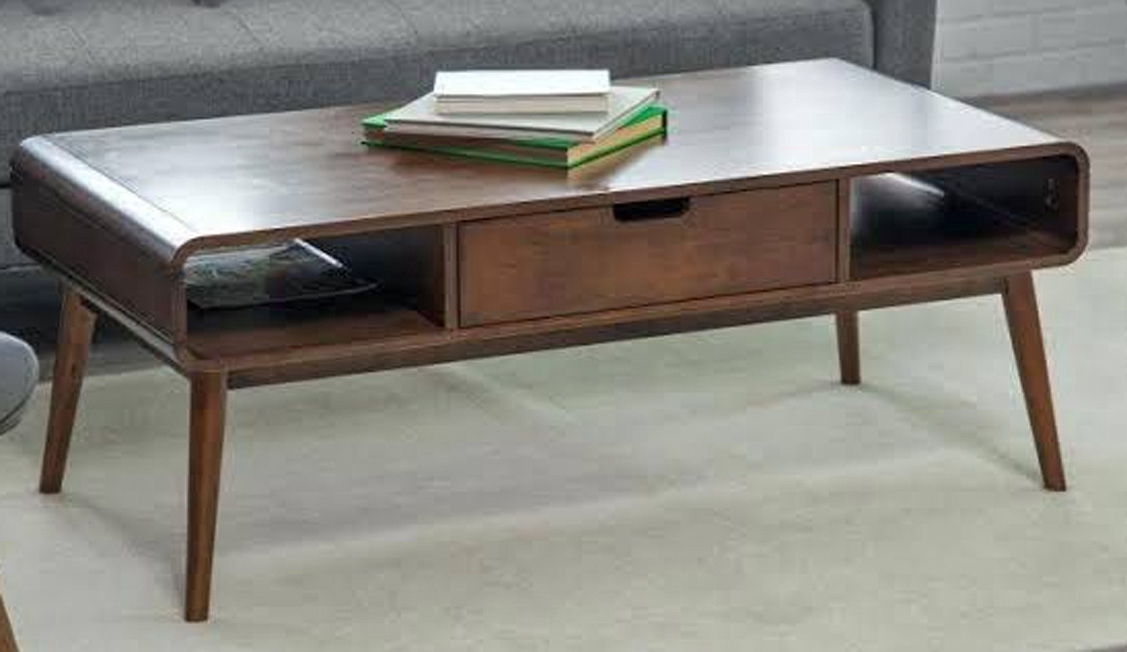
This was the model for the coffee table my nephew chose when I offered to build them a wedding present ...

AnotherCoffeeTable1_html_m7fcab0c6.jpg


Let's see how we did ....

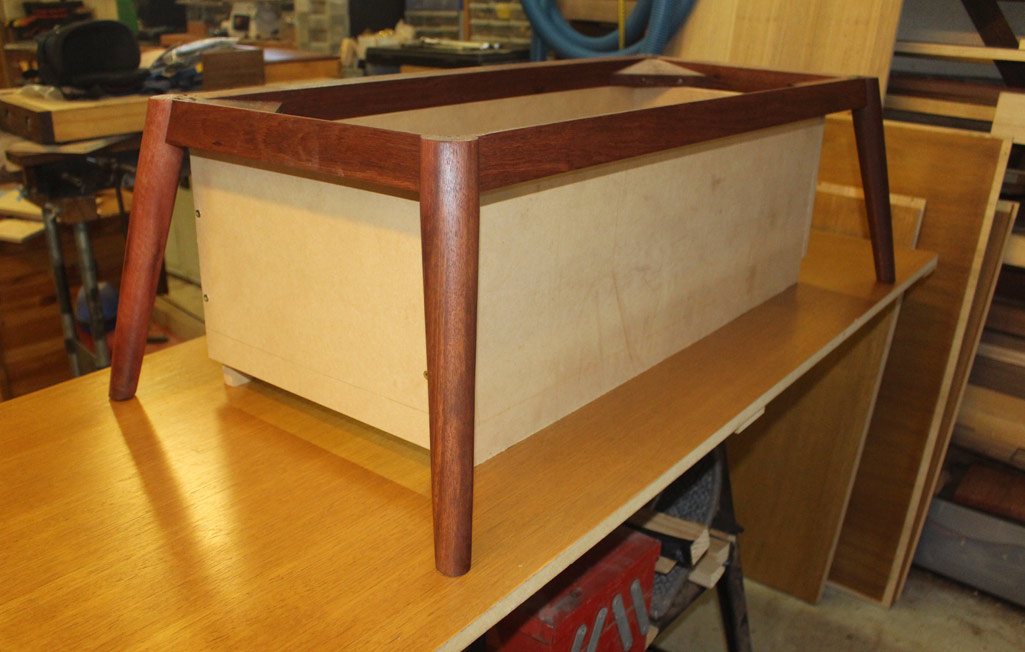
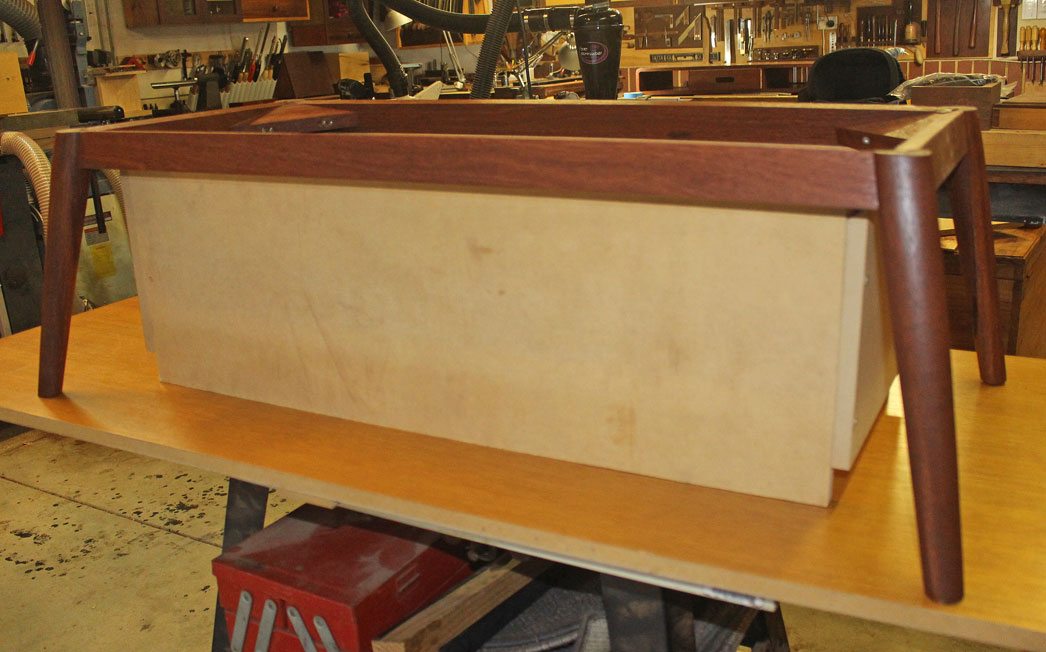
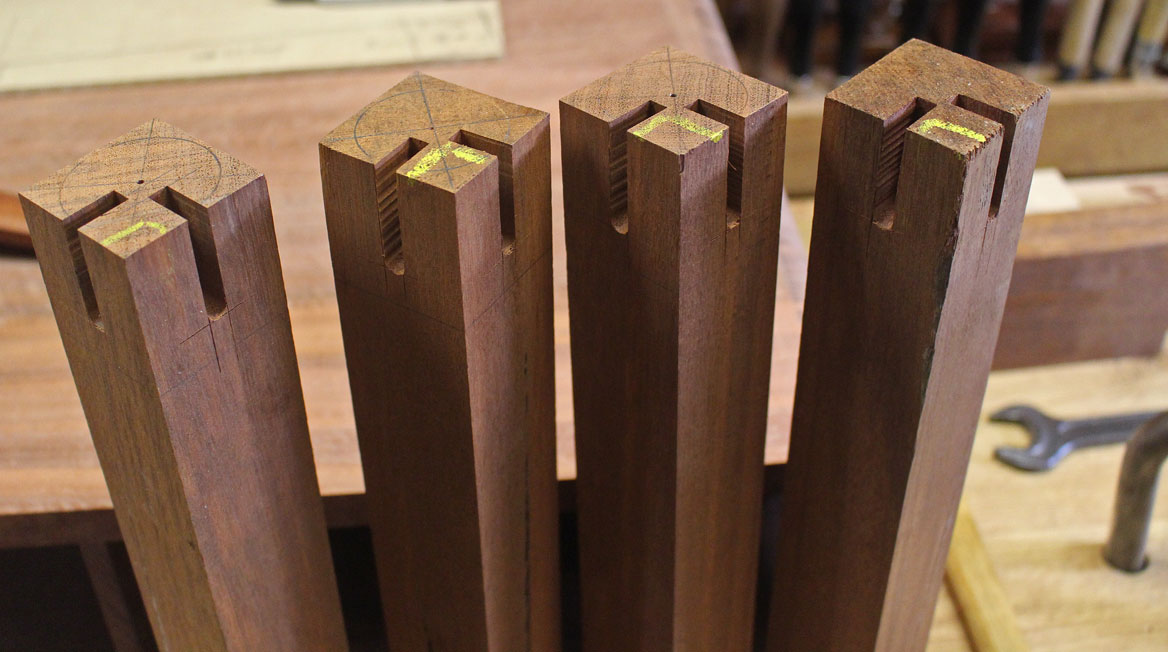
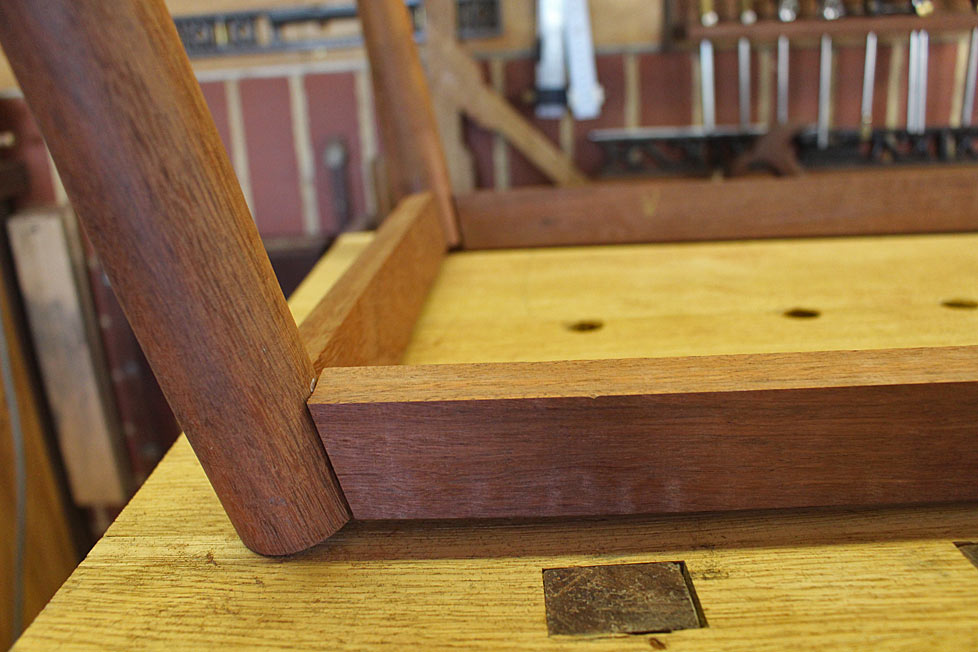
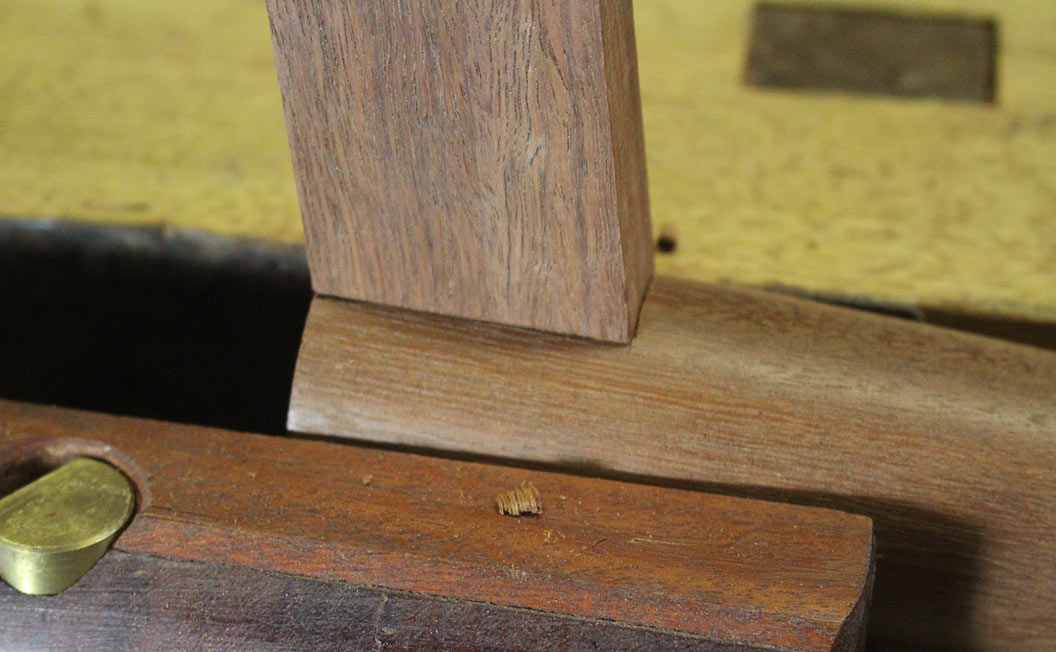
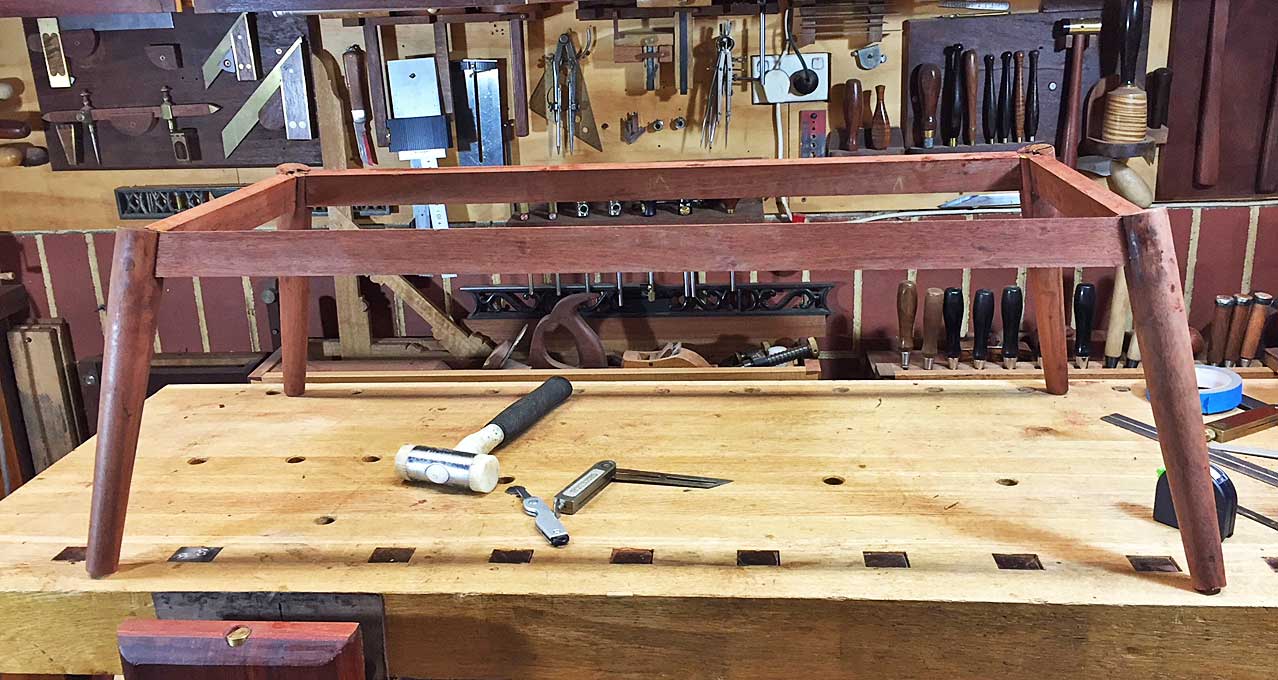
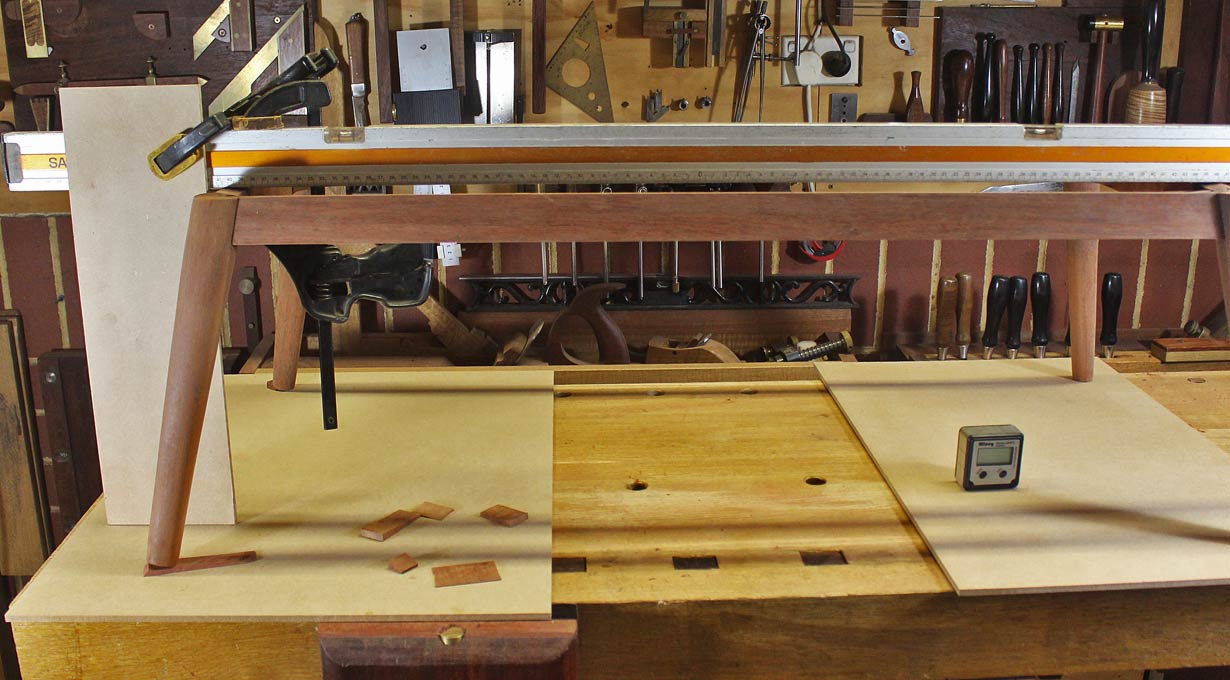
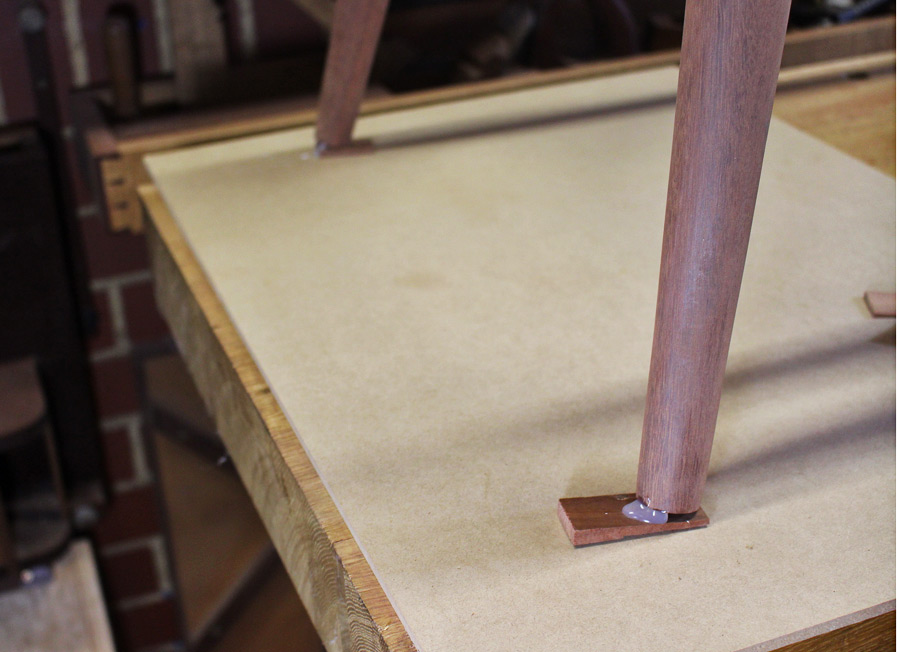
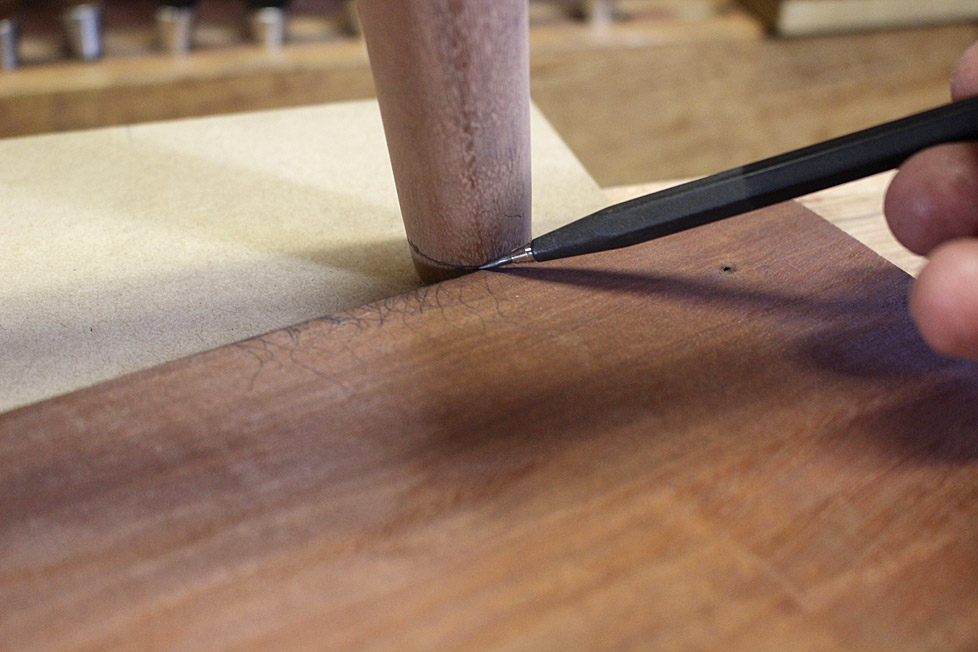
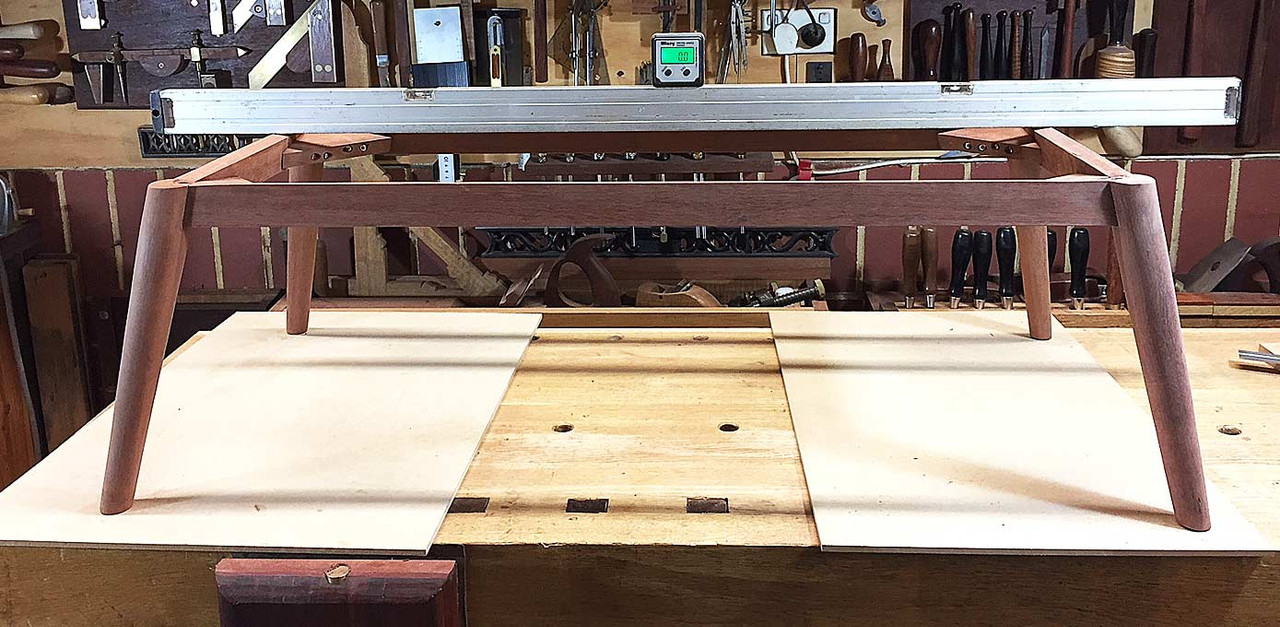
Before the coffee table was assembled from the parts, I was mindful that it would be shipped from Perth to Sydney (which is the further than New York to LA). The main concern was that the container might bounce (be dropped or be handled roughly), and the weight of the heavy Jarrah top coming down on the splayed legs might cause them severe damage. (I am not concerned about the strength of the legs for normal home use - the construction is strong. More shortly).

So, I build a table out of MDF that could be placed under the coffee table, and would take all the weight ...

1-Transport1a.jpg


2-Transport2a.jpg


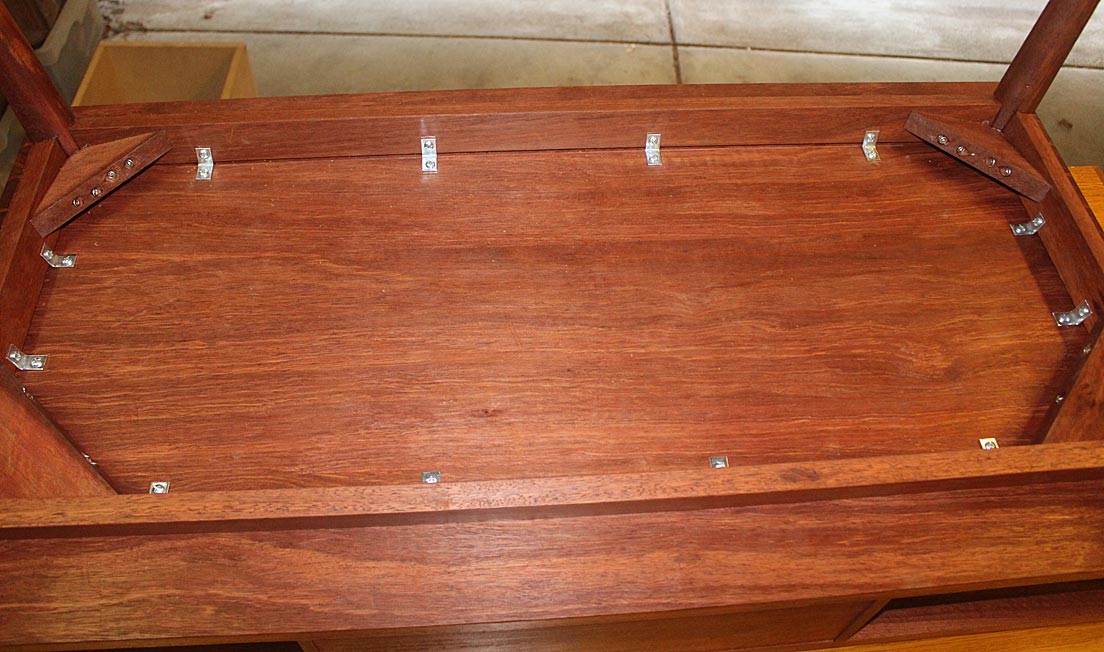
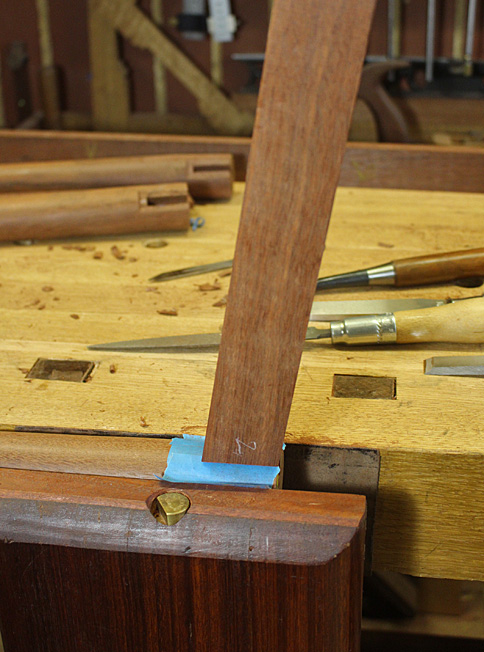
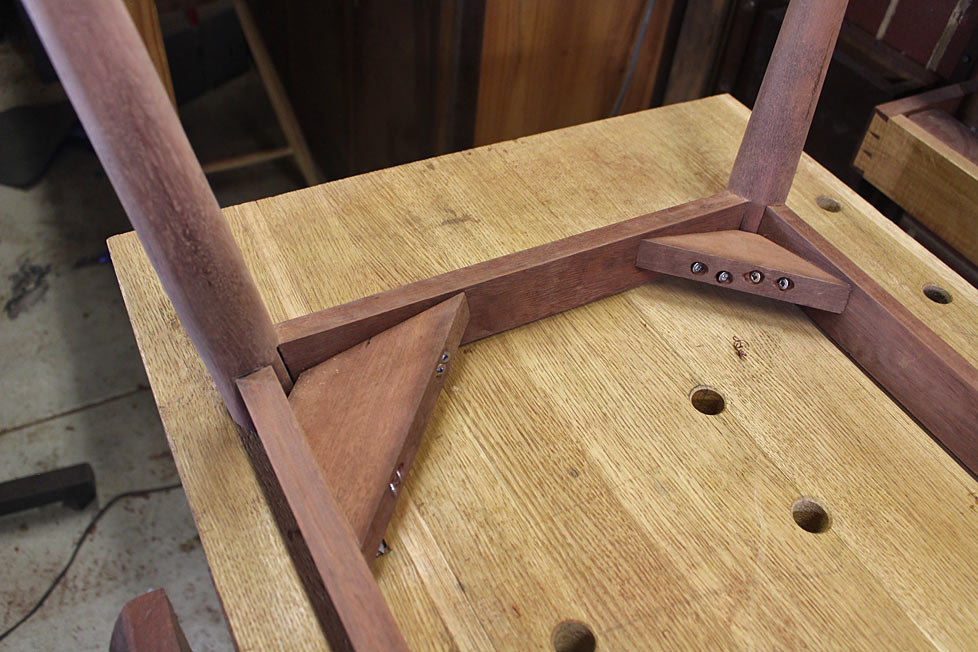
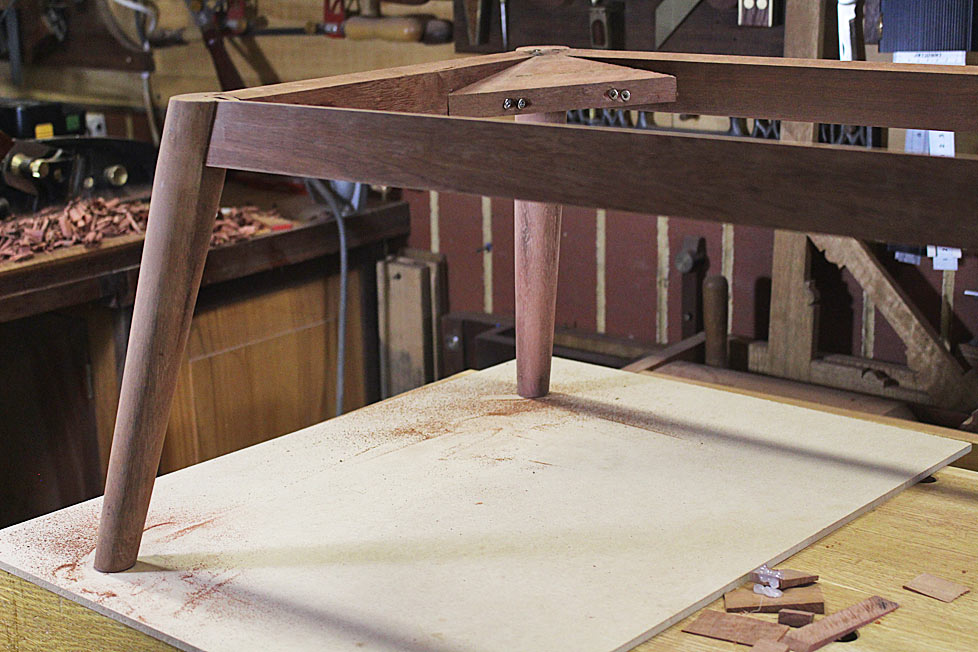
The top and base were connected with steel angle brackets ...

3-Connectors2a.jpg


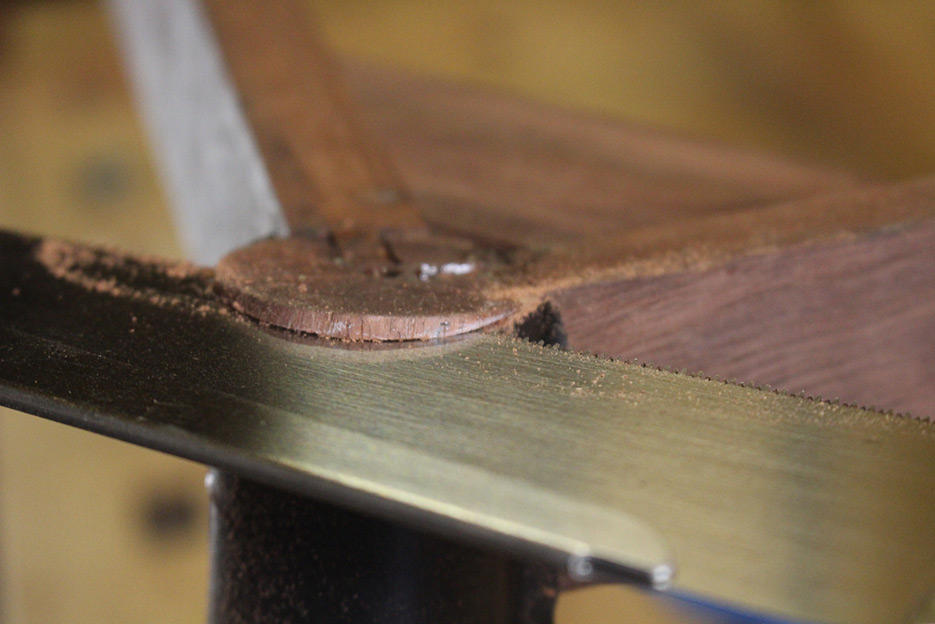
Part of the strength in the splayed legs comes from the corner brackets, which act to lock in the mortice-and-tenon joint by preventing movement. These steel angle brackets further lock in the base from any possible twisting.

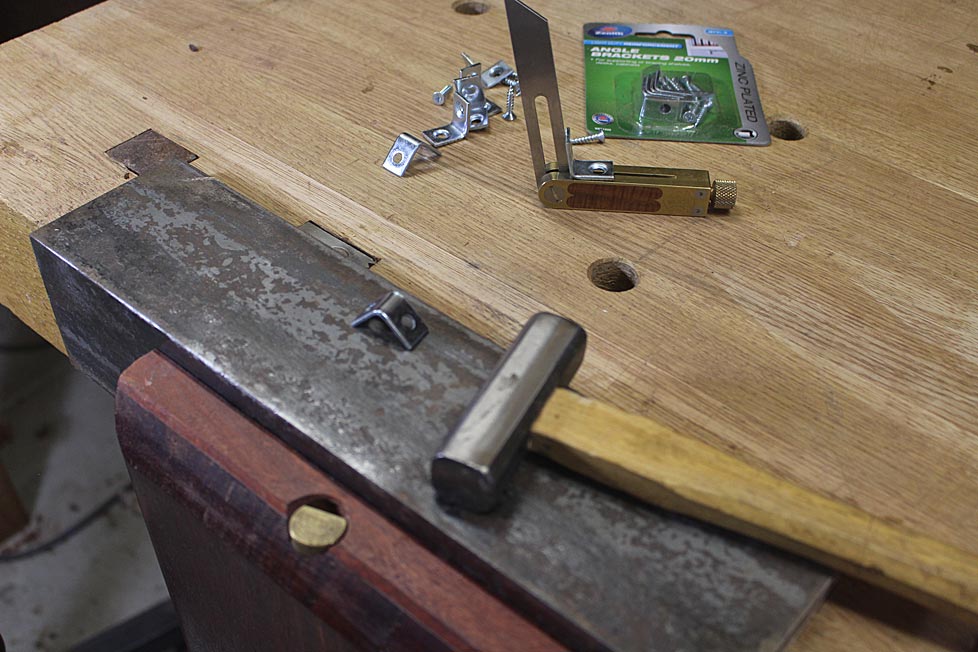
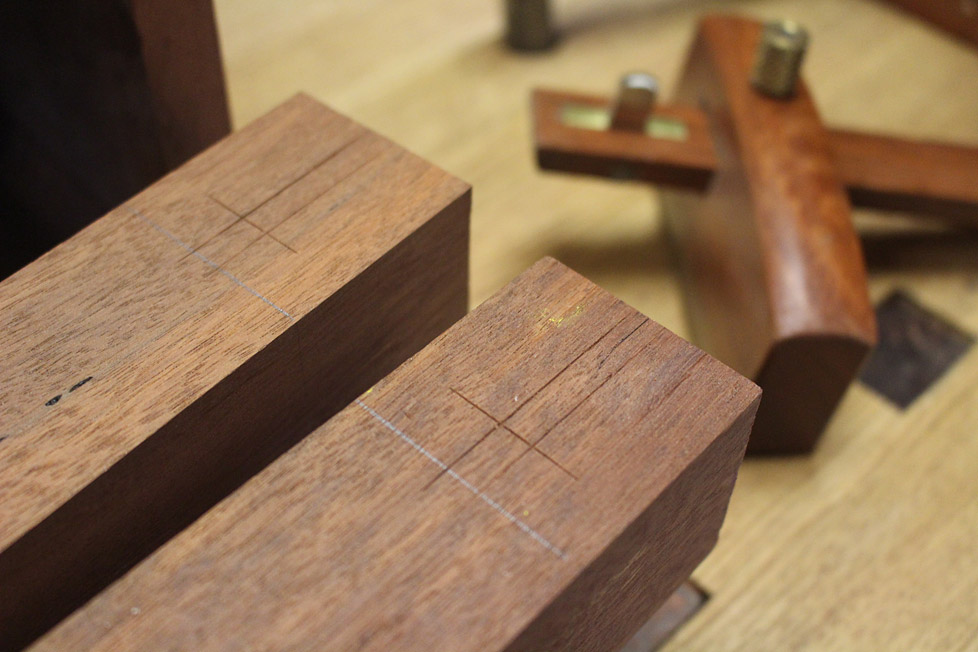
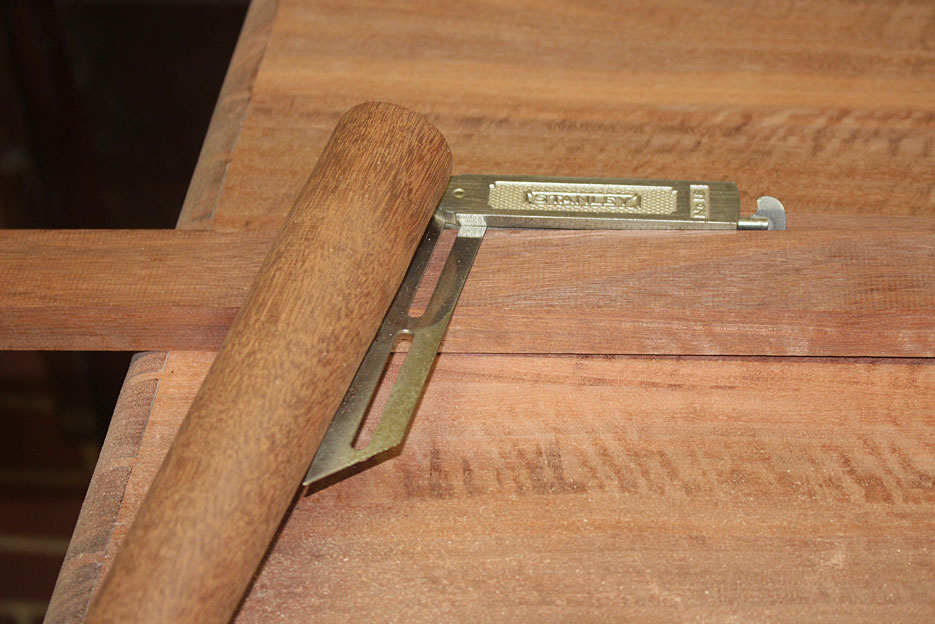
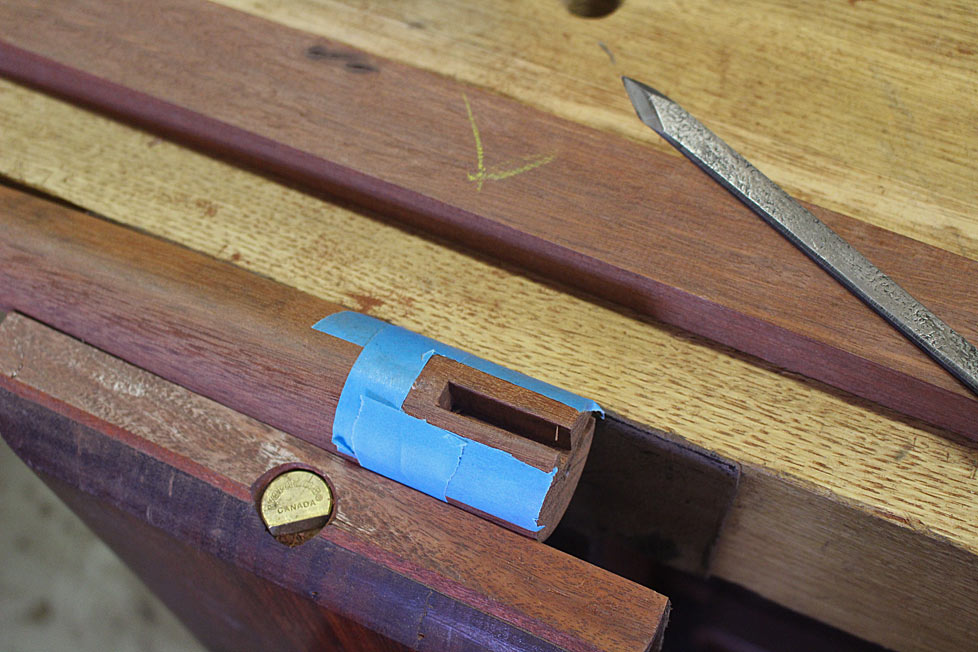
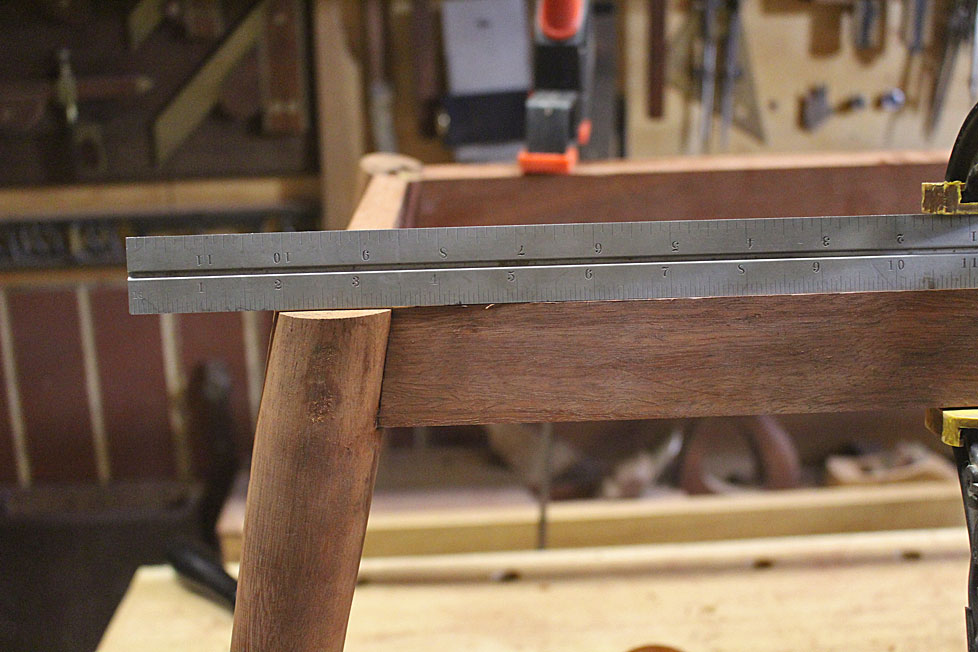
The brackets are angled to 10 degrees to match the inside of the rails ...

4-Connectors1a.jpg


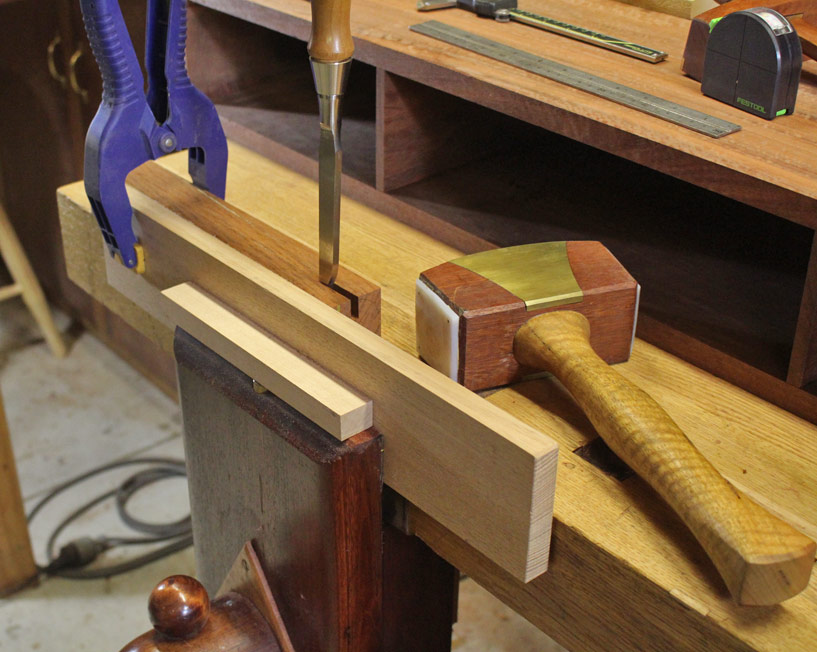
Incidentally, the best, and cheapest, anvil is this section of steel angle, the insides of which are lines with Hard Maple scrap, and then clamped in the leg vise over a leg ....

5-Anvila.jpg


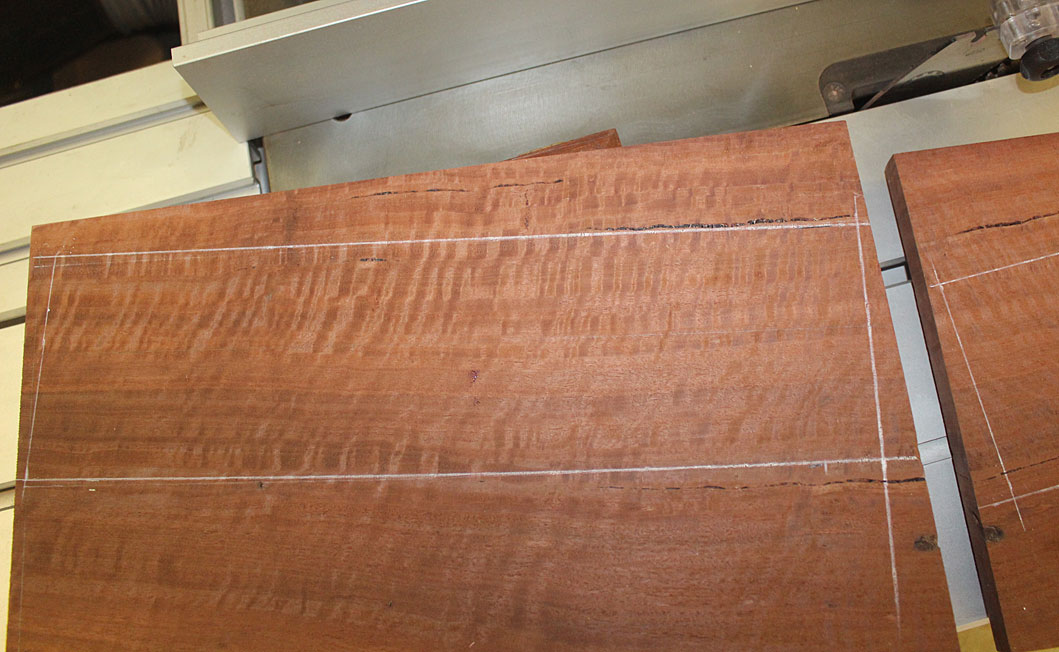
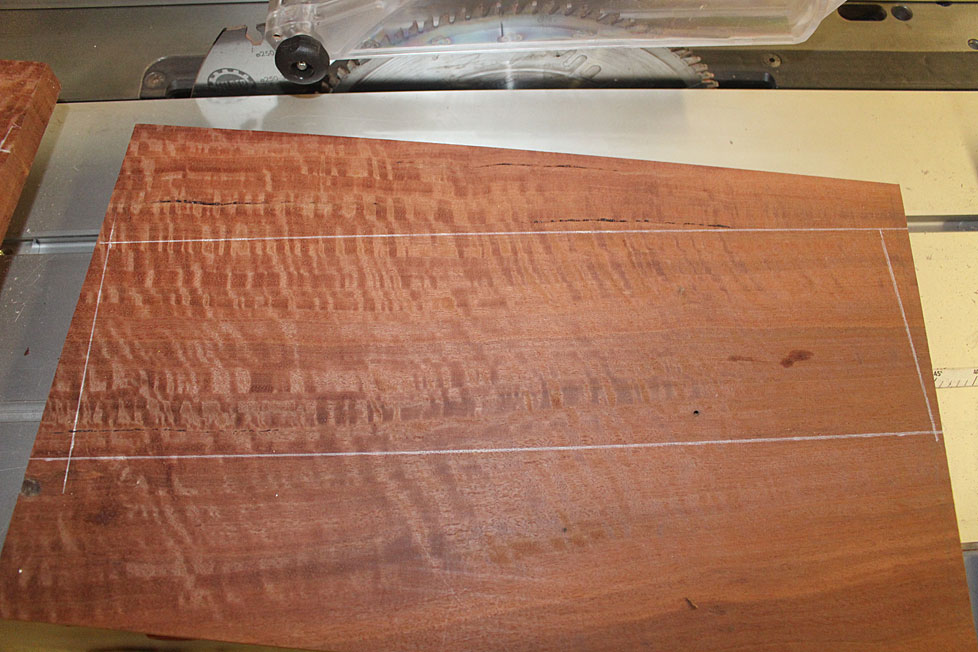
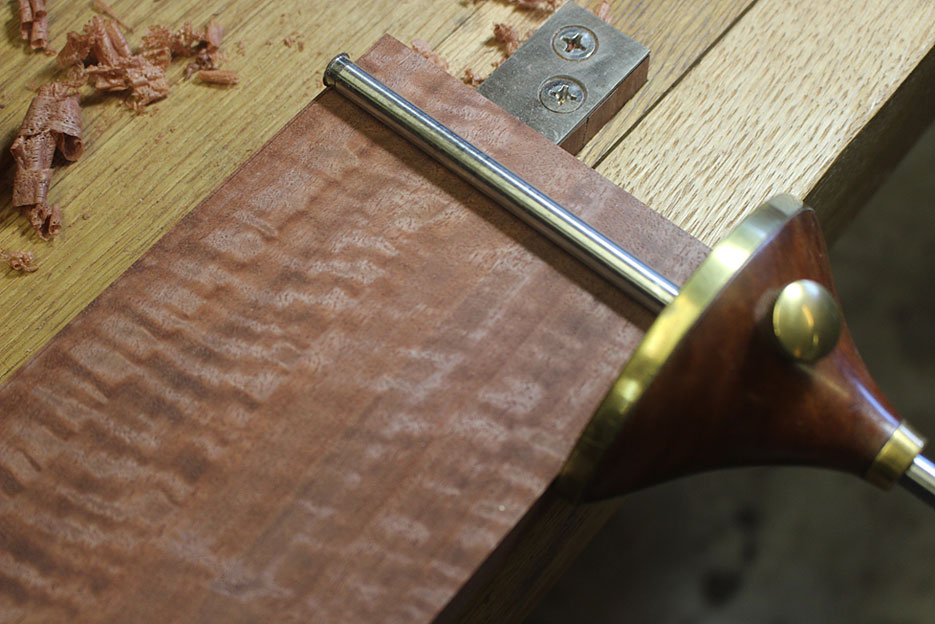
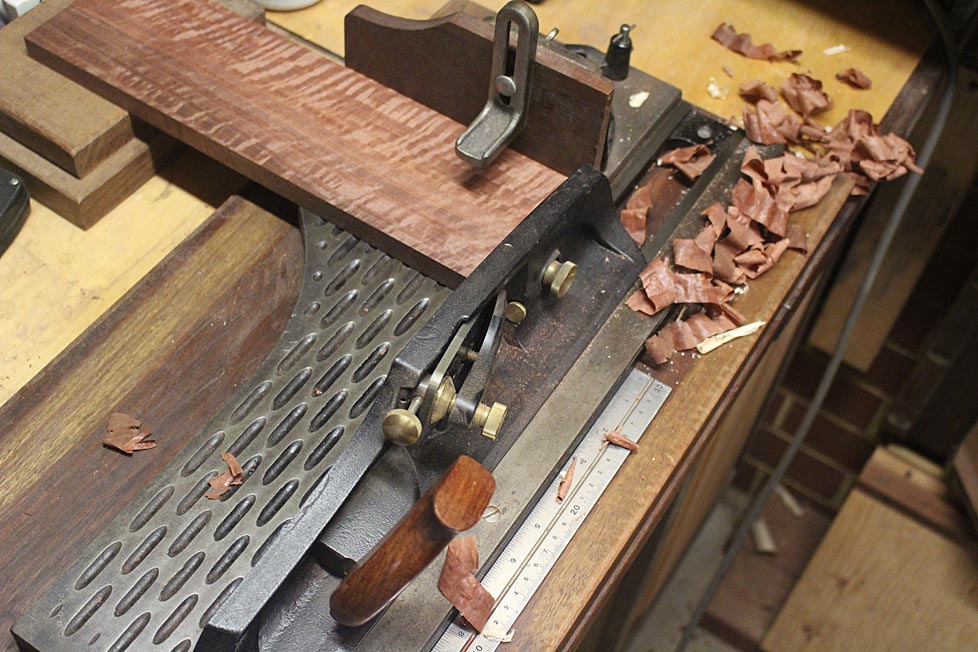
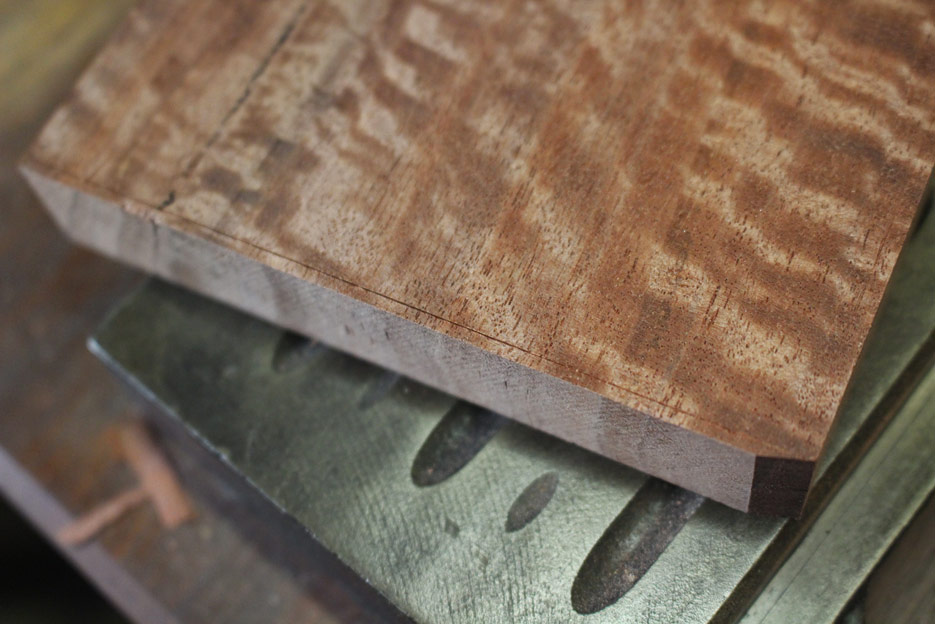
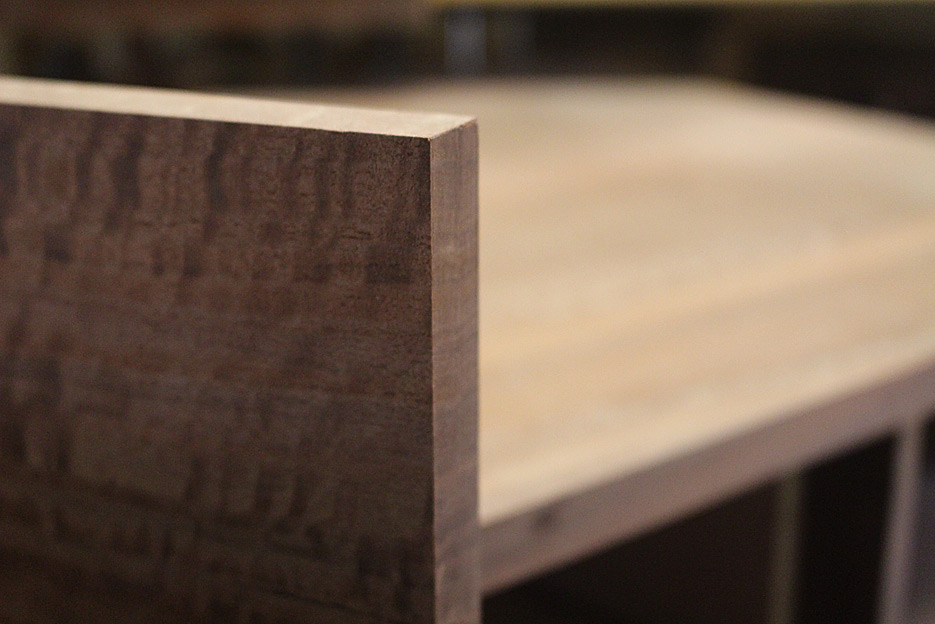
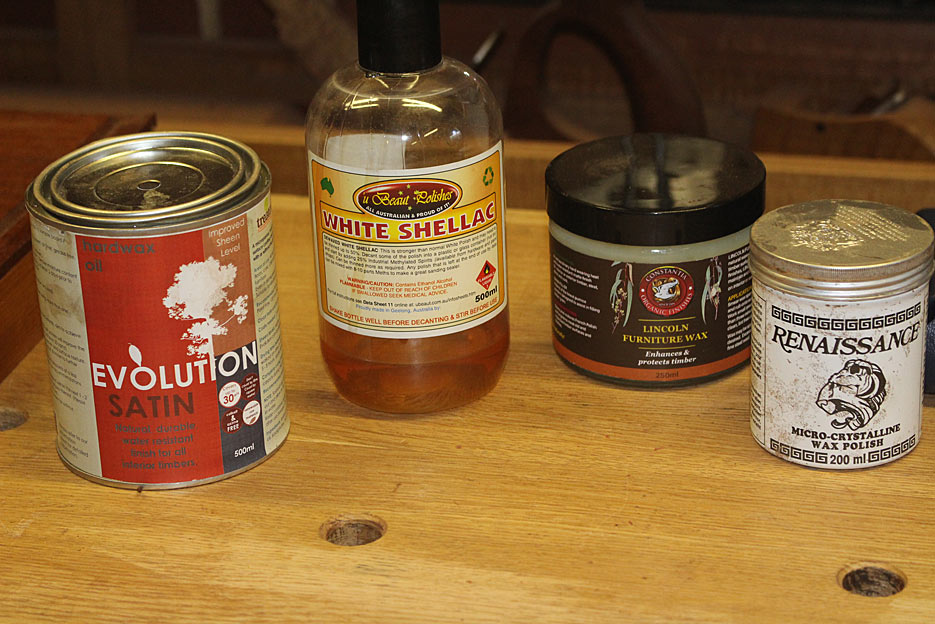
The finish for the wood - Fiddleback Jarrah for the top of the carcase and the drawer fronts, and Jarrah for the base of the carcase and base/legs - was chosen for durability. It needs to be capable of resisting water marks and heat, and still have a natural appearance - not a sit-on-top finish, such as a poly or varnish. Most oil finishes are not durable enough.

What I went with in the end was Evolution (satin), a hard wax oil by Whittle. This is a floor finish, and in the examples I saw it looked more like a waxed oil finish. The reports and reviews were highly favourable. I must say, after using it, I was completely sold. It is fantastic! The surfaces were sanded to 400 grit (Abranet), and then two coats were rubbed on with a micromesh cloth, 8 hours apart. Any residue was removed immediately. There was no grain raising that I could detect, however I did rub down the first coats with 400 grit grey mesh.

The drawer case was waxed (only) with Lincoln Furniture Wax. This is a shellac-based wax. The inside of the drawer was finished with Ubeaut Hard Shellac diluted 50% with methylated spirits (alcohol). All of the above are Australian products. The interior of the drawer was lined in leather, which was waxed with Renaissance Wax.

6-Finishesa.jpg


This is a close up of the Evolution. It is so much nicer in the flesh. Silky ...

7-Finish2a.jpg


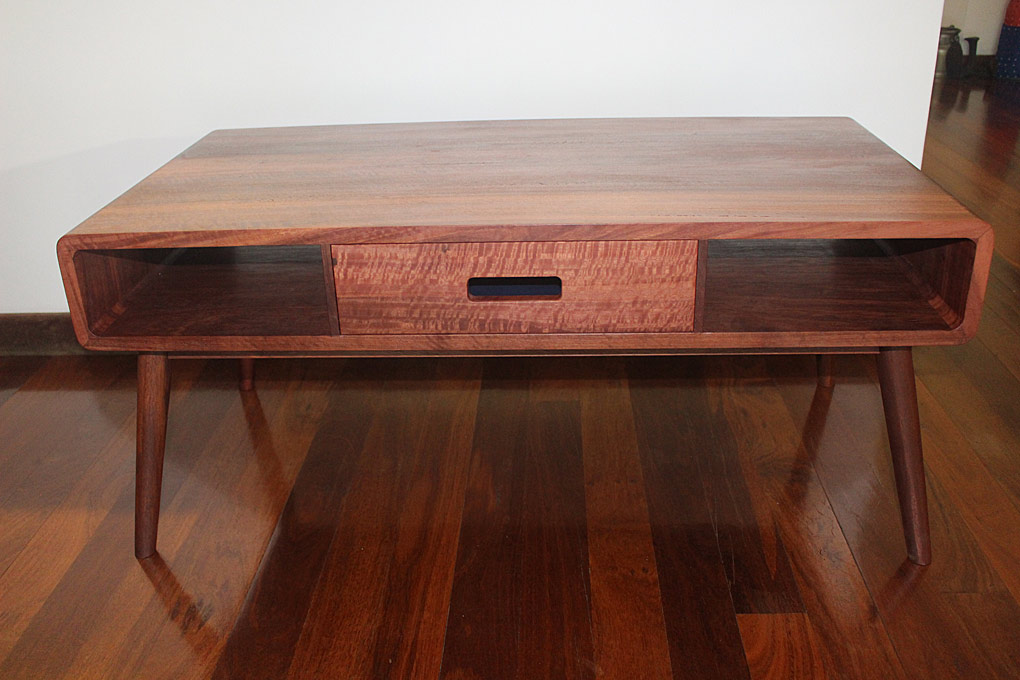
OK, to the coffee table ...

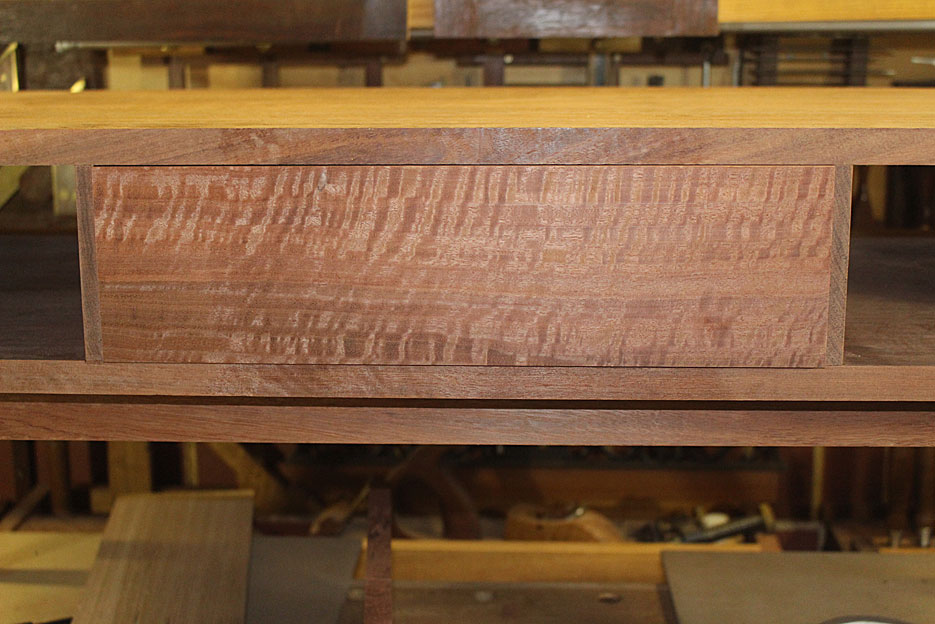
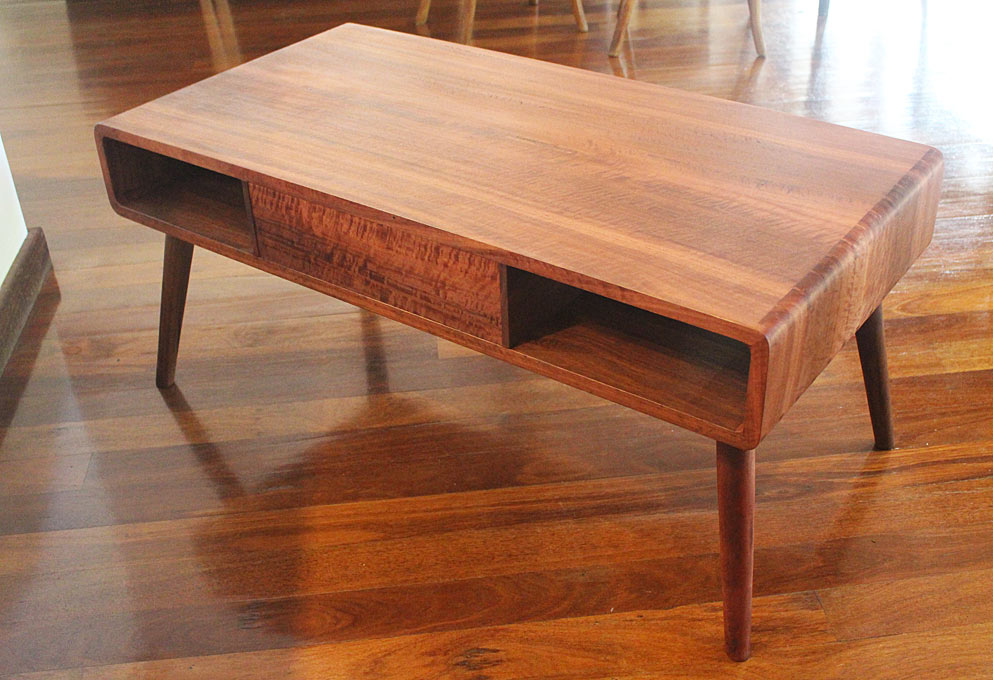
The front, with the drawer (and the agonised-over-drawer-handle-pull-whatever) ..

8a.jpg


9a.jpg


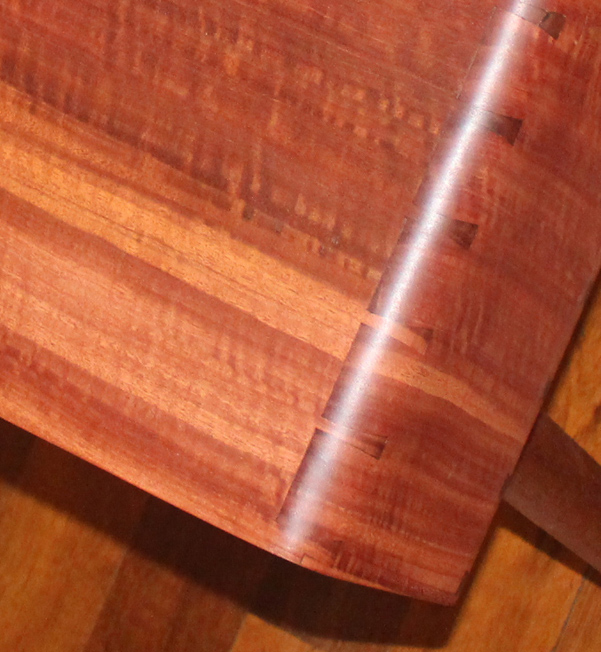
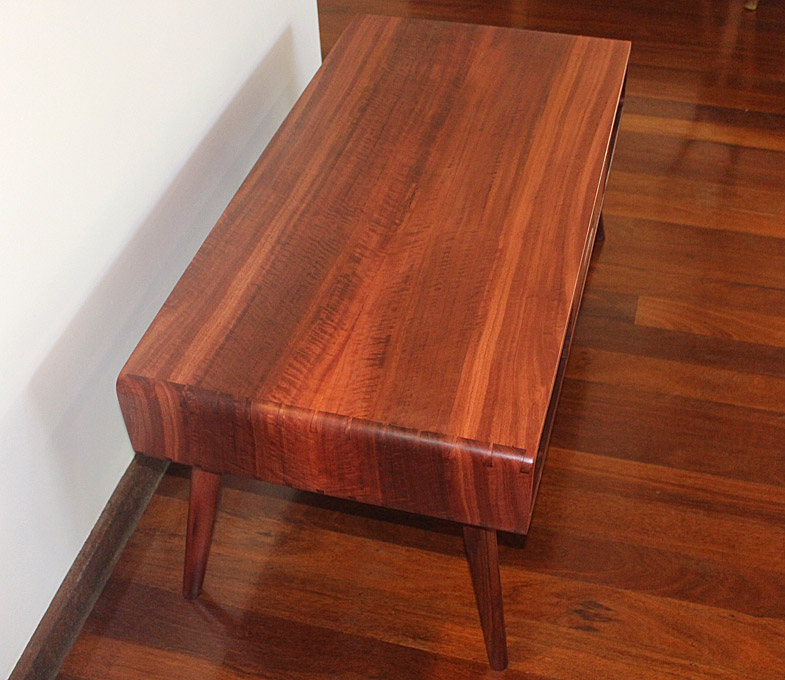
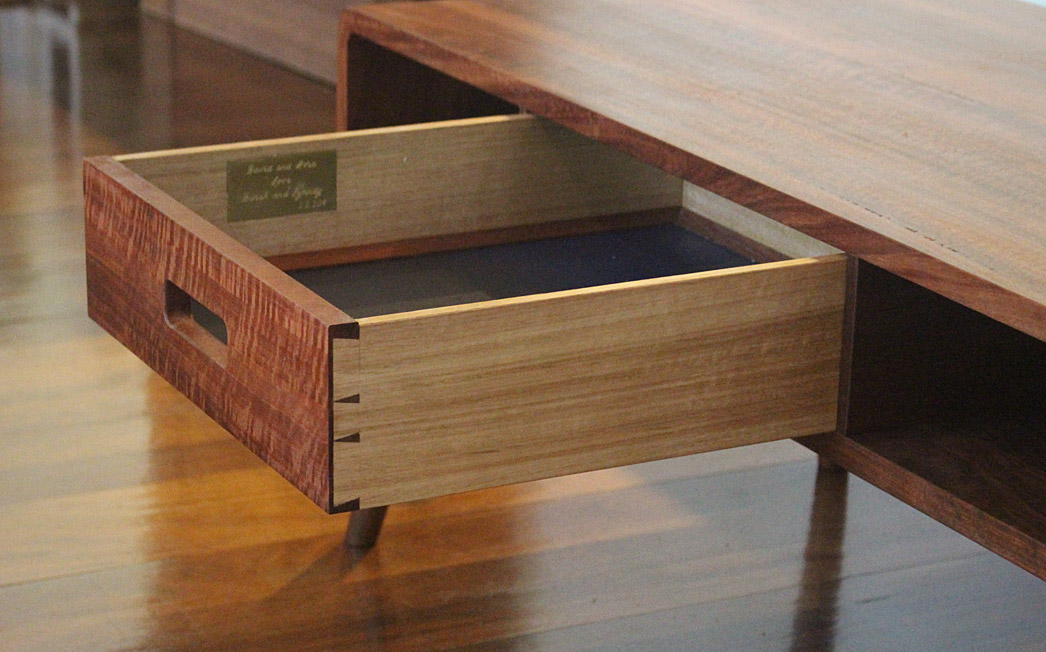
The colour, figure, and those rounded dovetails look fantastic ...
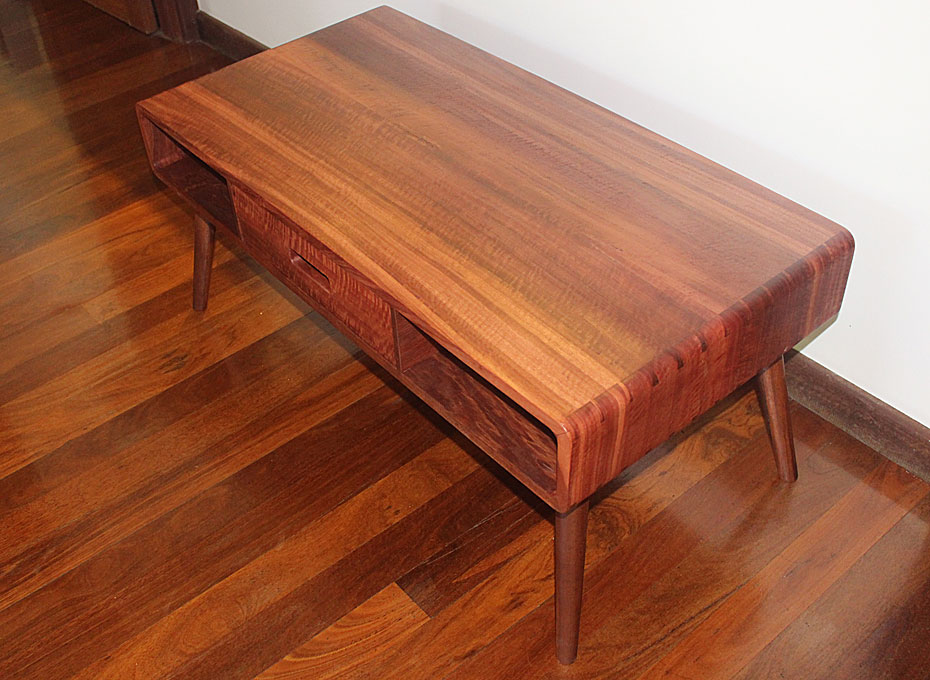
10a.jpg


Other end ...

11a.jpg


The rear has a closed panel. At the start of the project I had planned to make the drawer run all the way through, and open from each side. On reflection, this created more problems than it was worth, and so the one side was closed in with the same panel used as a drawer front ...

12a.jpg


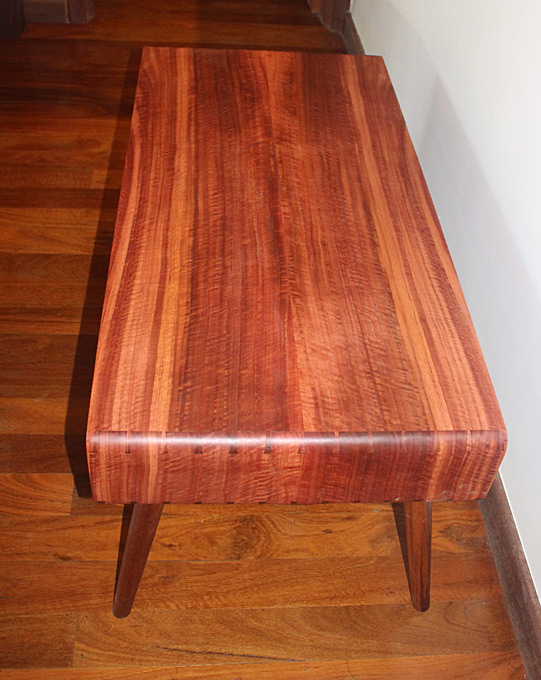
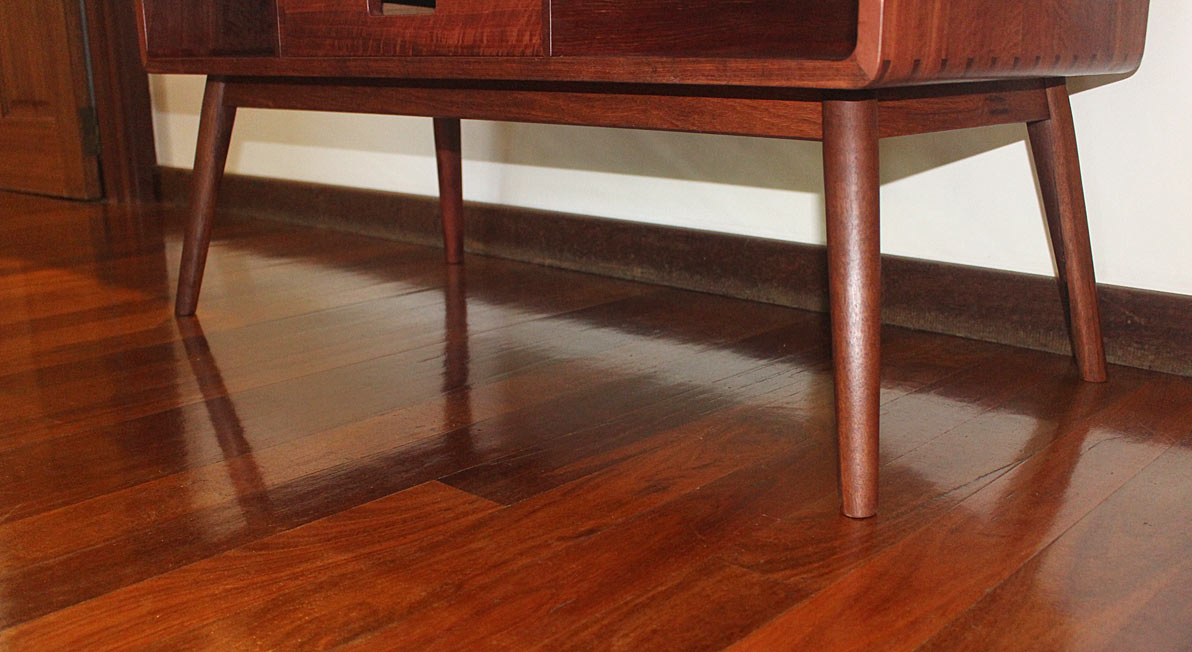
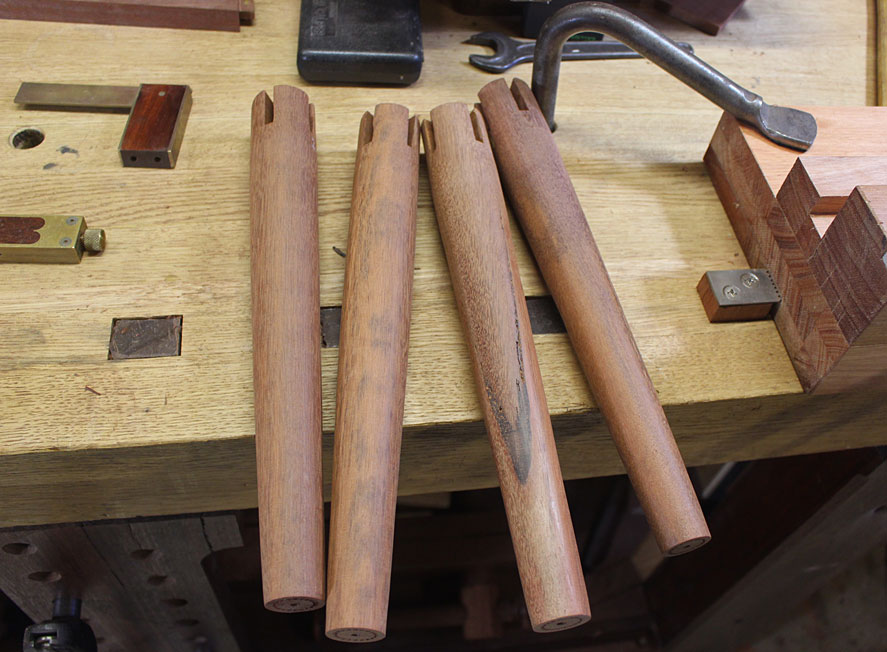
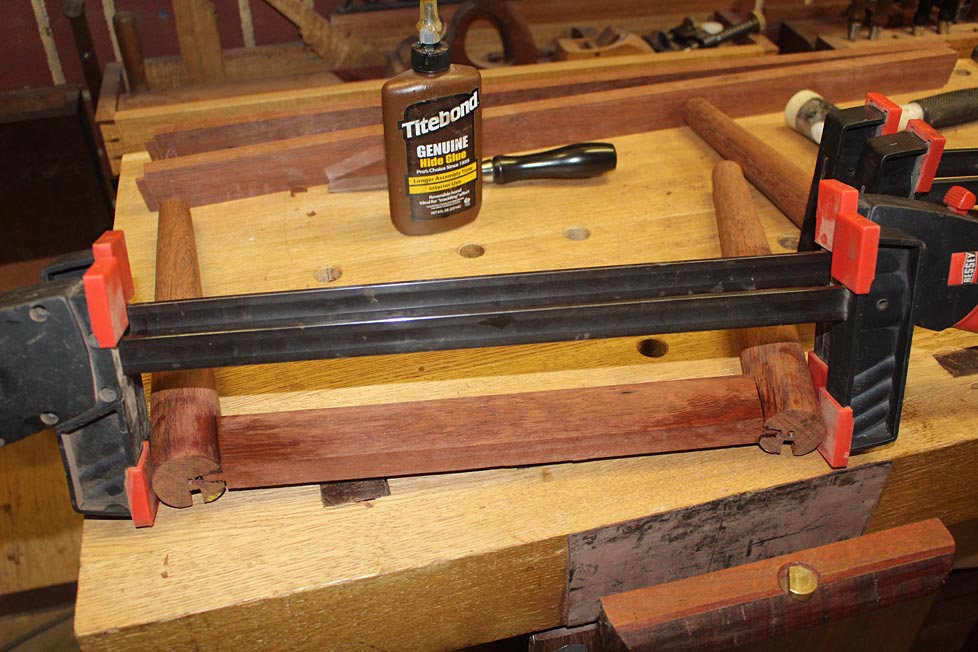
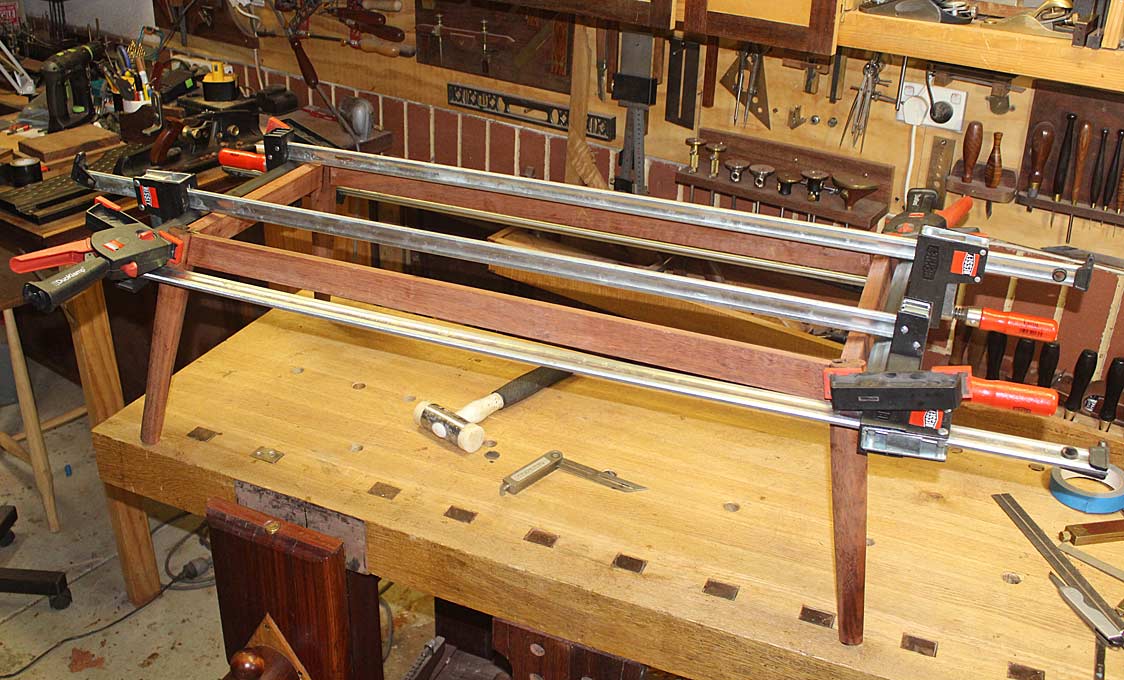
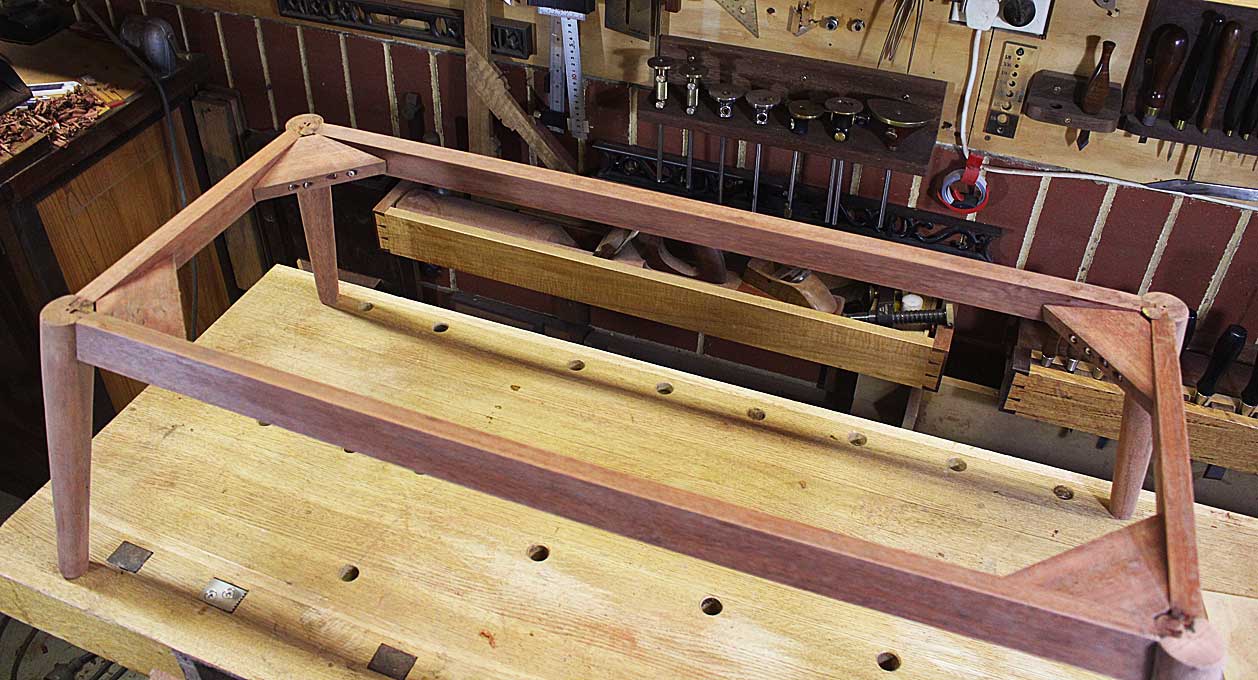
The Jarrah base and splayed, tapered legs ...

13a.jpg


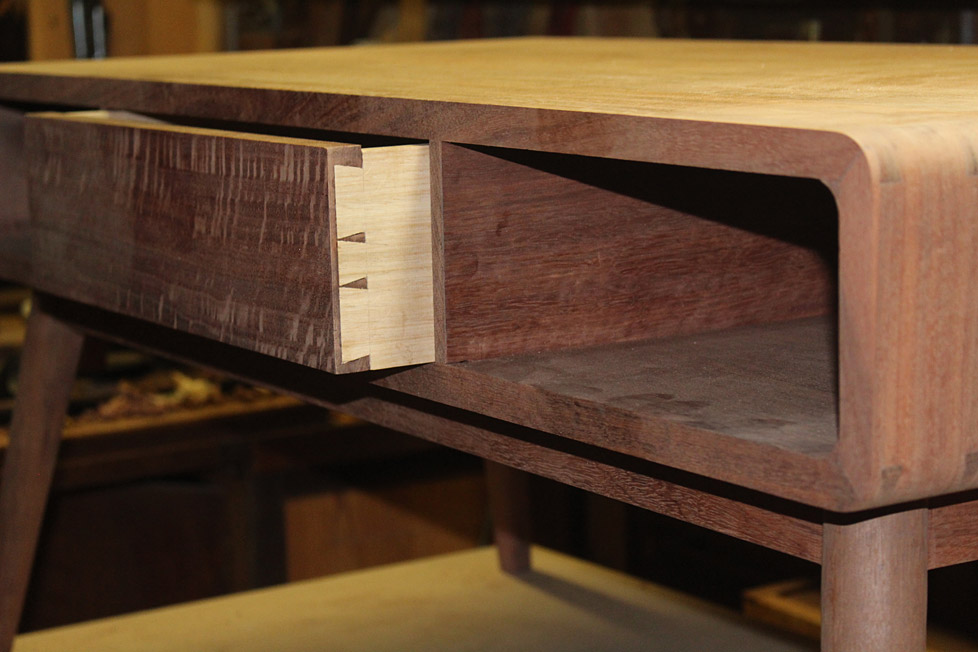
Finally the drawer ...

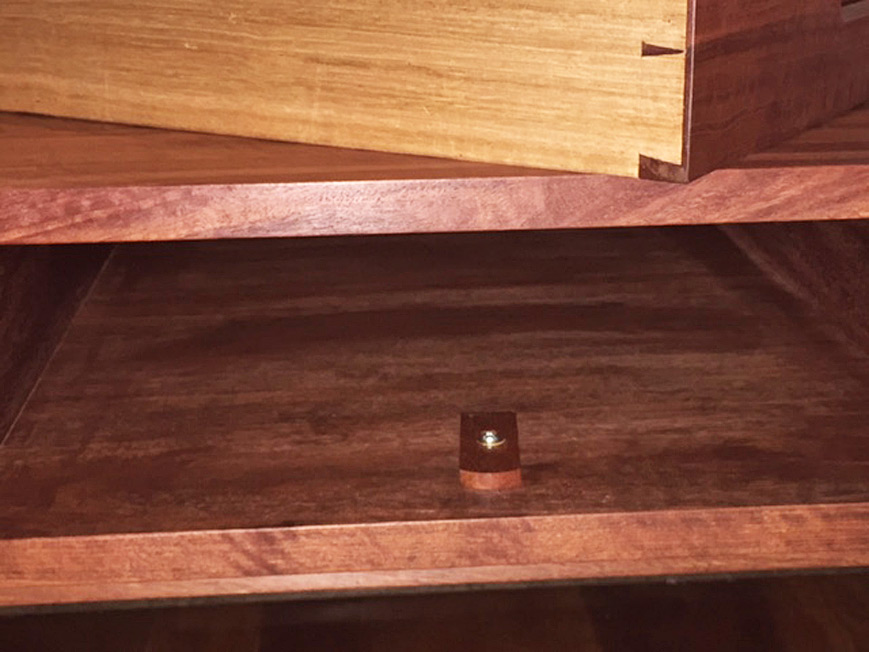
The drawer stop used was the same design as used in the Apothecary Chest. This is adjustable, which enable the position of the drawer front to be fine tuned ...

14-1a.jpg


The 10mm drawer sides are Tasmanian Oak, which I find great for this purpose as it all comes quarter sawn. It is a moderately hard wood (by Oz standards). Plywood was used for the drawer bottom, as it was inset in grooves and covered in leather. Jarrah cove moulding was made to finish.

15a.jpg


16a.jpg


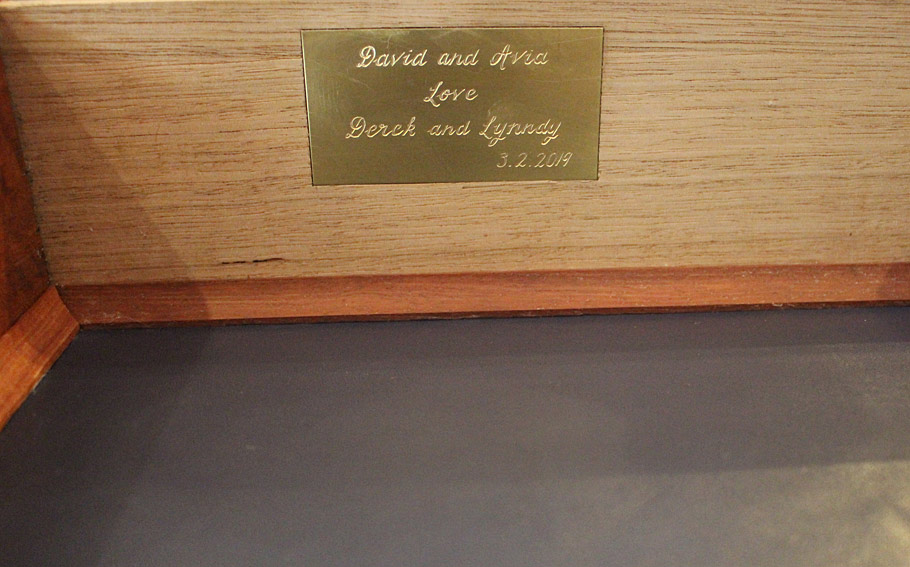
Inside there is an inscribed brass plate for remembrance ...

17a.jpg


Thanks for all the contributions and discussion along the way.

Regards from Perth

Derek
 
Beautiful piece.  Thank you for taking us along on the journey.

Sent from my iPhone using Tapatalk
 
Where do I sign up to be your nephew!?

Simply amazing work, Derek!  I'm sure the couple will forever cherish it.

Thanks for all the photos and details.]

 
My deepest thanks for all the kind words to all, especially those who offered opinions since one of the reasons I post to to create discussion. There are just so many ways to do joinery, and so many takes on design. We all benefit from the diversity.

This has been an interesting build (they have to be interesting, otherwise why do it?). A challenging design to reproduce with hand tools. The first time I had attempted mitred dovetails. That was interesting. It came together very satisfactorily in the end. I am in awe of the top - that Jarrah is simply stunning ... far more so in real life where you can see the chatoyance and fiddleback.

A couple of better photos (perspective is everything) ...

1a.jpg


2a.jpg


Thanks again.

Regards from Perth

Derek
 
Honestly...that is absolutely gorgeous. The work that went into it is fantastic. Well done!
 
Back
Top