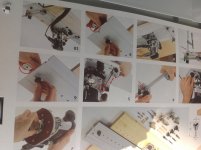
A LR32 video. The last video of the series. Video 7

Eric,

I'll echo the comments above.  If you want to make a video and share, then do what you want to do.  Don't worry if it has been done before or will be done again.  Sharing information is sharing information.  I have watched Brian or Steve or any one of several other Festool guys demonstrate the same thing several times.  Each time I get something different out of it.  That is the beauty of it.  Viewers have the opportunity to watch at their own pace and compare different ways of approaching the same task from different viewpoints.

Peter
 
I like farms' suggestions.  I'm essentially coming in at the ground floor, so your videos were the first introduction to the LR32 system for me.  After watching them several times over, I think you covered the carcass construction of a base cabinet pretty well.  Hinges, drawer slides, door and drawer construction would be a nice follow up!  On the later two, I'm sure there are videos out there, I just haven't gotten that far (really want to attend one of the festool instructional shows).
 
Eric

I agree with the others, you always can pick up something new, I watched the first series a couple of times and picked up different things, guess some of that depends on what your eyes and ears are looking for.  Maybe expanding the hardware part and the "domi" drawer would be good for more in depth videos. 

RKA,

I noticed you are also from NJ, there are 2 Festool Road School events in NJ coming up.  I believe they are September 17 (Hamilton Building Supply) and 19 (Morristown Lumber).
 
Yes thank you!  I've been keenly watching those annoucements.  Unfortunately burning a vacation day to attend won't work for me right now, and the one in Long Island City falls on a weekend I have to work.  If this day job didn't provide the funds for the green addiction, I'd give it up in a heartbeat!  It just seems to get in the way!  :)  BTW, I'm a few miles down the road from you in Monroe!
 
Is there a reason you use 16 up and out when Festool says 32 up and out - at least on the lid of LR32 box. Does it matter? As long as you switch when you do the doors this there a difference?

Gregor


Attachments

  • image.jpg
    image.jpg
    1.3 MB · Views: 821
Okay, so I'm a little stuck here, and perhaps this may be good material for Eric's next video?  I'm contemplating design of a base cabinet that would have a stack of shallow drawers and the layout has me a bit puzzled.  It's not hard, just that I haven't done this before, so I need a little hand holding.  This would be used for storage of layout and cutting tools so the inside height of each probably needs to be 3" tops (maybe less if the router bits go in horizontally).  Overall width should be 24-30".  I'm leaning toward the later to accommodate some of the longer layout tools I have.  with an outside dimension of 30", I figure I'll have an inside dimension in the drawers of 26" which is what I'm aiming for).  Ultimately, I would build other base cabinets with larger drawers, shelves and drawers and a continuous countertop over all of them, but I haven't figured out the grand plan yet.  That requires more thinking/planning.

So as I understand it, everything should be multiples of 32mm.  So I would start my pins at 96 mm from the top and bottom edge of the side panels.  Then somehow I need to figure out how many of these drawers might squeeze into the cabinet.  I assume side mounted slides would give me maximum usable space in the cabinet?  Then I need to dimension out the drawers.  How much clearance should I leave between each drawer?  Does it matter where I mount the slides on the drawer box (should they be center mounted or referenced off the top/bottom edge in multiples of 32mm)?  Given the width of the cabinet and # of drawers, should I plan on putting additional horizontal braces inside the cabinet (front and back)?  The sides would be 3/4" ply.  Or should I just use 1/2" ply for the back panel to give it some more rigidity?

Finally, a slightly off-topic question is building drawer boxes.  If I want to use this exercise to practice dovetails (using a router+jig), what size dovetails/router bits should I consider using?  I suspect I'd use 1/2" ply for the drawer boxes, not sure if the bottoms would be 1/4" or 1/2"?  I think I would prefer 1/2" (in case that's relevant).  If I screw up the dovetails, it won't be the end of the world, I'm just using this to store my tools in the basement. 
 
RKA,

  I'm not trying to be a smart guy here so please don't take it that way.  But that's the beauty of custom cabinets.

You can customize them for your needs.  You're building shop cabinets so any thing goes in my eyes.  Build them

to fit your needs.

You can drill all the holes you need to make your cabinet work for you.  If you're building a base cabinet that calls for all

drawers, then drill all the holes from top to bottom, bottom to top, how ever you want to view it.  This will give

you the most holes to locate the drawers any place you want with in the base cabinet. 

Only the side panels of the cabinet, doors and drawer fronts should be measured by 32mm.  The drawer box can be

as deep as you need it for a shop cabinet.    The 96mm location is for hinges.  If you're planning for doors then that's

where the 96mm comes into play.

Hope this helps.

Eric
 
+1 on start to finish.

Shoot me a pm with your Paypal as well. I am willing to help support the endeavor.
 
I absolutely am building this to my needs, but having never built a cabinet or drawer slides, I'm overthinking it.  It's hard to put everything to paper before I make the first cut.  I guess I can build the carcass first, order 6-7 drawer slides and play with them to figure out how many drawers I want to sandwich in there and how to evenly space them out so my drawer faces are all uniform in size and placement.  And the instructions for the slides will tell me how wide I can dimension the drawers?  How about the length of the slides?  Am I ordering slides that are equal to the interior cabinet depth or some increment less than that?  Use 1/2" ply for the back panel for extra rigidity or 1/4" is fine?  (figure 150-200 lbs in drawers and contents inside this cabinet).

Forgive me...I paint inside the lines, measure 5x's, cut once and look at a map before I start the car.  My brain is happier that way, but yes, sometimes that means I'm asking too many questions rather than making dust.
 
RKA

Here is how I would build a base cabinet with multiple drawers.

The true 32 base cabinet height is 878mm.  That's from the ground to the top of the cabinet box.  That does not include the counter top.

Subtract 78mm from 878mm to get your 800mm side panel (a increment of 32).  The 78mm is for your toe kick.  78mm is close enough for me

for a 3" toe kick.

So now that I have given myself a 800mm panel I can use that number to decide how many drawers I can get.

One example I will give you is this.

800mm divided by 5 (number of drawers) is 160mm.  160mm is an increment of 32.  So I would make 5 drawer fronts 160mm MINUS a

3mm reveal for the top and bottoms of the drawer fronts.  Making my drawer fronts 154mm for the height. 

Then lets say my cabinet is 400mm wide, finished.  I would also subtract 3mm for each side for the reveal.  Making my finish cut for the drawer front

154mm in height x 394mm wide.

Now for the drawer box,  normally the drawer slides need around 12mm per side for movement.  I subtract 25mm for the drawer slides that I have

used in the past.  So if my finish box is 400mm wide using 18mm plywood the inside of my box is 364mm.  I would subtract 25mm from 364mm

giving me 339mm.  Now I know that I have 339mm to work with for the width of my drawer box.  The depth of the drawer box depends on the slides

I use.  Say I make my cabinet 610mm (24")deep.  The standard depth of a base cabinet.  I would use a 510mm (20") drawer slide, because of the

way I build my cabinets.  I recess the back panel of the cabinet 19mm for a nailer to go behind my back.  I usually use 5mm (1/4") plywood

for the backs of the cabinets.  The nailers (or some guys call them cleats)  keeps my boxes square.

So now the finished drawer box would be 339mm wide by 510mm deep.  The height of the drawer box I would make at most 135mm for this cabinet. 

I like to subtract 25mm from the height of my drawer fronts to give me the height of my drawer box.  This give me plenty of room for multiple drawers

to work together.  BUT, you could make the a little bigger if you want. 

Personally, 1/4" ply for the backs are fine.  You're gonna screw the cabinets to the wall.  Heck, you don't even need full backs if you don't want to

waste the plywood.  Just put a couple nailers (cleats) across the top and bottom to keep the box square and to give you some meat to screw the

cabinet to the wall and your good.  Because the cabinet is all drawers you will never see the back of the cabinet anyways.  [wink]

Eric

 
I also have learned much from your videos and watched them several times.  As was stated above, we learn from what others are doing or have done and modify to fit our needs and/or variation that fits our needs.  (I have  thought about ways to incororate face frame methods in to the Euro style and vice vesa).  I don't think anyone doubts you present a good video and you explain why and how in your presentation MUCH BETTER than some others.  You may view this as your hobby, however, you obviously have a passion for your hobby.  To me, the FOG is a place where the exchange of ideas is GREAT for like minded people.  If you find the time Eric, please show your methods and comments  in cabinet building the euro way.  Some of the things that I would like to see are the types of wood, plywood, (oak, cherry, etc..), finish, (brand and/or way you apply them), types/brands of hardware and why you selected them like price or quality of brand or  like we see in the background of your shop.

There are pros on this site, but everyone goes about their jobs or hobbies in different ways.  I like to exchange ideas!!  Harry Reasoner, (commentator on 60 Minutes), was quoted as saying  "I try to stay surpised enough at life to learn something new each day".
 
That's awesome!  You filled in all the little details that have been tripping me up and a few I didn't think about.  Thank you!!!
 
HowardH said:
Although the LR32 looks great, wouldn't be a whole lot easier if you had one of these?

Easier way to bullt a cabinet

it would be whole lot cooler...   [eek] [eek]

[eek]  [eek]

Howard,  When do you get this machine delivered to your shop?    [tongue]

What size systainer would this fit in?  [big grin]

Eric
 
well uh... er... um....  [big grin] [big grin] [big grin]  Think I'll stick to my tried and true Green! 
 
Howard and Everyone,

Applied to appropriate tasks in a production situation, line drilling machines can be very effective. However, the stress is on Production Situation!

Back in 1946 when I started making Euro-style cabinets with adjustable shelves, there were no factory-made drill jigs with holes on 32mm centers. I was still working in a machine shop so I used a jig-boring machine to make a 1m long gig from 6mm thick aluminum. That did have replaceable drill jig inserts of I could drill 5mm or 1/4" holes. That served me well until I could purchase a slightly-used line drilling machine circa 1952.

My cabinet shops have always specialized in custom jobs, not production in quantity. Therefore in my us all line drilling machines have proven less than ideal. They were designed for factories. In the Original System 32 standards, no holes were skipped. So nearly always the 25 drills on such a machines were enough. Sometimes the outer drill bits were removed if all you needed were 23 holes. Remember, on a line drilling machine alternate drills rotate in opposite directions, so some are painted orange and others black, so the left-hand bits are put in the correct chuck.

What I found early on was that in custom work hardly ever are all the holes drilled. Most of my customers buying custom cabinets prefer there be few unnecessary holes. That means with a line drilling machine you need to manually remove the unneeded drill bits. Then, and this is very important, after the parts are made using removed bits, those must be put back on the machine. Otherwise what happens is a hole you need will be missing. Trust me, I have made that mistake many times.

Still, I used a then state-of-the-art line drilling machine in my custom cabinet shop from 1960 to 1996. It could drill two rows of up to 25 holes, with the second row adjustable from the fixed row. With that it still was necessary to remove unwanted drill bits, and then put them back correctly.

The time involved in removing bits was not an issue when you made many parts, as in production. But, in custom jobs it is rare to be making more than a handful of identical parts at a time. It is frustrating to remove and then re-install all those drill bits.

So in 2006 when I decided to start another custom cabinet business I felt the Festool LR32 approach made a lot of sense. All I needed to do was make a pencil mark so I could skip holes I did not need. Using  Festool Holy rails, an OF1010 and LR32 system I could make accurately 6 identical custom parts as fast as using a line drill after removing bits.

When I build my current shop I bought two CNC routers. I do use those for adjustable hole drilling when other CNC tasks are being done on a particular part. If the only holes are for shelf pins, I can do that as fast with a Holy rail, OF1010 and the LR32 system.

Sure, if you do decide to buy a Line Drill, those made by Felder are very good and fairly priced. But you should also talk to Stiles, a firm that makes many kinds of line drills. But for such a factory you would need pressure beam saws and similar factory-style machines.
 
HowardH said:
Actually, I was trying to be very tongue and cheek about it...  ;D ;D

Howard, actually I assumed you were being tongue-in-cheek, but The FOG being global it is entirely possible some might think owning a sophisticated line drilling machine would solve their problems.

My intention in responding is to explain the limitations as well as benefits of line drilling machines. Used appropriately in a factory they do a marvelous job, but they are labor-intensive in tasks when holes must be skipped. In a custom shop one constraint is that you prefer to assemble cases as soon as possible once the parts are prepared. In a factory it is possible to make a month's worth of parts at a time for assembly as needed. so if it takes several minutes changing a set-up on a line drill, it is not a big deal. In custom work repeat that set-up time a few times an hour is hardly reasonable.

Probably in a factory it would be hard to afford the labor to use the Festool LR32 system. yet in a home or professional custom cabinet shop the LR32 system can be a real money-maker, along-side CNC machines.
 
Back
Top