Alex's Major Home Improvement Thread

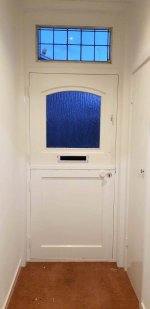
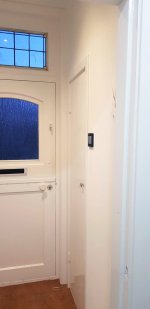
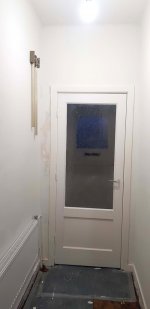
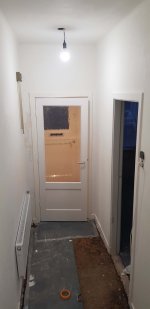
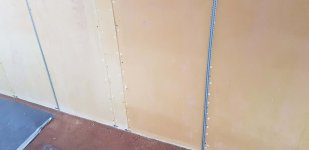
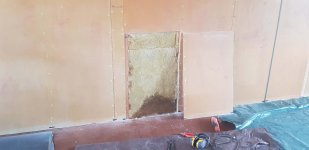
Here's my Double Dutch Door again. [smile] Fast forward a couple of months. So little time to work on my home, on average maybe 10 hours per week. Entrance all done and walls and wood painted. To the right of the door there's a little closet for the gas and electricity meters, and it's front was completely demolished due to all the nails of the wainscotting. So I put a new layer of 4 mm multiplex over it.

[attachimg=1] [attachimg=2]

Good progress in the rest of the hallway also, though not entirely done yet. But a huge difference with how it was.

[attachimg=3]

[attachimg=4]

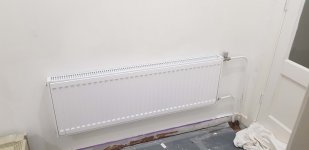
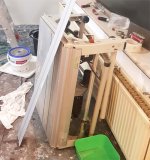
And my new radiator. Some of the fins on the back were bent that's why it was discounted from 150 to 10 euros.  Couple of hits with a hammer and it was good to go.

[attachimg=5]

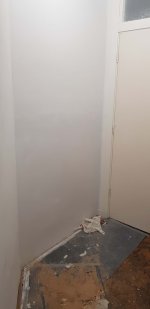
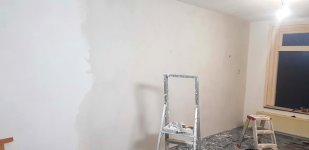
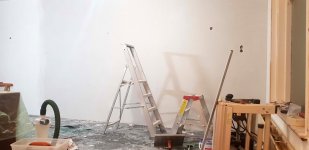
The wall where the plaster dropped off is also fixed again, and now thanks to the primer adhesion is rock solid. I need to sand it lightly and apply a last ultra-thin layer with a ready made paste to get it completely smooth.

[attachimg=6]

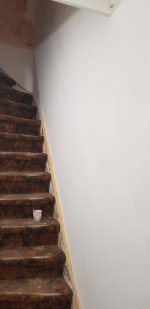
And the stairs done too, but also needs a bit of sanding and the last thin layer.

[attachimg=7]
 

Attachments

  • 020-20210112_170625.jpg
    020-20210112_170625.jpg
    58 KB · Views: 872
  • 026-20210112_170514.jpg
    026-20210112_170514.jpg
    227.3 KB · Views: 847
  • 025-20210110_184300.jpg
    025-20210110_184300.jpg
    178.9 KB · Views: 857
  • 024-20210110_184252.jpg
    024-20210110_184252.jpg
    194 KB · Views: 857
  • 023-20210112_170640.jpg
    023-20210112_170640.jpg
    212.7 KB · Views: 870
  • 022-20210112_170520.jpg
    022-20210112_170520.jpg
    195.8 KB · Views: 858
  • 021-20210112_170549.jpg
    021-20210112_170549.jpg
    222.5 KB · Views: 850
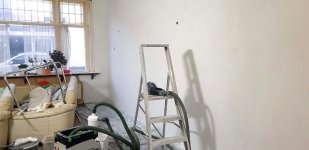
I moved on to the living room. This was a lot of work. Wallpaper everywhere, and sometimes 4 layers thick. There was one layer in it with a paper that was waterproof, so I could not remove it by just making it wet and dissolve the glue, but I had to practically chissel it all away with a putty knife. The long wall alone took me 2 days just to get the paper off. But I was left with a good surface of drywall.

When originally installed, all the drywall was nailed though, and nails work themselves loose over time. There was a lot of movement in the boards so I got a pack of those black drywall screws and screwed it all tightly down. I also painted all the old nails with an oil based primer to prevent them from rusting from water in the plaster.

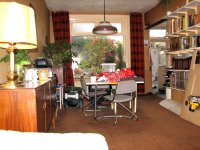
By the way, here is a picture of the room looked. This picture is 10 years old , but it still looked more or less the same. Some things were long gone though, like the book case and the CTL 22.

That wallpaper on the wall was originally as white as the paint of the window frame. That's what you get with two heavy smokers as parents.
[attachimg=1]

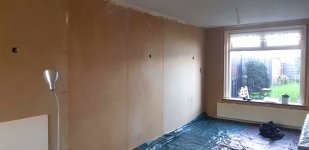
Removed everything. I'm left with a wobbly but workable surface. Screwed everything tight.
[attachimg=2]

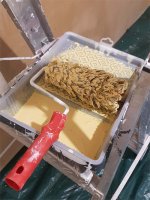
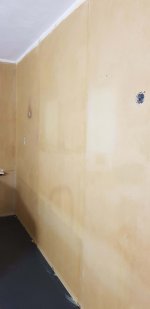
Then it was time to apply the primer, this is the yellow stuff which means it is for poreus surfaces to regulate their suction. If you don't do this, the drywall will suck up lots of water when you apply the plaster, and your plaster will "burn" as they call it, it won't harden properly because it doesn't have enough water anymore. You can just roll it on, make sure to saturate the surface.

[attachimg=3]

It dries quickly and you're left with a nice yellow wall. Time to place the 10 mm plaster profiles which ensure your layer gets the proper thickness. And place tape over the seams between the drywall boards.
[attachimg=4]

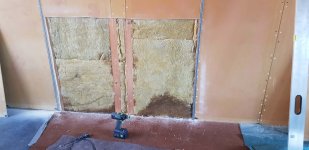
I found a problem here though, the boards were so wobbly, that at one place they stuck out 10 mm beyond the profiles. Time for a little surgery. I made an incision with the multimaster so I could take off the drywall in the spot that was too high. Then I used the EHL65 planer to cut away 15 mm from the wooden supports underneath, and placed the boards back. Now everything fits.
[attachimg=5]

[attachimg=6]

[attachimg=7]

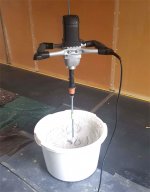
So, now after 3 days of preparation it was finally time to start plastering. It was also the first time I got to use the new-to-me Protool MXP 1602 mixer I bought for this job. Suffice it to say, it performed flawlessly, with its 1500 watt motor it has all the power to make  mixing a full bag of plaster a breeze. So much better than a mixing rod in a drill. I am really glad I got this tool.

It was perfectly balanced, you can just put it down on the mixing rod and it will stay standing up.

I had this 45 L bucket, and that is enough to hold one bag of 25 Kg plaster. For one bag you have to add 16 liters of water. First the water in the bucket, then you pour in the plaster, and you let it sit for 5 minutes so it can "drink" as they call it. This improves the mixing result. And then you mix with the machine for 5 minutes until it is one lump-free mass. The mixer has 2 speeds, you start slowly in gear 1 for the heavy work, and when you don't see any dust anymore you can go to gear 2 which makes it all a lot easier.
[attachimg=8]

The necessary tools laid out. A very handy step to reach the top of the wall.

[attachimg=9]

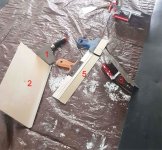
A close up of the tools. I have to describe them, I got no clue how you call them in English.

1 - trowel to put plaster from the bucket on your board.
2 - board that holds the plaster.
3 - thingy that scrapes the plaster from your board on the wall.
4 - long straight edge to smooth your plaster on the wall.
5 - the knifes you use to plaster everything smooth in the end.

[attachimg=10]

[attachimg=11]
 

Attachments

  • 037-reilat-200-cm.jpg
    037-reilat-200-cm.jpg
    18.6 KB · Views: 832
  • 036-Untitled-1.jpg
    036-Untitled-1.jpg
    276.7 KB · Views: 830
  • 035-Untitled-1.jpg
    035-Untitled-1.jpg
    202.7 KB · Views: 824
  • 034-Untitled-1.jpg
    034-Untitled-1.jpg
    181.1 KB · Views: 844
  • 033-20201214_122141.jpg
    033-20201214_122141.jpg
    358.3 KB · Views: 822
  • 032-20201214_120635.jpg
    032-20201214_120635.jpg
    272.4 KB · Views: 828
  • 031-20201214_115410.jpg
    031-20201214_115410.jpg
    224.1 KB · Views: 845
  • 030-20201212_212535.jpg
    030-20201212_212535.jpg
    172.6 KB · Views: 859
  • 029-Untitled-1.jpg
    029-Untitled-1.jpg
    267.9 KB · Views: 832
  • 028-20201210_125424.jpg
    028-20201210_125424.jpg
    267.1 KB · Views: 827
  • 027-IMG_3135.jpg
    027-IMG_3135.jpg
    729 KB · Views: 852
You might want to cover the floors with Ramboard or the equivalent and hang plastic on the doorways for dust containment with a zipper for a passageway. Looking good.
 
mkasdin said:
You might want to cover the floors with Ramboard or the equivalent and hang plastic on the doorways for dust containment with a zipper for a passageway. Looking good.

Thanks, but as you can see in the pictures, I did. But the carpet has to go anyway. I got a whole lot of PVC laminate flooring waiting to be installed instead.
 
Alex,  this is all a historical journey correct? this and what you will show has been done, you are just showing us all after the fact (a review of the year, but presented as you experienced it)
 
DeformedTree said:
Alex,  this is all a historical journey correct? this and what you will show has been done, you are just showing us all after the fact (a review of the year, but presented as you experienced it)

Everything I did in the hallway was done over the past year. But I started in the living room last month. We have a lockdown here in Holland for a month now, so I am locked in here with all my tools and got to do something. And in oktober and november I did my attic. 

But isn't everything we tell a historical journey in a sense? Can't tell you what I've done if I haven't done it yet.  [tongue]  [big grin]
 
Infinite Alex's in Infinite Universes on his Journey.  Some of which he master plaster at 19 years old, others he never heard of Festool, and one he was born in New Jersey to a used car salesman.

So, how big is your house?  Based on the comments, I'm gathering this is a row house, neighbor on one side at least (though shall not disrupt them watching their stories), maybe a shared wall on both.
 
Great thread Alex - you have made good progress and are making good use of your tools, also learning new skills, sometimes the hard way.  It sounds like the Multimaster is a workhorse for many of the tasks.

"ALWAYS PRIME" - I learned that on a previous project, not with plaster but seems to be even more important than with paint.

I am in a somewhat similar situation, living in the house I grew up in and trying to fix it up.  My projects are not as ambitious as yours, but you are giving me ideas...

Also, as far as I know my father never traveled to Europe, but he seems to have attended the same school or non-school as yours - every time I open up an area, or remove some camouflage that was applied years ago, there is more clean-up / rebuild / repair to be done. 

My place was built in the late 1950s, the walls are a combination of what I think was called "blueboard", then lath (wire mesh), then a coat of plaster or similar.  Instead of removing all of it back to the studs I am cutting out various panels here and there for electrical and other work.  I am using the TSC-55 with cement blade and finishing up with the M18 multitool, the blades for this last about one meter in these walls.  Obviously I am not going to rebuild with the same material but instead use normal drywall.  However the thickness of the existing finished walls does not match any available drywall, so I am furring out the studs to match the finished wall thickness.

Keep up the good work.
 
1 - trowel to put plaster from the bucket on your board
2 - board that holds the plaster.
3 - thingy that scrapes the plaster from your board on the wall.
4 - long straight edge to smooth your plaster on the wall.
5 - the knifes you use to plaster everything smooth in the end.
I think these would be the right names:
1: Bucket scoop
2: Hawk
3: Trowel
4: Screed
5: Drywall knife
 
DeformedTree said:
Infinite Alex's in Infinite Universes on his Journey.  Some of which he master plaster at 19 years old, others he never heard of Festool, and one he was born in New Jersey to a used car salesman.

So, how big is your house?  Based on the comments, I'm gathering this is a row house, neighbor on one side at least (though shall not disrupt them watching their stories), maybe a shared wall on both.

Whoa, you're getting very philosophical here, not sure a home renovation warrants that.  [smile]

As for size, my house's base is 5,65 m x 9 m, with two full floors and an attic with a pointy roof. Total living space 150 square meters. And an 18 meter long garden.

Jeff Zanin said:
Obviously I am not going to rebuild with the same material but instead use normal drywall.  However the thickness of the existing finished walls does not match any available drywall, so I am furring out the studs to match the finished wall thickness.

If you just want to close a patch here and there it is not so difficult. You can apply the plaster as top layer and just sand it flat. Maybe a few thin layers on top of each other. That's how I started out with this stuff.

cpw said:
I think these would be the right names:
1: Bucket scoop
2: Hawk
3: Trowel
4: Screed
5: Drywall knife

Thanks. I'll try to remember.  [smile]
 
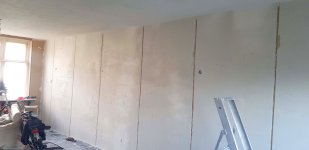
Well, the long wall of the room has its first layer of plaster. I was trying to do too much at once, so when I got back to where I started in order to smooth things out it was already too hard. I decided to leave it like that and do the smoothing with a second layer. At least now everything is dead straight due to the stuc profiles. Normally you take them out once you filled the spaces between them and fill the seams up in one go, but my big amateur bottom decided to do that the next day.

Need to store the bike in the room for now as the shed where it normally recides is filled to the brim with building materials like wood and plaster.

[attachimg=1]

[attachimg=2]

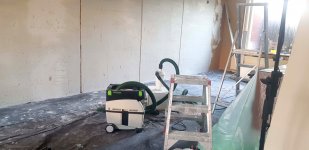
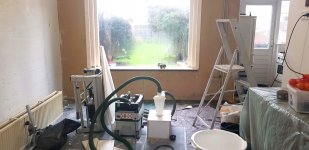
The seams where a bit too rough of course now so I sanded them quickly with the Rotex. Used 80 grit granat. Cyclone attached to the Midi to save my bags. The cyclone really catches most of the plaster.

[attachimg=3]

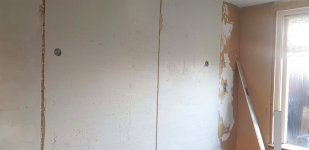
I also prepared the next wall for plastering. Had to take off the radiator again.

[attachimg=4]

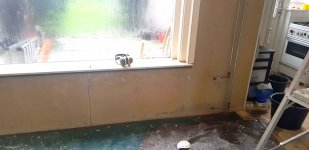
Notice how the windows are completely fogged up with water. I used 90 liters of water to mix the 6 bags of plaster I used on the long wall. While some of that becomes part of the plaster as it is used in the chemical reaction to cure, lots of it comes out again. There were constantly puddles of water forming at the bottom of the windows which I had to mop up.

[attachimg=5]

All the seams filled up. Now I had to wait 2 weeks for the plaster to dry. 10 mm thickness @ 1 mm per day @ 20 degrees celcius room temperature. But it wasn't 20 degrees, more like 12 because I disconnected the radiators so it took longer.

[attachimg=6]

[attachimg=7]

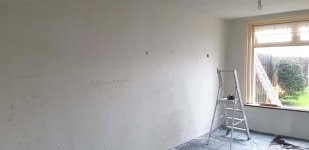
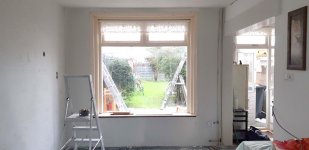
The back wall also got its first layer. What a difference, shaping up nicely.

[attachimg=8]

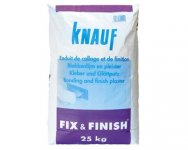
Two weeks later, time to put on the final layer. This time I use Knauf Fix & Finish, a plaster that can be applied in a very thin layer, 1-3 mm.

[attachimg=10]

[attachimg=9]


Attachments

  • 044-20201224_144055.jpg
    044-20201224_144055.jpg
    237.5 KB · Views: 787
  • 045-20201224_144100.jpg
    045-20201224_144100.jpg
    315 KB · Views: 795
  • 046-20201224_152524.jpg
    046-20201224_152524.jpg
    209.9 KB · Views: 780
  • 054-Fix & Finish - 25kg.jpg
    054-Fix & Finish - 25kg.jpg
    14.4 KB · Views: 758
  • 043-20201221_122815.jpg
    043-20201221_122815.jpg
    227.1 KB · Views: 802
  • 042-20201221_122800.jpg
    042-20201221_122800.jpg
    365.3 KB · Views: 832
  • 041-20201221_122748.jpg
    041-20201221_122748.jpg
    324.1 KB · Views: 832
  • 040-20201218_121617.jpg
    040-20201218_121617.jpg
    331.2 KB · Views: 866
  • 039-20201218_121518.jpg
    039-20201218_121518.jpg
    249.2 KB · Views: 848
  • 038-20201218_112540.jpg
    038-20201218_112540.jpg
    223.1 KB · Views: 966
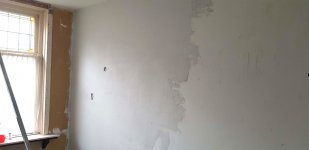
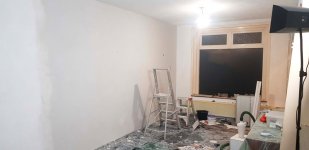
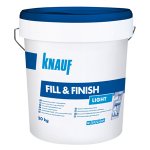
I first did one half, and then the second half. Now everything is smooth - almost. While it is very good already, it is not 100%, I do the final patching up with a ready made plaster called Knauf Fill & Finish. Notice how the edge of the plaster is feathered out once you go over it with the plaster knife.

[attachimg=1]

[attachimg=2]

[attachimg=3]

In another post someone asked about storing the CS70 vertically. No problem.

[attachimg=4]

The thin top layer had dried quickly, just 2 days. A final sanding session with the Rotex and Indasa Rhinogrip 280 grit paper to knock off everything that still sticks out.

[attachimg=7]

Moving the Midi and the cyclone attached is a bit troublesome though. And the Rotex, and the ladder. I made the box of the cyclone in the size of a systainer to put it on top of the Midi, but that tipped over by just looking at it. Better to keep it safe and sound on the ground.
[attachimg=5]

Time for the Fill & Finish.

[attachimg=6]
 

Attachments

  • 053-Fill-&-Finish-20-kg.jpg
    053-Fill-&-Finish-20-kg.jpg
    46.5 KB · Views: 751
  • 052-20210112_164058.jpg
    052-20210112_164058.jpg
    379.1 KB · Views: 791
  • 050-CS70.jpg
    050-CS70.jpg
    213.8 KB · Views: 818
  • 049-20210110_184043.jpg
    049-20210110_184043.jpg
    254.4 KB · Views: 808
  • 048-20210110_184019.jpg
    048-20210110_184019.jpg
    243.9 KB · Views: 791
  • 047-20210110_165712.jpg
    047-20210110_165712.jpg
    190.1 KB · Views: 788
  • 051-20210112_164035.jpg
    051-20210112_164035.jpg
    55.4 KB · Views: 745
I feel the work, Alex! But that's an amazing transformation & progress.

Have to add that I love the street side window, I guess those are original from when the house was build? The grit pattern and yellow/orange corners are fantastic!

Kind regards,
Oliver
 
Alex, couldn’t you put some largish size casters on your cyclone? Or make a larger platform from a sheet that fits both the CT and the cyclone, in order to wheel them both easily?
 
six-point socket II said:
Have to add that I love the street side window, I guess those are original from when the house was build? The grit pattern and yellow/orange corners are fantastic!

Yes, they are nice, aren't they. Original glass-in-led as we call them. But very weak and drafty due to all the seams. I got acrylic windows in front of them.

FestitaMakool said:
Alex, couldn’t you put some largish size casters on your cyclone? Or make a larger platform from a sheet that fits both the CT and the cyclone, in order to wheel them both easily?

Seems too much trouble. I'll manage. I also need to haul it quickly upstairs.
 
Putting acrylic in front of them is certainly a great idea, so glad you're enjoying them yourself and saving them! To many of these gems are gone/ being removed nowadays.

Kind regards,
Oliver
 
It's coming along nicely Alex...a huge difference.  [cool]

I'd certainly say that living in the house at 12ºC would provide a very strong impetus to complete the plastering job ASAP.  [smile]

The use of stuc-stop profiles is very clever to get a uniform wall thickness.  [big grin]  That was a new one for me.
 
six-point socket II said:
Putting acrylic in front of them is certainly a great idea, so glad you're enjoying them yourself and saving them! To many of these gems are gone/ being removed nowadays.

The problem is that single glass is not very energy efficient. You really notice the difference in your heating bill when you go to modern HR++ double glazing.
 
Alex said:
six-point socket II said:
Putting acrylic in front of them is certainly a great idea, so glad you're enjoying them yourself and saving them! To many of these gems are gone/ being removed nowadays.

The problem is that single glass is not very energy efficient. You really notice the difference in your heating bill when you go to modern HR++ double glazing.

Couldn’t you install either single or double glazing inside. That way you would have 1+1 or 1+2 insulated? To keep the old glass and frame (which usually are of much better quality than new windows). That’s a usual solution here, and often performers better regarding insulation than a whole new window. I doing this very soon to keep my oldest smallest windows - cheaper than having new replicas made. Many exclusive (older) windows was produced with oak or teak frames. With minimal maintenance they can easily hold well over 100 yrs or more.
 
Back
Top