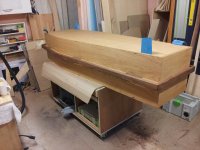
Yesterday was a hectic day - I had some errands to do in the morning (including collecting the new walnut pieces) so didn't get started until around 1pm.
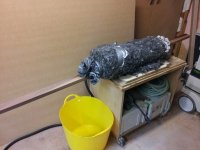
I needed to make a steam box to bend the walnut. I had some PVC soil pipe, but had read that it wasn't suitable as it would soften with the heat. Luckily I had a short (~600mm) piece of underground pipe that had a thicker wall, so decided to use that. I sealed the ends with multiple layers of gaffer/duct tape - the answer to everything! - leaving a 50x25mm opening so that I could slide the timber through.
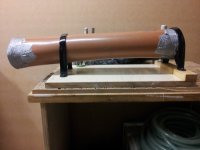
I bought a cheap wallpaper steamer to generate the steam, and taped that in to one end too. I had a couple of pipe clamps so I secured the pipe to a board, with one end raised, and then drilled a small drain hole at the opposite end for any condensate to drain out. I then wrapped some insulation round it.
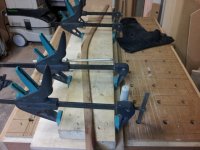
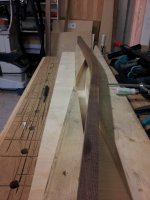
I decided to do a test with one of the shorter pieces, just to see if I'd got the radius of the curve right, and how much springback there would be:
[attachimg=1]
[attachimg=2]
[attachimg=3]
Success!
The radius and the amount of springback were just about right, I got quite lucky on that. I'd left the timber to steam for around 50 minutes. I was aiming for an hour as I'd read 1 hour per inch of thickness, and the timber was 25mm. Unfortunately the wallpaper steamer would only run for 50 minutes before the water ran out & it shut itself off. So, on with the actual pieces.
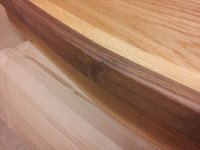
The first one went fine, but on bending the second it unfortunately cracked:
[attachimg=4]
It wasn't too bad, so whilst it was in the jig, I used some black solid-surface resin to fill & stabilise the crack. I didn't have any brown, but figured black wouldn't look too bad.
I dry-fitted and mitred all 4 walnut pieces before sanding and rounding over the edges with a 6mm bit. The curved pieces were, if anything, curved a little too much, and required some serious force to get them straightened a little. When I did the test piece I only left it in the jig for around 20 minutes; the actual pieces were each in there for over an hour. I guess that made a difference! Then I took them off and glued them one at a time, working around the box. I mixed some PVA and sanding dust to fill the last remnants of the crack, and sanded it back in situ, before putting a coat of oil on.
Here's the result of the crack repair:
[attachimg=5]
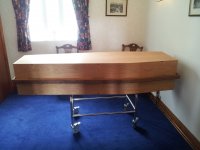
And the finished item (the blue plastic is some strips of thick plastic sheeting, so I can remove the lid):
[attachimg=6]
All that's left to do now is insert & trim the walnut dominos once Kate is placed inside.
Overall I'm very happy with the end result. To be honest I wasn't 100% confident I could do this when I started, but it's turned out OK. It's not perfect by any means, and there are quite a few areas I would work on more if I had the time. Ideally I would have liked the walnut to be a little darker to provide more contrast. I might even have done the handles in oak and then fumed them. I would certainly put more oil on if I had time - it's only really had one good coat, so I hope it looks ok on the day.
I guess it's appropriate that it's only got one coat of oil on, as that means it's not quite "finished", and Kate was right all along... [big grin]