Another Barn Wood project jumped the queue.

Crazyraceguy

Member
Joined
Oct 16, 2015
Messages
4,901
The wood itself showed up Wednesday, so I knew it was coming, but didn't know it would be so quick. Apparently, the lead time was more than expected. I was in the middle of the Cherry as shop ply job, and it got bumped out of the way.
I don't really know why the camera make the pics look so intense? The contrast is not that heavy and it is not that black looking either. It does the same thing to the shop floor, it is not like that either.
It's about 18 feet long, just over 9 feet on one side and 4 feet on the other. I comes apart into 3 pieces and has to ship about 200 miles, next week.
 

Attachments

  • Brewery2.jpg
    Brewery2.jpg
    660.4 KB · Views: 294
  • Brewery3.jpg
    Brewery3.jpg
    360.2 KB · Views: 254
  • Brewery4.jpg
    Brewery4.jpg
    344.4 KB · Views: 241
That stuff must be awkward to work with and despite that you’ve applied it superbly.

On the other hand I don’t like the waterfall miter effect with this barn wood stock.
Each piece is a unique object but wrapping it around the corner like this makes it seem like wallpaper.

Might be a good subject for a poll…
 
Very nice job!

I actually really like the extra effort and care spent to do the grain wrap around. It looks fantastic, and really just adds to the overall appeal, and ties it all very nicely together.
 
Excellent work!  I agree with Michael on the corners with the barnwood, but the craftsmanship is very apparent. Which direction is it shipping?  Possibly if my way I could provide a picture “in the wild” someday.
 
Looks great.  Is that real-from-the-barn barn wood?  Or is it manufactured like that, with an aging process?

Nailed on?  Glued on?

Que” = “what?” [Spanish]

Queue” Chiefly British, “line”.
 
I like the way he wrapped the corners. It gives the look of being built up from some old, large, hand-hewn timbers to me.
 
Bob D. said:
I like the way he wrapped the corners. It gives the look of being built up from some old, large, hand-hewn timbers to me.

And I thought it was thin planks applied because it was all face grain around the corners where I would expect end grain.

I don’t think that will ever happen.  End grain sliced to the thickness of the planks would probably split the the very first driven nail, and even if they were applied with adhesive, I think an unreasonable percentage would break in transit.

Plus most people would not notice, and most people prefer the appearance of the face grain.

But, I agree, the corner miters all look very tight.
 
It is all 3/4" thick legitimately aged on a barn. These are from a new source, where they are "processed" a bit more than the place we used to get it from. The original source just dismantled the barns and sold the parts basically "as-is", with the exception of de-nailing and kiln-drying to kill any insects. That meant that some of the parts were just as aged looking on both sides and the thickness varied a lot. They may have been bowed, cupped, twisted, however they naturally wanted to after being released from the structure.
These are planed on the back to get a pretty consistent thickness and straight-line ripped on both edges. This order was filled as 10", 7" and 3 1/2" planks.

As far as the mitering, that was my choice. I was given total creative control on this one, which is very rare. Things are usually strictly spec'd and don't deviate from the drawings. About the only thing that isn't typically detailed it the spacing (layout) of the access panels on the inside of these desk/bar units. I set up some "standards" on that many years ago and really only change that when conditions seem to require it.
I have done quite a few of these cladded projects, especially lately. Everyone seems to like the  look of the mitered corners. It's refined and rustic juxtaposed, I guess? The edges are clean and straight, so no gaps there, like it was on the very first job I did with barnwood. That was the stuff with the weathered edges too. So that tight fit seemed to "need" the miters (in my mind anyway)
Some of the running joints are tight/square mitersaw cut ends. Some are done with "used" ends, which are not square. There is one joint, so far anyway, that is not the same board wrapping the miter. The interesting part will be the way it ends on the side where it can be seen, not done yet.
It will come apart into 3 sections and some of the boards cross that joint. Those will be shipped loose and applied in the field. This was done to hide the idea of field-joints and look more like it was built in-place. More pics when I finish it.
It ships out of state, by another carrier, and to be installed by a sub-contractor from the city where it goes. This is yet another that I will probably never see again and may not even get pics, since it's not our people doing the job. It goes to Pittsburgh Pa. 150-200 miles away.

Michael Kellough said:
I forgot to comment on the cleverness of blackening the particle board behind the joints.  [thumbs up]
Thank you. That was I thing I came up with on the very first one. There were lots of gaps between the sides of the boards, since they were weathered everywhere. The raw wood underneath just looked to new and clean.
 
I have an album of my unusual jobs (all masonry). On the more unusual jobs, i took it to the source of my materials to have Lee cut it. Steps and hearths mostly. I found out Lee was retiring. I gathered up all of his projects that he had done for me and put them in an album. I presented that album to Lee. He told me had never seen the completed projects. Had tears in his eyes when he told me that.
Tinker
 
Tinker said:
I have an album of my unusual jobs (all masonry). On the more unusual jobs, i took it to the source of my materials to have Lee cut it. Steps and hearths mostly. I found out Lee was retiring. I gathered up all of his projects that he had done for me and put them in an album. I presented that album to Lee. He told me had never seen the completed projects. Had tears in his eyes when he told me that.
Tinker

Most of what I have done over the years is in a similar situation.
In the beginning, I took pics of the cool looking or unusual stuff, just mostly for myself. After a while I got teased about it from the old guys, saying "I remember my first build too..." and stuff like that. So, I king of slowed down on it some. Then I came to see the value in progress pics, to help remember how it was done, for reference. This can help with similar challenges in the future, or for repairs if something gets damaged in use.
In the early years, I had to plan a little more to take the pics, because it was before the camera in the phone thing. Having the phone makes it a lot easier. I do have a few gaps in picture taking because of camera issues with the phone though. I put up with that for way too long. A couple of very interesting looking projects are sadly stuck with the bad pics. They look cloudy, like waxed paper was on the lens. I think I even have some old pics that are still on an old phone, most of which were never seen. I'm not even sure that I can retrieve them?
At one time, I was even accused of taking pics to build up a portfolio, to save as a reference for job hunting. That has never been the case though.
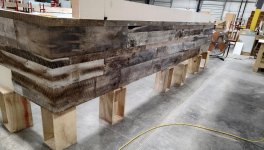
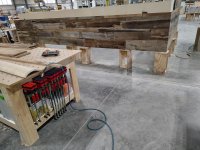
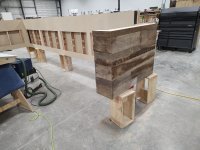
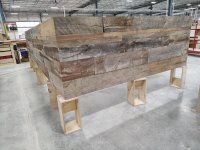
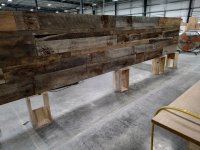
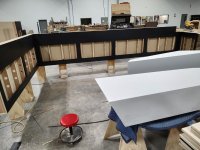
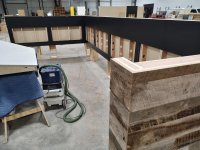
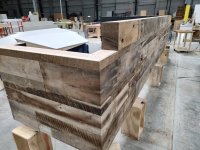
Also, most of my pics are in the shop itself, no context, propped up on 20" high blocks and generally incomplete. Only the smallest of jobs ever get 100% finished there. Countertops are usually missing, unless built-in obviously, access panels are removed, etc.
On a few occasions, long ago, I did have to get involved with the installation, but not any longer.
They need me in the shop far more than out doing that kind of thing. That means I never get to see things completed and in place. There are a few places which are more "public" than others, which I can/have been into. Most of the medical facilities, schools and law offices that own the projects that I have built are not freely accessible, even if they were close enough. Libraries, restaurants, gas stations, and retail places are easier, but not necessarily close.
I have been to a few of them, but only a tiny percentage.
We have a TV screen in reception and in the conference room that have a rolling slide-show of completed jobs, but they are sorely lacking. Covid slowed a lot of that down and it hasn't seemed to come back.
 
A few more pics. Should be done tomorrow. All that is left is laminating the inside, it's simple black HPL.
 

Attachments

  • Brewery7.jpg
    Brewery7.jpg
    357 KB · Views: 117
  • Brewery5.jpg
    Brewery5.jpg
    416.8 KB · Views: 124
  • Brewery6.jpg
    Brewery6.jpg
    332.6 KB · Views: 115
Sorry-I thought it would be tacky to take a picture, but I was at a funeral yesterday and the coffin had an exterior of barn wood, including the lid. 
 
Let's hope no one makes a coffin as a pallet wood project.
 
Finished, all that is left is disassembly for shipping.
There are two more sections of a coffee bar that go with this. They are pretty boring though, just the same black on the inside and raw on the outside, for tile to be done after install.
 

Attachments

  • Brewery8.jpg
    Brewery8.jpg
    267.9 KB · Views: 98
  • Brewery9.jpg
    Brewery9.jpg
    285 KB · Views: 98
  • Brewery12.jpg
    Brewery12.jpg
    347.8 KB · Views: 97
Back
Top