hdv
Member
I noticed a couple of people posted their custom-built drill press table, so I thought to add another one. Who knows? It might inspire someone to make an even better one.
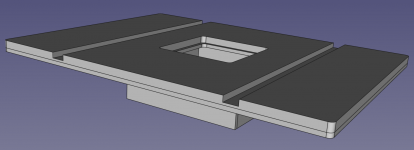
I started out with a CAD drawing. If anyone wants a copy, it is available, but in a non-standard format (FreeCAD).
View attachment 1
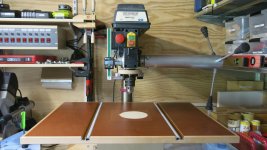
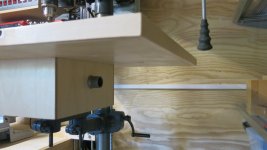
First I have to move the handles outward, because otherwise they would get blocked by the platform.
View attachment 2
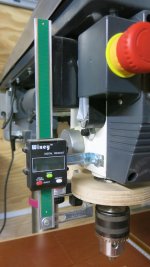
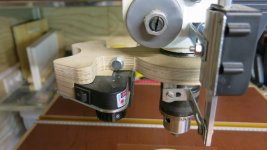
I also added a Wixey depth gauge and a laser, because my drill press didn't have those.
View attachment 3
View attachment 4
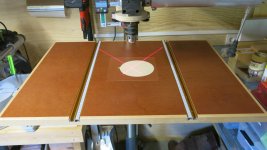
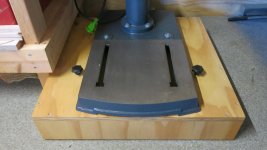
Here's the platform with integrated T-tracks and centre scales.
View attachment 5
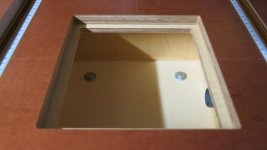
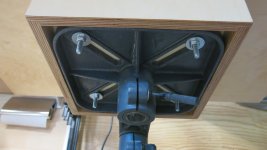
You might notice the laser lines do not cross in the centre of the sacrificial plate. That is on purpose. I wanted to use round backer boards, because square ones can only be used on 4 sides. Now I can get a lot more mileage out of them by just turning them a few degrees. There's a finger hole to make it easy to replace or turn the backer boards. And the boards are inserted in another insert [tongue]
View attachment 6
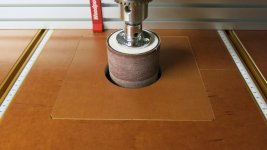
I did that so I could easily replace the drilling insert with sanding inserts for drums with different widths.
View attachment 7
View attachment 8
Obviously dust collection when drillng would be nice to have as well
View attachment 9
And to have dust collection when sanding I put the platform on a box with a dust port that fits my CTL26.
View attachment 10
The whole assembly is fixed with 4 bolts that can easily be loosened if I need to remove the table.
View attachment 11
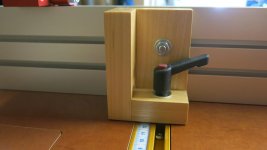
I had a Woodpeckers Super Fence that I didn't use yet, that I now use as a fence (both vertical and horizontal). I made 2 blocks that are perfectly square to fix the fence in vertical mode to the tracks. On the fence I epoxied a left and a right lexan scale to create a centre scale. The epoxy works really well for this. There is still no peeling at all.
View attachment 12
View attachment 13
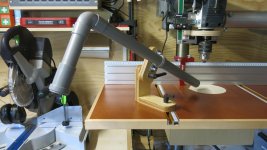
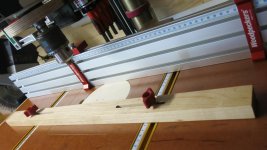
Sometimes I have very small pieces where the knuckle clamps I use don't work that well. So I made a wooden sub fence that can be attached to the T-tracks for those situations.
Finally I put the drill press on a platform with casters so I could move it when needed.
View attachment 14
Up to now I am very satisfied with this contraption. If there is one thing I regret then it is that I didn't notice in time that the guide rail had moved when I routed the groove for the right T-track. I won't repeat the noises I uttered when I found out... [scared][crying]
I started out with a CAD drawing. If anyone wants a copy, it is available, but in a non-standard format (FreeCAD).
View attachment 1
First I have to move the handles outward, because otherwise they would get blocked by the platform.
View attachment 2
I also added a Wixey depth gauge and a laser, because my drill press didn't have those.
View attachment 3
View attachment 4
Here's the platform with integrated T-tracks and centre scales.
View attachment 5
You might notice the laser lines do not cross in the centre of the sacrificial plate. That is on purpose. I wanted to use round backer boards, because square ones can only be used on 4 sides. Now I can get a lot more mileage out of them by just turning them a few degrees. There's a finger hole to make it easy to replace or turn the backer boards. And the boards are inserted in another insert [tongue]
View attachment 6
I did that so I could easily replace the drilling insert with sanding inserts for drums with different widths.
View attachment 7
View attachment 8
Obviously dust collection when drillng would be nice to have as well
View attachment 9
And to have dust collection when sanding I put the platform on a box with a dust port that fits my CTL26.
View attachment 10
The whole assembly is fixed with 4 bolts that can easily be loosened if I need to remove the table.
View attachment 11
I had a Woodpeckers Super Fence that I didn't use yet, that I now use as a fence (both vertical and horizontal). I made 2 blocks that are perfectly square to fix the fence in vertical mode to the tracks. On the fence I epoxied a left and a right lexan scale to create a centre scale. The epoxy works really well for this. There is still no peeling at all.
View attachment 12
View attachment 13
Sometimes I have very small pieces where the knuckle clamps I use don't work that well. So I made a wooden sub fence that can be attached to the T-tracks for those situations.
Finally I put the drill press on a platform with casters so I could move it when needed.
View attachment 14
Up to now I am very satisfied with this contraption. If there is one thing I regret then it is that I didn't notice in time that the guide rail had moved when I routed the groove for the right T-track. I won't repeat the noises I uttered when I found out... [scared][crying]
Attachments
-
 drill_press_table.png133.5 KB · Views: 198
 -
 20190627@101703.jpg214 KB · Views: 269
 -
 20190627@101712.jpg186.2 KB · Views: 174
 -
 20190627@101727.jpg162.5 KB · Views: 191
 -
 20190627@101752.jpg186 KB · Views: 189
 -
 20190627@101824.jpg128.5 KB · Views: 127
 -
 20190627@101833.jpg115.9 KB · Views: 124
 -
 20190627@113817.jpg180 KB · Views: 182
 -
 20190627@102625.jpg203.7 KB · Views: 228
 -
 20190627@101907.jpg142.6 KB · Views: 181
 -
 20190627@101854.jpg154.7 KB · Views: 186
 -
 20190627@102203.jpg127.6 KB · Views: 162
 -
 20190627@102346.jpg202.2 KB · Views: 246
 -
 20190627@102715.jpg190.7 KB · Views: 174