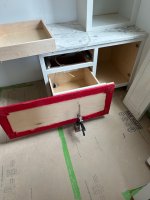
Attaching Drawer Faces to Boxes

Mike Goetzke

Member
Joined
Jul 12, 2008
Messages
1,133
Finally done with a dresser for my soon to be grandson. I need to attach the faces to the drawer boxes but the parents to be have not provide drawer hardware. Usually I'll mark the hardware fastener locations on the drawer faces, drill holes and use wood screws to attach them to the boxes. Just wondering what others do?

Thanks
 
Pre drill and countersink holes in the drawer boxes, drive your fixing screws in so they just protrude from the front of the box.
Close the drawer, sit your front in position, using spacers. Firmly, but not over the top, hit the front with your fist/palm, in the area of each screw.
Remove the front, drill the pilot holes where the protruding screws marked the back of the drawer front.
Drive two of the screws home, check, adjust with a soft mallet, drive the remaining screws home.
 
Drill over sized holes....attach with DRAWER FRONT SCREWS..tap til perfect...add another pair of screws to lock in place
 
I have two preferred methods. One is sticking double-sided tape to the box and placing spacers below and on the sides of the front and then press the front to the box. If the front is of the overlay type, then I use long sticks to align the sideways position.

The other method I use when I can be reasonably sure of the exact position of the handle up front. In such cases I pre-drill the holes for the screws in the front of the box. Then I put in 4 mm dowel markers in the screw holes (around here the fasteners for drawer pulls are standardized to M4). Then I'll stick double-sided tape to the box and again use spacers to position the false front. Now I press the false front to the box. The points of the dowel markers will show exactly where you need to drill.

In the past I have bought drawer front installation clamps similar to the ones Rockler sells, but in the end I've gone back to my old and tried methods again. The clamps are somewhere gathering dust now.
 
Made a fixture (actually 3 fixtures, inset, overlay and euro) to set the drawer faces. The placement of the box is fixed for almost every drawer opening you make if you use the same style slide across your builds. The drawer box should center in the opening and the reveal or overlay is a given. Makes installing the face quick easy and very accurate.

We use drawer face screws to hold the face to the box. Hardware is installed by the builders cabinet installer.

Here is the inset fixture used on a drawer box that I was to lazy to diconnect the docking drawer from. Normally the drawer faces are installed before the cabinets leave the shop, this job had to go out due to other scheduling prior to the faces being finished and installed. Ultimatley I'm just a lazy guy...

[attachimg=1]

Tom
 

Attachments

  • IMG_0785.jpeg
    IMG_0785.jpeg
    82.6 KB · Views: 228
The every-day stock standard stuff is done with a series of fixtures.
They all have the same overlay. The distance from the bottom of the box is always the same for top drawers, so that is one fixture. Bottom drawer has one too, since it is different. If there are any in between, they are all the same, so that's a third. Those 3 fixtures are attached to one of the benches, in the assembly area. The front is placed in first, face down. The box sits on top of it, against the stops, and it gets screwed through pre-drilled holes. The holes are done during the CNC process, slightly over-sized, so slight adjustments can be made.

Most of the is 100% useless for home-shop hobbyists though [unsure]
For occasional situations it can be done by clamping the fronts in place. One at a time, starting from the bottom, install only that box. Clamp the front in place (front to back) reach inside and screw through the pre-drilled holes. This can be a little difficult in small cabinets.
Then install the next one up and repeat. A series of spacers can help, when stacking the fronts up.
It sounds harder than it is.
 
I recently refaced my kitchen cabinets, including new doors and new drawer faces.

My process went like this.

All my drawers have faces attached with either two or four screws from the inside and the through screws from the attached handles.

I drill undersized through holes for the 2 or 4 screws that will attach the face to the drawer box.

I drive the screws in from the inside so that the points of the screws protrude by about 1/8”.

I then hold the face in place on the cabinet and apply pressure which will allow the protruding screws to make marks on the hidden side of the drawer face.

I then drill appropriate size pilot holes for the screws into the drawer face.

I then remove the screws from the drawer box and drill out the hole enough so that the screws will insert easily. 

I then tighten the screws from the inside, attaching the drawer face.

If it is not perfect, I slightly enlarge the screw holes to allow for some adjustability.  The need for adjustability was infrequent.

Finally, I use a jig to place the holes in the center for the handles.  There are many jigs for this purpose.  I used Kreg’s because it was inexpensive and worked well.

Note:  The drawer slides on my cabinets allowed the drawer boxes to slide further into the cabinet making it difficult to see the markings for the pilot hole.  I made a block that slipped over the rear panel of the drawer boxes and prevented them from sliding back.  I was then able to get clearly defined markings.

Note:  I continue to be plagued by an overly aggressive spell checker which auto-corrects words.  It changed “size” (correct) to “side” (incorrect).  It also changed “slide” to “side”.

All the “corrections” made the post incomprehensible.  I think I caught all the unwanted changes.  If anything sounds like nonsense, let me know and I will correct that too.  (Of course if you think everything I wrote was nonsense, I would appreciate it if you neglected to let me know. [big grin])
 
Back
Top