Baseboard trim install setup

shulse01

Member
Joined
Aug 7, 2022
Messages
2
Hi everyone, I'm about to start a baseboard install project where no two walls are the same, hence lots of cuts. Looking for suggestions on my setup, my plan is Kapex with rails/extension wing and a roller/ballbearing stand. Each baseboard is 16 ft, and I have 600ft. Let me know if you agree on this setup, or suggest another for making the cuts. Thanks!
 
I'd probably skip the wings. Then again, a lot of times my stock has some tension in it and I'd rather it only register on the deck near the cut and merely supported by rollers or other point things. I also don't have that much space either side when working hence the faster I can move the miter saw to the ends, the better.
 
With the miter saw, getting accurate 45 degree miters is pretty much automatic. More difficult is getting measurements that are sufficiently accurate to make the miters meet up perfectly.

I don’t use a tape measure or any other measuring device for this type of application. I bring the moulding to the installation location and mark directly on the moulding the correct length. If the 16 foot length is too long for that to happen, I would cut the moulding a few inches oversize and then mark it directly onto the moulding. No tape measures or measuring devices.

I have an older Lion Miter Trimmer. The trimmer allows for precision “fine-tuning” of the length of the moulding.

Lion is unfortunately now out of business due to Chinese knockoffs. The knockoffs are frequently very good. The blades that come with them are of mixed quality. Infinity sells a good offering.

They are limited to a capacity of about 5”. I don’t remember the exact size, but the site should have that information. Note: The miter trimmer is for trimming only. You cannot cut a miter with it. I can get slices so thin that I can see through it, probably about 0.005” (more or less).

 
Baseboard, not picture frame. You'll need standing miter cuts for inside corners so you can cope.
Granted that the baseboard trim does not require the precision that picture framers require, the miter trimmer works fine for situations where you might use a shooting board plane, but for less money and greater accuracy.

I use it as I describe, and it is easier to use than shaving a bit off with a miter saw.
 
" Let me know if you agree on this setup, or suggest another for making the cuts. Thanks! "
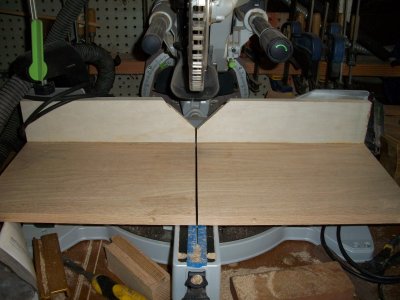
Sounds like a good set up to me. Maybe make yourself a ZCI ( zero clearance insert ) so tiny off fall pieces to get launched into your work area. I bent a blade not using one.
All the Best.
 

Attachments

  • 3F17A828-DD48-4536-904D-BA7D75B5AC06.jpeg
    3F17A828-DD48-4536-904D-BA7D75B5AC06.jpeg
    1.1 MB · Views: 12
I never liked using a roller outfield stand for trim. Usually I would hand hold trim (learned when crappy clamps or no clamps were available for miter saws) and the last thing I would want was the possibility of the extension roller helping me accidentally move a piece I was cutting. Ball bearing ones won't work due to trim dimensions - thick / thin/ round / etc.

Peter Tenfingers
One of my subs has this pivoting board outrigger he uses for an outfeed stand. I think it's a Ridgid? It works surprisingly well. Looking it up I see it's called the Flip Top Work Support. I'm not a huge fan, but I like it more than I like roller stands or bearings.

Forty (or so,) 16' sticks would be enough for me to bring a stand. For outfeed I'd probably default to a stack of Systainers on the rolling cart.
 
Thanks guys, much appreciated! I'm liking the Flip-Top work support as an easy, go-to stand for intake. Outfeed is going to the flat cart. Will post before/after photos when done.
 
Last edited:
Back
Top