Best order to laminate cabinet door/drawer faces and edges?

rmwarren

Member
Joined
Jul 11, 2010
Messages
3,063
The boss decided this fall is the time to gut and renovate our guest bath. This is a chance to take my limited cabinet making skills up a notch, and will be followed by the laundry/utility area with lots more cabinets.

The boss has parlayed 20 some years of producing live corporate events, with mega stage sets and lighting, into a business doing interior and exterior design and decorating. She is very talented and our home is a blank canvas for her to experiment with. I am just the semi-skilled labor, mostly in charge of making sure things are plumb, level and don't fall off the walls. She spent the last 2 days researching laminates, etc.

Anyway, I am looking for suggestions on the best work flow/approach to applying laminate to the faces and edge of prefinished (1 side) maple ply for the boxes, and unfinished ply for doors, drawers. She wants a very contemporary look.

I will probably use this as an excuse to buy a MFK 700 to handle trimming.

I think I will just use a water based contact cement, but my only experience is with the Home Depot stuff so please chime in with suggestions.

In the example of a drawer front or door, is the best method to laminate the front & rear, trim them and then apply the edges 2 at a time, sides the trim, followed by top/bottom and trim?

Any suggestions would be welcomed.

RMW
 
If you follow the laminating and trimming as you described you will see the core of the laminate from the front of the door.  I laminate the edges and then the front and back so that the  core is visible from the side.

Personally I have never had success with the water based contact cement.  I use the non water based and deal with the fumes.  Wilsonart brand or another from a cabinet shop.

Peter
 
The MFK700 is an outstanding tool for doing what you describe.  Unless you have a lipping planer, I suggest getting the optional 0 degree horizontal base for flush trimming the edge banding.  I always laminate edges first and then follow with the face. 

Like Peter, I am not a fan of water based contact cement and deal with the fumes as well.  I use the DAP Weldwood contact cement.  I no longer use contact cement on the edgebanding as I have found that Fastcap Speedtape holds much better and takes a lot less time. 

In addition to the MFK and Fastcap Speedtape, I highly recommend the following tools to make the job easier;
1) Virutex end trimmer (RC21)
2) J roller
3) Textured roller cover for spreading cement
 
Richard/RMW said:
The boss decided this fall is the time to gut and renovate our guest bath. This is a chance to take my limited cabinet making skills up a notch, and will be followed by the laundry/utility area with lots more cabinets.

I would do the laundry/utility area first because there will be less stress, your boss won't be as anxious about the outcome, you will most likely be working with less expensive materials and any errors will not be seen by guests.

Richard/RMW said:
Anyway, I am looking for suggestions on the best work flow/approach to applying laminate to the faces and edge of prefinished (1 side) maple ply for the boxes, and unfinished ply for doors, drawers. She wants a very contemporary look.

It can depend on the type of look you want to achieve and the pattern/texture of the laminate. I would make up some samples with the laminate the Boss picks. As a rule I usually want the larger piece protecting the smaller or narrower piece, so I do edges and then faces.
I wouldn't use plywood, as the wood grain can telegraph through higher gloss laminates.

Richard/RMW said:
I think I will just use a water based contact cement, but my only experience is with the Home Depot stuff so please chime in with suggestions.

I use 3M Water-Based Cement Adhesive #30, I haven't got any call backs. It has little or no odor. I put two coats on with a smooth roller. Keep your work space clean and use help when laying the sheet down.  Use a good "J" roller to get a good bond.

Tim
 
Awesome, thanks for the tips! So far, revised plan of attack:

  • Consider MDF for door/drawer fronts - although I know the boss will choose a subdued/matte laminate.
  • Apply/trim edges first.
  • Speedtape - love this idea but wonder if the adhesive might cut loose if I use a solvent based contact cement? Steve, sounds like this is not an issue as you use this combo? Does it work well with MDF?
  • Zero degree base makes sense with the edges applied first, great tip. I do have the OF 1010 with the edging plate, so I MAY not be able to convince myself I NEED the MFK, that's $700 for a tool I have limited use for.

The bath will come first, no choice there, so I just need to be careful and prepared to remake any panels with glaring issues. I get to gut it, make a few tweaks to the framing, rough in electrical and plumbing and then turn it over the the tile guy to do the drywall/backer board/wet bed & tile. While he is doing that I will have a couple weeks to make the vanity cabinet.

This time of year is the best time to work in my outdoor shop anyways.  [thumbs up]

Thanks for the advice, keep it coming.

RMW
 
Hi,

I would also do the edges first & then the face & back. I also have had good luck with the 3M water base contact. I would also agree with Tim about not using ply for the substrate. Most laminate manufactures won't warranty their product on ply as the expansion coefficient is too dissimilar not to mention the fact that very little of it is flat enough so it won't telegraph through. If you have a RO 150 I would try it after the banding has been trimmed to even up the laminate with the substrate. A hard pad & something around 100 or 120 grit paper will make quick work of it but keep it flat on the substrate. I like industrial particle board for laying up laminate on a M4 grade if you can find it. I find MDF too heavy & the edges are hard to get good glue adhesion to. Also vertical grade laminate has a thinner phenolic layer so shows a cleaner edge but can be a little harder to work with in large sheets. I like it for the faces & backs on doors.

My$.02 worth,
Gerry

 
  • Richard/RMW said:
    • Speedtape - love this idea but wonder if the adhesive might cut loose if I use a solvent based contact cement? Steve, sounds like this is not an issue as you use this combo? Does it work well with MDF?

    I have used this combination on 3 different projects over the past year and haven't had any problems using Speedtape with solvent based contact cement.  I haven't used it on MDF but it does a good job on particle board and plywood edges so I would think MDF would be better.
 
I would tend to agree that it's best to laminate the edges first, starting with the shortest edges, using a flush cut bit in the MFK 700 to trim each edge flush.  Then apply the top (or front), but once the top (front) has been closely trimmed, change out the flush cut bit for an Amana No-File bit to final-trim the top edge and exposed edge trim to give it a gently contoured edge that is less likely to chip than a chamfered edge.

 
Festool also sells 2mm radius and 3mm radius roundover bits for the MFK that perform the tasks Willy referenced with those Amana bits.

I really like the 3mm bit for finishing the sharp corners of plastic parts. I make stuff out of acrylic, UHMW, or HDPE occasionally.

Tom
 
If you're worried about seeing the edge use Formica ColorCore or Pionite Pan-O-Lam.

Tom
 
First off, thanks for all the input so far. I have to sort thru everything and make some decisions. We finished the demo/plumbing/electrical yesterday and turned it over to the tile guy today. Now I get to have some fun, i.e. cabinet making!  [thumbs up]

The vanity cabinet is going to be 24" high (including stone top), 20" deep and 39" wide. The boss acquired a really stunning glass vessel sink (hate to think what THAT might have cost...) and the faucet mounts to the wall. She wants a very clean, contemporary look with only one front panel and no visible hardware. The only plumbing in the cabinet is the tail piece & P-trap. So far this is what the concept looks like:

[attachthumb=#]

[attachthumb=#]

[attachthumb=#]

[attachthumb=#]

If possible, we want to avoid using legs or a toe kick, it will just hang on the wall. The left side bangs into the side wall so it has support rear + one side.

My quandry is with using particle board under the plastic laminate. I don't know how to secure the sides to the back in a way that gives me comfort it will support the total weight when hanging from the wall. The stone/sink/drawers must end up weighing 200-250#.

My preference would be to use plywood everywhere, with dominos and concealed pocket screws + some strategic blocking. I guess my questions boil down to:

1.  Is it really such a bad idea to use good VC plywood as the substrate for the laminate, even if I apply it to both sides?

2.  Assuming this is still a no-no, any suggestions on how to construct the carcase to support the weight?

Thanks as always.

RMW
 

Attachments

  • ScreenClip [7].png
    ScreenClip [7].png
    409.3 KB · Views: 349
  • ScreenClip [3].png
    ScreenClip [3].png
    655.9 KB · Views: 339
  • ScreenClip [5].png
    ScreenClip [5].png
    494 KB · Views: 348
  • ScreenClip [6].png
    ScreenClip [6].png
    423.5 KB · Views: 253
Richard/RMW said:
The vanity cabinet is going to be 24" high (including stone top), 20" deep and 39" wide. The boss acquired a really stunning glass vessel sink (hate to think what THAT might have cost...) and the faucet mounts to the wall. She wants a very clean, contemporary look with only one front panel and no visible hardware.

That drawer front is going to be unwieldy. Try to at least divide that large front in half horizontally. Reaching down 24" into the bottom drawers is gonna be a killer...

Richard/RMW said:
1.  Is it really such a bad idea to use good VC plywood as the substrate for the laminate, even if I apply it to both sides?

You can use a MDF venered ply if you want to use a plywood.

Richard/RMW said:
2.  Assuming this is still a no-no, any suggestions on how to construct the carcase to support the weight?

Rabbet and Dado glue your joints and the back on. Use a french cleat attached along the top of the back and either a wood cleat on the bottom that takes up some of the weight or if you are really worried use a steel "L" bracket under the base.  Jon Hilgenberg's thread shows how he did it.

Tim
 
Install a piece of 3"x3" angle iron to the studs to support the unit from the bottom. If you turn the leg of the angle up the vanity will cover the opening in the drywall when you place it. French cleat with a few screws through a screw rail along the top should keep it from rolling off the wall.

I would use a plywood core with mdf surface for the laminate. I hate particleboard cabinets.

Tom

What Tim said.
 
Tim/Tom, thanks, that makes it easy. Will document my progress.

Surprisingly the deep drawer is not that bad, we have a similar cabinet in another bathroom. The drawer is used only for bulk stuff like TP and shampoo bottles, not too had to reach.

Thanks again!

RMW
 
Think the interior layout of the deep drawer through. I'd be inclined to add a sliding shelf/tray to it. Tall stuff under the hidden drawer, when the large drawer is pullout, you can slide a tray(s) that holds smaller items from left to right. I would also double stack that hidden drawer, very few items in a bath room are tall. A roll of toilet paper on end only needs 5". Then again I try to make every bit of volume useable.

Double stacked drawers in this picture.

Tom
 

Attachments

  • IMG_0326.jpg
    IMG_0326.jpg
    1.4 MB · Views: 511
Progress Report:

Ended up using 3/4 primed MDO from Fess Hall, Fastcap's Speed Tape and Weldwood contact cement. I tried the 3M waterbased ($44/QT!) but was not getting consistent results with it.

The speed tape worked great, I am really impressed with it. I also picked up up a full complement of Fastcap's veneer/laminate tools including the roller and cutters. The roller is a lot easier to use than my old J-roller. 

[attachthumb=#]

[attachthumb=#]

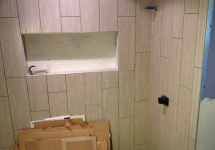
Tile work is progressing nicely, the guy we hired is awesome.

[attachthumb=#]

Overall the results are good considering that I have not worked with laminate in years and never was very good with it even then.

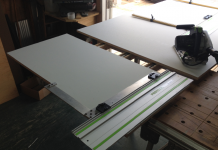
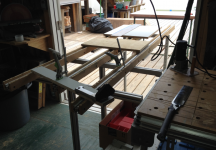
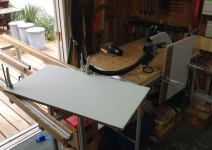
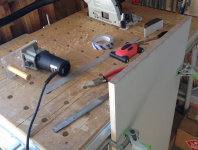
I have also been playing with the layout of the extensions on my MFT, since the weather was good I extended them out the shop doors in an L configuration, worked out nicely to keep the MFT clear for cutting and other operations like Domino'ing the cabinet sides and bottom. I can even feed a full sheet of plywood in and cut parts as needed.

[attachthumb=#]

[attachthumb=#]

[attachthumb=#]

Thanks again for all the advice. 
 

Attachments

  • Cross Cutting.png
    Cross Cutting.png
    896.5 KB · Views: 344
  • MFT Extensions.png
    MFT Extensions.png
    1.1 MB · Views: 324
  • Domino.png
    Domino.png
    1.1 MB · Views: 492
  • Tile.png
    Tile.png
    1.2 MB · Views: 414
  • Cabinet.png
    Cabinet.png
    1.4 MB · Views: 697
  • Edgeband.png
    Edgeband.png
    1.1 MB · Views: 480
Richard/RMW said:
Progress Report:
Ended up using 3/4 primed MDO from Fess Hall, Fastcap's Speed Tape and Weldwood contact cement.
Looks goood!

Richard/RMW said:
I tried the 3M waterbased ($44/QT!) but was not getting consistent results with it.

What was the problem? Application or adhesion?

Nice pink slippers BTW! [big grin]

Tim
 
Tim Raleigh said:
Richard/RMW said:
Progress Report:
Ended up using 3/4 primed MDO from Fess Hall, Fastcap's Speed Tape and Weldwood contact cement.
Looks goood!

Richard/RMW said:
I tried the 3M waterbased ($44/QT!) but was not getting consistent results with it.

What was the problem? Application or adhesion?

Nice pink slippers BTW! [big grin]

Tim

Thanks Tim, they are steel-toed fuzzy slippers...

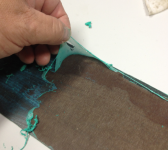
I found the adhesive to be finicky, in one case it rolled right off the laminate, in another it was taking forever to dry and then would not grab once it did. In fairness the day was warm then became humid with temp dropping recommended 65 degree application temp when the issues happened.

[attachthumb=#]

I chalk it up to operator error, I guess the Weldwood is more idiot-proof.

RMW
 

Attachments

  • ScreenClip.png
    ScreenClip.png
    489.7 KB · Views: 232
Richard/RMW said:
I found the adhesive to be finicky, in one case it rolled right off the laminate, in another it was taking forever to dry and then would not grab once it did.

Hmmm, interesting. It could be the temperature. Weird.
Tim
 
Progress report:

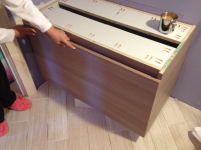
Tile guy is finished, he did an awesome job. Drywall taped. Installed the vanity today, top goes in Tuesday. Shower doors one week out. Should be ready for Thanksgiving.

meryjeha.jpg


3azetu3e.jpg


2ymegu4a.jpg


Learned a lot about laminate from this, thanks to all for the advice. Fastcap speedtape was a great find.

RMW
 
Back
Top