As some of you are aware, I'm building a kitchen in what was once my dining room. This is a lot of firsts for me - my first house, my first full set of cabinets, my first time making use of the LR-32, etc. Never lacking for hubris, I'm also attempting to make the cabinets mostly in the same 15 x 13 room that I'm working in.
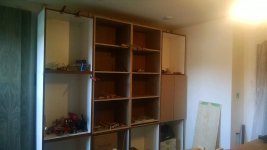
Perhaps the most complex piece of the remodel is that I'm building what amounts to an 8' x 8' wall of cabinets consisting of stacked frameless boxes, with a middle section that will be open shelving with a face frame. It isn't that it is actually complex, but the clearances are a challenge.
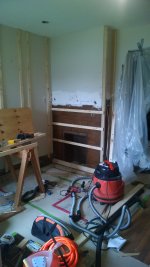
Here is the fireplace that had brick hard enough to break a number of bosch bits:
View attachment 3
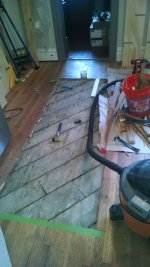
And a section of flooring that needed to go:
View attachment 1
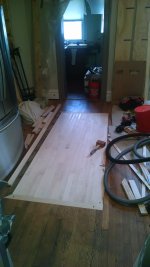
Patched with some maple, and walnut plugs in the corners.
View attachment 2
Yes, I did cut the flooring out with my TS55. And yes, it was as clean a job as you might imagine.
[big grin]
More to come.
-Adam
Perhaps the most complex piece of the remodel is that I'm building what amounts to an 8' x 8' wall of cabinets consisting of stacked frameless boxes, with a middle section that will be open shelving with a face frame. It isn't that it is actually complex, but the clearances are a challenge.
Here is the fireplace that had brick hard enough to break a number of bosch bits:
View attachment 3
And a section of flooring that needed to go:
View attachment 1
Patched with some maple, and walnut plugs in the corners.
View attachment 2
Yes, I did cut the flooring out with my TS55. And yes, it was as clean a job as you might imagine.
[big grin]
More to come.
-Adam