Cabinet construction confirmat screws vs staples

This is kind of running off of the original topic, but we almost always use ladder style toekicks. There are a few exceptions, but they are rare. The typical cabinets are CNC machined, edgebanded, doweled on a computerized machine, from a scan of a label applied as it comes from the CNC. They are pressed together, again huge machine, then sent to the next station for completion.
Each of these operations is done by a different person, until it gets to assembly. There are 2 of the big presses, so 2 guys there, and 2 that do the final up-fit. The speed of the glue is the choke-point. Each cabinet has to sit in the press for at least 5 minutes. In general though, that's as long as it takes to staple in the back, screw the nailer to the rear stretcher, and assemble the next one anyway.
Most of the time, cabinets are sent individually. This is for transportation needs and elevator sizing requirements. There are exceptions there too. More complex shapes by-pass some of this and come directly to me. Things have become so specialized over the years that things that would have been done by the regular assembly guys, when I was one of them, aren't done over there anymore.
The ladder type kicks are far easier/quicker to install than the integral kick style. Once the platform is in place, shimmed/level, the boxes just slide on one at a time. You attach them to each other and then a few to hold the whole thing to the wall. Trying to get shims under the back of the sides on integral type cabinets is a pain.
Then there is the waste factor. You can get 6 kitchen height cabinet sides from a single sheet when the toekick height is not part of the equation.
 
Not specifically mentioned, but the ladder base is easier to level in my experience. 

Adjustable feet, you would think, would be easier to level, but I’ll be damned if I can reach all the feet to adjust them.

I’ve made the ladder bases from 2” x 4” lumber and from 3/4” plywood.  I prefer the plywood.  I’m not sure which will hold a greater load though.

About the staples, it seems that there is a consensus that staples are not the way to go.  Is that correct?

I always mill a slot to accept the back panel.  No one else is doing that?
 
[member=68525]usernumber1[/member]

I do not know why the sides are run the way most run them. It is a simple math function to get the proper hieght gable.

The center strechers make a big difference in the strength of the box to oppose racking. If we have a trash pullout with a drawer above it that area gets a full deck.

I would not run the uppers that close to the ceiling due to most ceilings are not as flat as you think they are. Most of the homes we work on have 10' ceilings, 120-54=66. We would need to make the uppers 66" tall to get the top against the ceiling. You'd need a 72" ladder to reach the upper shelf....Woodferret nailed all the other reasons why.

The side panels for built in refrigerators go to the floor. The toe area on the refigerator is far different than the cabinet toe area. Bringing the panels to the floor allows the toe area to be treated as an individual space.

[member=74278]Packard[/member]

We have sent out loose stiles in situations where the cabinet goes in an alcove area with room doors on both sides that have been trimmed. We fit them in the shop, remove them and tape them to the cabinet. The installer needs to get the box installed on the centerline, scribe the stiles and reinstall them. Some installers have no problem with this others well....

We don't glue our drawer boxes....

All of our cabinets get ladder toe boxes. On face frame cabinets where the gables go to the floor the front "sub kick" is installed, its height is 1/8" less than "to the floor". Depenging on the length of the cabinet smallish toe boxes are sent out to be placed along the wall located under each internal gable. Really simplifies the install.

As to the staples, we use them as a "third hand".

Tom

 
tjbnwi said:
[member=68525]usernumber1[/member]

As to the staples, we use them as a "third hand".

That was what attracted me to Bent's assembly method for DIY in a small shop, along with the progression of rotating the carcass and useding the work surface to align everything. Haven't tried it yet but it looks quick and easy.

I may be underestimating the need for structural strength in fasteners, but seems to me once the boxes are attached to each other and the walls, the difference in holding power of Spax versus Confirmat become moot. Am I mistaken?

RMW
 
Packard said:
"Not specifically mentioned, but the ladder base is easier to level in my experience. 

Adjustable feet, you would think, would be easier to level, but I’ll be damned if I can reach all the feet to adjust them."

I’ve made the ladder bases from 2” x 4” lumber and from 3/4” plywood.  I prefer the plywood.  I’m not sure which will hold a greater load though."

I agree, we use ply ladder kicks and make the front and back of the kick about 1/4" taller than the cross members. We find against the wall is almost always the high point, and we can zip a bit off the back and save some shimming on the front. I think the ply has more than enough strength for kicks and is more stable than solid. A friend gave me a 5 gallon bucket full of shims he cut from 2x lumber and that has been what we have used since for levelling in kicks. We cut them on the bandsaw.

About the staples, it seems that there is a consensus that staples are not the way to go.  Is that correct?

I knew a company that used nothing but staples, but he was selling to low end builders and the cost was the main concern. We always used dowels and confirmats.

I always mill a slot to accept the back panel.  No one else is doing that?

We use 5/8 material for gables and backs and rabbet the back down to  1/4" and cut a slot to insert it. We glue it in with PL premium, then we know the back is square and will stay that way. Also, this gives you more options when it comes to fastening cabinets to the wall and back to back for an island or peninsula.
 

I may be underestimating the need for structural strength in fasteners, but seems to me once the boxes are attached to each other and the walls, the difference in holding power of Spax versus Confirmat become moot. Am I mistaken?

RMW


If you build and install yourself, and if you not only level the base, but also check to confirm that cabinet itself is square and plumb and the installation does not look like the leaning tower of Pizza, then you are correct.

But if you hand it off to a third party to do the installation then the installer might say,”Listen lady, I don’t know where you got this wobbly pile of junk cabinets from, but I won’t be responsible for anything the minute I leave the house.  All my work is 100% guaranteed until used.”

 
Copied from Oldwoods post above;

“I always mill a slot to accept the back panel.  No one else is doing that?”

We use 3/4” for the gables, backs are 1/2” slid into a groove.

Tom
 
Tom said;
"We use 3/4” for the gables, backs are 1/2” slid into a groove."

On the uppers you say you use a french cleat, do you have a stretcher behind the back on the base cabinets?

I do own a CNC machine, I just don’t have one——yet.

What brand of CNC are you waiting for?

It looks like you can make good use of a CNC when you are cutting 200 sheets for a job!

Beautiful kitchen you are doing, I love the all wood interiors. 
 
Oldwood said:
Tom said;
"We use 3/4” for the gables, backs are 1/2” slid into a groove."

On the uppers you say you use a french cleat, do you have a stretcher behind the back on the base cabinets?

I do own a CNC machine, I just don’t have one——yet.

What brand of CNC are you waiting for?

It looks like you can make good use of a CNC when you are cutting 200 sheets for a job!

Beautiful kitchen you are doing, I love the all wood interiors.

We do not install a stretcher behind the back on the base cabinets. The installer needs to shim at the studs. A lot of wonky walls around here.

HolzHer 5x12 Lift, it’s already 6 months late.

Tom
 
"A lot of wonky walls around here."

Yes, that has been my experience also.

"HolzHer 5x12 Lift, it’s already 6 months late."

That would be more than a little frustrating when you are busy and could make use of it.

We had a Thermwood and used their Ecabinets program for cabinets and Vectric Aspire for the other stuff.

It is a game changer when the whole kitchen gets cut and drilled for hardware in an afternoon, ready for edgebanding and assembly.

It took a while to get our CNC library of cabinets set up the way we wanted, but it worked great when it once that was done.

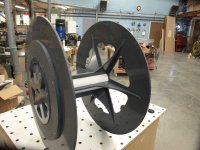
I found the Aspire software intuitive, once you get going with it. Here is a crazy job we designed and built for a local manufacture of solar electric fencers. They were all PVC in order to be non conductive as they would reel up the wire while it was live.

It looks like you will keep your router busy cutting cabinets.

I hope it arrives soon. I look forward to seeing what you get up to with it.


Attachments

  • completed reel.JPG
    completed reel.JPG
    481.3 KB · Views: 147
  • cut parts.JPG
    cut parts.JPG
    734.7 KB · Views: 130
[member=7143]Oldwood[/member]

I have to figure out the best use of the machine seeing as most of our builds are face frame. I know it will cut all the sides and backs, drill shelf pin holes, groove the sides. Without flipping the panel it will do only one side of the tongue we use. Still working out in my head how I can have it do lock miters.

We run Cabinet Vision software for the cabinets, CV will install a post on the machine. All the odd ball stuff I design in Fusion 360. I can also write NC code (G and M) directly on the machines screen. Holzher has a built in software that I'll figure out.

Tom
 
We tried doing the flip ops but could not maintain the accuracy so worked out other ways to some of the operations.

I have not used Fusion 360, but a friend uses it and looks like a good program. He has used Aspire but likes Fusion 360 better for what he does.

I am sure in no time you will find numerous ways to work it into your daily operations.

 
Packard said:
Not specifically mentioned, but the ladder base is easier to level in my experience. 

Adjustable feet, you would think, would be easier to level, but I’ll be damned if I can reach all the feet to adjust them.

I’ve made the ladder bases from 2” x 4” lumber and from 3/4” plywood.  I prefer the plywood.  I’m not sure which will hold a greater load though.

About the staples, it seems that there is a consensus that staples are not the way to go.  Is that correct?

I always mill a slot to accept the back panel.  No one else is doing that?

Our are done with 3/4" ply, usually covered by rubber base on-site, by others. Sometimes people want matching (or contrasting) laminate, usually metal to cover it.
Backs are an "it depends", mostly 1/4" in a groove, but there are variations. Sometimes 1/2" also in a groove, once in a while full 3/4" in a rabbet.
The thin backs always get a 3/4" nailer behind the back, angled staples and hot-melt.
 
tjbnwi said:
For center stretchers, the good ol’ pocket screws.

[attachimg=8]

Tom

[member=4105]tjbnwi[/member]  Howdy Tom. Hope you are doing well.

Just saw this post and seem to remember your guy using a Kreg pocket hole machine.  Did you upgrade to a Castle, or I am just demonstrating my less than perfect memory?

I'm using the Kreg for my pocket holes but would enjoy having something that presented the screw at a lower angle like the Castle offerings do.
 
thudchkr said:
tjbnwi said:
For center stretchers, the good ol’ pocket screws.

[attachimg=8]

Tom

[member=4105]tjbnwi[/member]  Howdy Tom. Hope you are doing well.

Just saw this post and seem to remember your guy using a Kreg pocket hole machine.  Did you upgrade to a Castle, or I am just demonstrating my less than perfect memory?

I'm using the Kreg for my pocket holes but would enjoy having something that presented the screw at a lower angle like the Castle offerings do.

Doing well, thanks for asking. How are you?

The Kreg Foreman had gotten to be too slow for our process. Still have it just incase.

Upgraded to the TSM-22 in May of 21.

[attachimg=2]

Tom


Attachments

  • 398CFC6D-643F-4272-8430-23F871CB5642.jpeg
    398CFC6D-643F-4272-8430-23F871CB5642.jpeg
    79.8 KB · Views: 144
  • 3B47BF1D-F601-49F3-9732-3E0F67EC59E1.jpeg
    3B47BF1D-F601-49F3-9732-3E0F67EC59E1.jpeg
    94.1 KB · Views: 207
tjbnwi said:
Doing well, thanks for asking. How are you?

The Kreg Foreman had gotten to be too slow for our process. Still have it just incase.

Upgraded to the TSM-22 in May of 21.

Tom

Had some work done on both rotator cuffs but doing well.

That Castle looks like a good fit for your operation. Are you using their screws as well?  If so, have you gone to using the star drive screws? The ability of a square driver to hold the screw in place is about the only advantage it has on the star drive in my estimation.

Could never justify something like that for my operations but the CSM-12 would be nice and even the 110 look appealing.
 
thudchkr said:
tjbnwi said:
Doing well, thanks for asking. How are you?

The Kreg Foreman had gotten to be too slow for our process. Still have it just incase.

Upgraded to the TSM-22 in May of 21.

Tom

Had some work done on both rotator cuffs but doing well.

That Castle looks like a good fit for your operation. Are you using their screws as well?  If so, have you gone to using the star drive screws? The ability of a square driver to hold the screw in place is about the only advantage it has on the star drive in my estimation.

Could never justify something like that for my operations but the CSM-12 would be nice and even the 110 look appealing.

I do have the sample box of Castle screws from when I bought the machine. They are the Hi-Low thread which is no longer available. I recall the reason we're not using their screws are the driver bits. I could not find a 6" long bit with Centrotech. I believe the longest Festool was 4".

I know Justin (Chicago Carpenter on IG) uses the CSM-12 and the Castle screws. He's the one who convinced me to go with Castle. 

Tom
 
Back
Top