Cabinet door spraying sequence using Kem Aqua Plus

bill01

Member
Joined
Jan 15, 2019
Messages
3
1st time poster here.  Been reading this site.  Great site and great info! 

I need some help troubleshooting a problem I'm having when spraying raised panel cabinet doors using gray tinted Kem Aqua plus (Medium Rubbed).  The problem I'm having is maybe what "Tom" referred to in a previous post as wet on wet spraying causing "acne looking" blemishes on raised panel cabinet doors.  I'm trying to figure out what the preferred sequence is for spraying the raised panel doors; ie. should I spray the outside edge, then the top edges, then the inside where the panel meets the stiles and rails, then the edge of the raised panel, and then the panel itself, or should I spray the area where the panel meets the stiles and rails and then set the doors aside to dry before spraying the rest of the door and panel.

I'm using a fuji Q5 with a T70 bottom cup gun.  I've sprayed using both a 1.0 and 1.3 air cap set.  The problem seems to be a little worse using the 1.0 however I changed the spray sequence trying to eliminate the problem so the cap size differences may not be really associated with the differing cap sizes.  Additionally the general finish appearance is very good with little to no noticeable orange peel.  If I could eliminate the "acne" the finish would be near perfect.  The "acne" spots almost disappear when the panels dry but I would like to eliminate them completely.

A little additional info, I sprayed the back of the doors which are essentially a flat panel, and I did not get any of the "acne spots" in the finish.  Therefore I'm guessing the problem with the raised panels is related to the way I'm spraying them.

All suggestions and help would be greatly appreciated. 

Bill

 
Spray the edges when you spray the back, doing this allows you to spray on just the face of the front.

I use a 0.8 for clears (your gray was mixed in a clear) in the T-70.

Tom
 
Tom, appreciate the info on sides.

How about the door face.  I'm shooting the doors on the "flat".  Should I shoot the door all at one time, let it dry and spray it several times or should I shoot the parts that are hard to get covered ( the sloped section where the panel meets the rails and stiles) first and then reshoot the entire door.  When I shoot the hard to cover parts first and then immediately shoot the flat parts of the door ( panel and flat portions of rails and stiles) that's where I think I'm getting the wet on wet problem showing up as the "acne looking" spots. 

Tom, what is your sequence for shooting a raised panel door?  Definitely appreciate your time and help!

Bill
 
bill01 said:
Tom, appreciate the info on sides.

How about the door face.  I'm shooting the doors on the "flat".  Should I shoot the door all at one time, let it dry and spray it several times or should I shoot the parts that are hard to get covered ( the sloped section where the panel meets the rails and stiles) first and then reshoot the entire door.  When I shoot the hard to cover parts first and then immediately shoot the flat parts of the door ( panel and flat portions of rails and stiles) that's where I think I'm getting the wet on wet problem showing up as the "acne looking" spots. 

Tom, what is your sequence for shooting a raised panel door?  Definitely appreciate your time and help!

Bill

I shoot the back and the edges this allows me to shoot the face without worrying about the edge

The acne looking spots are called micro foaming.

I shoot the face in one coat.

I start by shooting the stile farthest from me, the gun is angled to get the inside edge of the stile and the face, the edge is my target, the face may be slightly light, next step is to angle the towards the cove of the raised panel, in this position I'll get the cove and redcoat the title, as you make your passes you'll learn to pivot the gun together the coves and inside edge of the rails, next pass is parallel to the panel, pivoting as needed at the rail, make the parallel passes, as you approach the nearest stile, angle the gun to get the inside edge of the stile, adjust angle to get the cove, do a final pass over thistle---done.

Doing at as above you keep the gun parallel to the faces being sprayed, parallel does not mean you have to stay vertical or horizontal.

Tom
 
Tom, thanks for explanation

So do you have to spray the door more than once or does one "coat" cover sufficiently.  I'm shooting the medium gray color over the "white" kem aqua plus surfacer.  Would shooting the door like you suggest cover the white in one coat or would a second application be needed.

Also what can I do to prevent the micro foaming.  When I shot the backs I didn't have a problem with the micro foaming but also I was pretty much able to shoot the entire door without having to shoot the detailed areas separately.  I did shoot the outside edges first though.

 
bill01 said:
Tom, thanks for explanation

So do you have to spray the door more than once or does one "coat" cover sufficiently.  I'm shooting the medium gray color over the "white" kem aqua plus surfacer.  Would shooting the door like you suggest cover the white in one coat or would a second application be needed.

Also what can I do to prevent the micro foaming.  When I shot the backs I didn't have a problem with the micro foaming but also I was pretty much able to shoot the entire door without having to shoot the detailed areas separately.  I did shoot the outside edges first though.

My basic finish is 2 coats Surfacer (we're now using Gen II) and 2 top coats. It can be done with one, I just prefer the protection of 2.

Practice with the method I suggested.

Tom

 
Tom - we have been using KA+ surfacer for a few years.  I am curious why you switched to Gen II.  Slower dry/recoat times than KA+, so you must have seen other improvements.

Mark
 
[member=15240]GadgetGuy[/member],

The store manager called me and asked if I'd try the new product. I was the only one they were stocking Surfacer for. Had to tell him I tried Gen II over a year ago when it was first rolled out, but I'd give it another try. He sent me a couple of 5's at no cost. He did tell me if I was not happy with the Gen II he'd still stock Surfacer.

What I found----Slightly heavier body, fills somewhere between Surfacer and 65P. Things dry a lot faster in Colorado Springs than they do in Northwest Indiana, someties a little slower dry helps. Sanding is the same between the two products.

Tomorrow I'll start the finish process on 97 doors and drawer faces, the added 15 minutes of dry time does not affect me much.

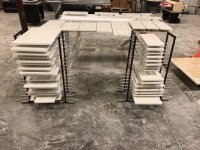
I am set up to shoot both sides at the same time using the Door Rack Painter system. Surfacer/Gen II are the only products done this way. Topcoats are one side at a time even though they're dried on the same racks.

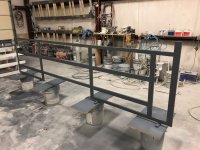
One thing we did find is the Gen II with 20 oz (5 gallon pail) of black colorant makes a really nice blue/gray. The faceframe is the tinted Gen II.

Tom
 

Attachments

  • IMG_1713.jpg
    IMG_1713.jpg
    336.9 KB · Views: 713
  • IMG_0864.jpg
    IMG_0864.jpg
    377.4 KB · Views: 697
Back
Top