Cascamite Question

Crazyraceguy

Member
Joined
Oct 16, 2015
Messages
4,908
This stuff is completely unknown to me, but I understand it is quite common in Europe.
My questions are about mixing (thickness) and drying time. I am looking for a thicker glue for a specific application, but I don't want it to dry faster too. The thick version of Titebond is a quicker drying formula.
If I would mix the Cascamite thicker, does it dry faster? How long does it take to harden? Is there another alternative that I am unaware of?
 
Can't specifically answer your question, but I thought Cascamite went out of business in the 80's ?

That said, it was a resin glue and doesn't exhibit the same properties as PVA - Titebond, which dry/cure by evaporation of the water. The former dries via chemical reaction.
 
[member=58857]Crazyraceguy[/member] don’t know what your use age might be but you might want to take a look at Loctite 9460 epoxy. Used a lot on the home built aircraft group. Has a 50 minute open time and is thicker.

Rob
 
No, it is still very much in use. However, as far as I know, mainly in the UK. Here in mainland Europe I see it only once in a while. The company behind it (Polyvine) has had a bumpy ride quality-wise in the recent past. It even got so bad that people stopped using it. However, it seems that they have been able to resolve their problems some time ago. I have read quite a few posts over the last year of people who were using it (again) without complaints.

I remember reading an elaborate discussion regarding Cascamite on the ukworkshop.co.uk forum recently. Can't help you with a link at the moment. Sorry for that.

I know Axminster does have it in their webshop.
 
Not sure of your exact need.  Lee Valley Cabinetmakers glue is a PVA that is thicker than Titebond Orig. , II, and III. But not as thick as the Titebond Thick & Quick.  I really like the Lee Valley as my all purpose wood glue.

According to the sites spec info ---

      TB Thick Open Time 3 - 5 minutes ,  Total Time 10 - 15, Viscosity 35,000
   
      TB II OT 3 - 5, TT 1- - 15, Vs 4,000

      Lee Valley only gives one time frame 15 - 20, Vs 6,000

  I know that the viscosity scale is not a straight progression on the numbers vs the actual observed thickness. As far as times go I have not found the LV glue to be any faster than TBII.  It is definitely thicker but still completely workable.

  What are you glueing?

Seth


Crazyraceguy said:
This stuff is completely unknown to me, but I understand it is quite common in Europe.
It is a urea formaldehyde based glue. You can buy a similar products such as Pro Glue or Unibond 800 in NA which are sold as dry and or premixed. These are usually used for veneering because they form a very ridged (not flexible) bond.

Crazyraceguy said:
My questions are about mixing (thickness) and drying time. I am looking for a thicker glue for a specific application, but I don't want it to dry faster too. The thick version of Titebond is a quicker drying formula.
If I would mix the Cascamite thicker, does it dry faster? How long does it take to harden? Is there another alternative that I am unaware of?
These glues usually take 4-6 hours to cure in a veneer bag. Because they cure through a chemical reaction are (hydroscopic) they do not require exposure to air and are water proof. The directions for mixing with water are reasonably specific (by weight or measure) and altering it too much either way affects bonding.
Alternatively, you could use an epoxy with the slow hardener and add filler to give it some additional viscosity.
Tim

SRSemenza said:
Lee Valley Cabinetmakers glue is a PVA that is thicker than Titebond Orig. , II, and III. But not as thick as the Titebond Thick & Quick.  I really like the Lee Valley as my all purpose wood glue.
Seth

Agreed, a great all round use glue. Lee Valley Cabinetmakers glue is much better than Titebond Org. and II. It is not waterproof so I would use Titebond III or a polyurethane based glue like Gorilla glue or similar. Polyurethane based glues are a pain to clean up though.
 
As some of you may have seen in my posts in the member projects area, I have had a run of display units that get miterfolded. Some of these have quite a few pieces. Getting the glue applied to all of the places required, folded, and clamped/secured before the glue starts to set is getting more challenging.
The point of thicker is to keep t from running down the vertical surfaces before I can get it all wrapped up. Slower is of course to allow for more clamping time.
I really don't want to mess with epoxy, especially having to go another step of adding a thickener, mostly because of the mess. There is also the problem of potential clean-up. If any epoxy got under the tape, it could be a disaster to remove. The non-waterproof properties of regular wood glue is helpful there.
I'm doing ok with these now, but there are several more to do already in the que, with the potential for more over the spring/summer. The heat may make this more difficult, just trying to get ahead of it.

As far as Cascamite itself, I have seen some Youtube cabinet makers use it. The London Craftsman and Kingpost Timberworks (New Zealand) have both shown it for sure, but they don't really go into detail. I guess because they expect it to be common enough not to need it?
Anyway, accessing it is easy, Amazon and it's there next day. In fact, I got some today, just to test.

Something really thick, like construction adhesive (liquid nails) would probably work fine, but my boss hates the stuff. Apparently there were some catastrophic failures from it, several years ago? So, that's a no-go.
 
Some of the problems you encounter (running down, etc.) can be avoided by changing your glue up strategy. For instance: miters are often end grain. Do a first application, fairly thin, to all of the surfaces. Once you have applied glue to everything come back to them in the same sequence and do a second application with a controlled amount of glue. This really helps, I find.
 
We  use  Cascamite  on a regular basis.
Have mixed  gallons  of  the stuff. 
We  mix  it  to a creamy  consistency. To thick  and  its  slower  to spread.

I cant  say  if  it  behaves    like  cement.  The  more  water  you add  the weaker  it becomes.
But I expect so.
 
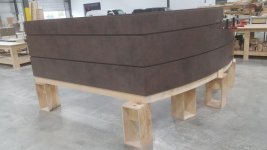
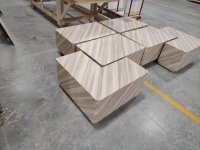
In case you haven't seen them in my other posts, this is what I am gluing.
The Zeta won't work, because the alignment requirements are just too good. Getting glue on all of these surfaces (in the miters, on all of the edges around the perimeter, and on the vertical ribs inside) then wrapping and taping the last joint, finally clamping long enough to drive in some pocket screws, is quite a speed contest. This is all done in one-shot, with pieces that are all pre-laminated. That way, once it is screwed, all I have to do is plug/sand the screw holes and laminate the top.
The challenge is that as it gets warmer in the spring/summer, this will get harder to do before the glue sets up, and it's not like another person could really help. They would be as much "in the way" as helping.

These are all separate units. The 4 clustered in the back are free-standing (actually on wheels) and the L shapes are to be attached to the ends of the main display assembly.
 

Attachments

  • chester display.jpg
    chester display.jpg
    337 KB · Views: 184
Crazyraceguy said:
This stuff is completely unknown to me, but I understand it is quite common in Europe.
My questions are about mixing (thickness) and drying time. I am looking for a thicker glue for a specific application, but I don't want it to dry faster too. The thick version of Titebond is a quicker drying formula.
If I would mix the Cascamite thicker, does it dry faster? How long does it take to harden? Is there another alternative that I am unaware of?

Dont know if the thickness affects the drying time. I like Cascamite.
Good stuff.
It does take a while to dry though.
I used to leave it overnight.
 
Crazyraceguy said:
In case you haven't seen them in my other posts, this is what I am gluing.

Thanks, I did look at your posts but didn't see these. They look good.

Crazyraceguy said:
The Zeta won't work, because the alignment requirements are just too good.

Do you mean the Zeta is too precise or your miters need to be? Just curious as to process, not questioning your approach.

Crazyraceguy said:
Getting glue on all of these surfaces (in the miters, on all of the edges around the perimeter, and on the vertical ribs inside) then wrapping and taping the last joint, finally clamping long enough to drive in some pocket screws, is quite a speed contest. This is all done in one-shot, with pieces that are all pre-laminated. That way, once it is screwed, all I have to do is plug/sand the screw holes and laminate the top.

There is a lot of folds to glue at once there, curious as to why you need to do all these steps all at once? Can't you add the vertical ribs after the glue up? What is the veneer substrate - MDF?

Crazyraceguy said:
The challenge is that as it gets warmer in the spring/summer, this will get harder to do before the glue sets up, and it's not like another person could really help. They would be as much "in the way" as helping.

Understood.
Tim
 
The miters are dead-on. They have to be, because this is done with laminate that is already applied to the substrate, so there is no chance of "fixing" anything. It has to be perfect when it gets un-taped. All I can really do is clean up any glue that might get forced up under the tape. This is kind of the advantage of normal wood glue, water takes it right off.

I haven't tried the Zeta on this, but my guess is that actually getting them to go together coming from an angle, might not go so well? Then I would have to deal with getting them out of the way. I have run into this with Dominos back in the day as part of the learning curve. Order of operations matters.

As far as "all at once". It just works better that way. The pics I just posted are from the 3rd set of these. There are differences in each location, but the basic look is the same. I have done these a few different ways, as well as having done many other miter-fold jobs over the years. Different sized panels get different methods. These are fairly small (36" x 24") so getting them all tight is the priority. Taping the pieces when they are loose works the best for this. I have tried doing just part of it, but getting the other sections added and tight is a lot tougher. It seems to work best when the whole thing can "float" around the core until the clamping pressure is applied. Pocket screws hold it once clamped, so I can turn it over and take care of the bottom. The thing is totally solid on the top and bottom, with internal ribs holding them apart at the right height. The whole skin wraps around. I take some pics of the next set in progress.
Big panels, like these, get glued together first then attached to the base.
 

Attachments

  • Hocking Hills4.jpg
    Hocking Hills4.jpg
    154.5 KB · Views: 160
Back
Top