Changing out housing on RO 150 EBQ

grobkuschelig

Member
Joined
Dec 27, 2016
Messages
783
Hi dear FOG,

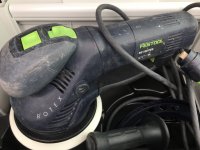
I was lucky to find a used RO150 at a „garage sale/shop liquidation“.

I usually like my tools new and with warranty, but I wanted to have the big Rotex for some time now and the deal was just too sweet to pass up.

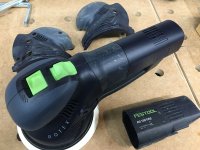
To fulfill my craving for a „new“ tool, I am thinking about replacing the plastic parts on the Rotex.
I got the part numbers out of EKAT and it is not a big investment.

My only question is:
Is it possible to rip the Rotex apart and change the plastic parts?
Or will I end up with a huge mess and a broken tool?

Thanks for any tips!

Sent from my iPad using Tapatalk Pro
 
[member=11933]ScoFF[/member] just did this on his. This should give him an alert and hopefully he can chime in.

Ron
 
Not trying rain on your parade, but tools are not trophies they are tools.  Each bump and scrape tells a story.  They are tools,  enjoy them and use them!!
 
I prettied up my trophy :)
I was sent a left and right side housing and the rear part. Here's a before and after and it was only like 3-4 screws. As simple as changing a battery on a kids toy.
I wasn't sent the middle piece but she said it was more difficult to replace.

View attachment 1

View attachment 2
 

Attachments

  • IMG_7007.JPG
    IMG_7007.JPG
    2.1 MB · Views: 215
  • IMG_7331.JPG
    IMG_7331.JPG
    2.2 MB · Views: 233
Thanks @ScoFF !

That’s good to hear!
I already saw that the middle part houses parts of the electronics and might make it really fiddly to change that.

Did you also change some of the buttons?

It definitely looks a lot better, especially the handle. That’s what I was looking for. :)

Sent from my iPad using Tapatalk Pro
 
T. Ernsberger said:
Not trying rain on your parade, but tools are not trophies they are tools.  Each bump and scrape tells a story.  They are tools,  enjoy them and use them!!

Your watering my plants... ;)

I think it is more that this machine has seen some/a lot of use and I‘d really like to start from scratch and make my own dents and bumps.
Also, I do not mind scratches or marks, but I still prefer keeping my tools in a very good condition.

My grandfather was a machinist and taught me to take care of my tools and workplace and make it a habit to clean tools after use.
It makes work more enjoyable for me, when I‘m stating out with a clean tool and I also think it makes your tools hold up longer.

Might just be my OCD, though. ;)

Sent from my iPad using Tapatalk Pro
 
grobkuschelig said:
My grandfather was a machinist and taught me to take care of my tools and workplace and make it a habit to clean tools after use.
It makes work more enjoyable for me, when I‘m stating out with a clean tool and I also think it makes your tools hold up longer.

Might just be my OCD, though. ;)
No, just common sense when working with your own tools.
And a good approach (game theory wise) when working in a team...
 
I didn't replace the buttons. Maybe sometime if it bothers me.

grobkuschelig said:
T. Ernsberger said:
Not trying rain on your parade, but tools are not trophies they are tools.  Each bump and scrape tells a story.  They are tools,  enjoy them and use them!!

Your watering my plants... ;)

I think it is more that this machine has seen some/a lot of use and I‘d really like to start from scratch and make my own dents and bumps.
Also, I do not mind scratches or marks, but I still prefer keeping my tools in a very good condition.

My grandfather was a machinist and taught me to take care of my tools and workplace and make it a habit to clean tools after use.
It makes work more enjoyable for me, when I‘m stating out with a clean tool and I also think it makes your tools hold up longer.

Might just be my OCD, though. ;)

Sent from my iPad using Tapatalk Pro
 
ScoFF said:
I prettied up my trophy :)
I was sent a left and right side housing and the rear part. Here's a before and after and it was only like 3-4 screws. As simple as changing a battery on a kids toy.
I wasn't sent the middle piece but she said it was more difficult to replace.

View attachment 1

View attachment 2

Try an ordinary pencil eraser to clean up those buttons.  I think it will help.
 
Back
Top