Cheap and cheerful rail squaring jig

AlexR

Member
Joined
Apr 20, 2010
Messages
107
044.jpg


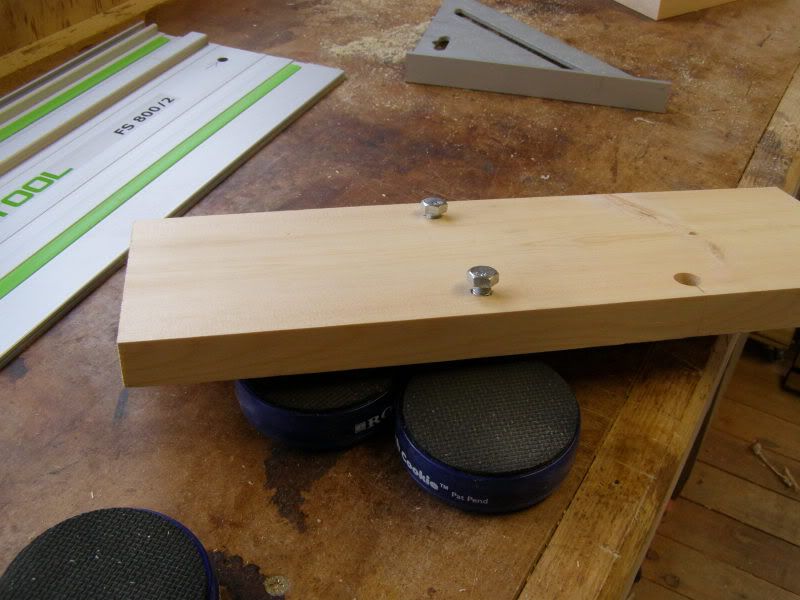
Ok it's a 6x1" pine PAR with two M8x30 bolts. Obviously the bolt holes where put in square to the face.
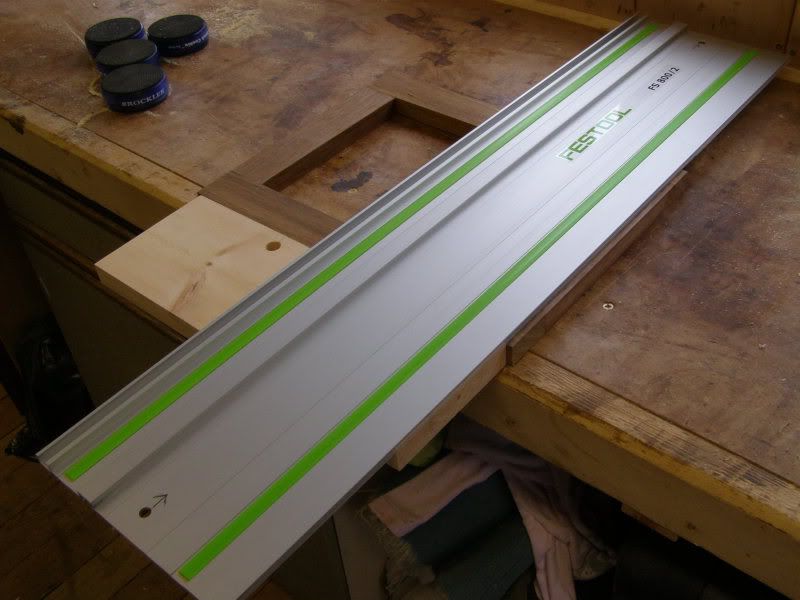
The arrows show which direction the saw cuts in,for us beginners, helps when rails upside down. I've got arrows on both sides of all my rails.
For us daft ones. [tongue]
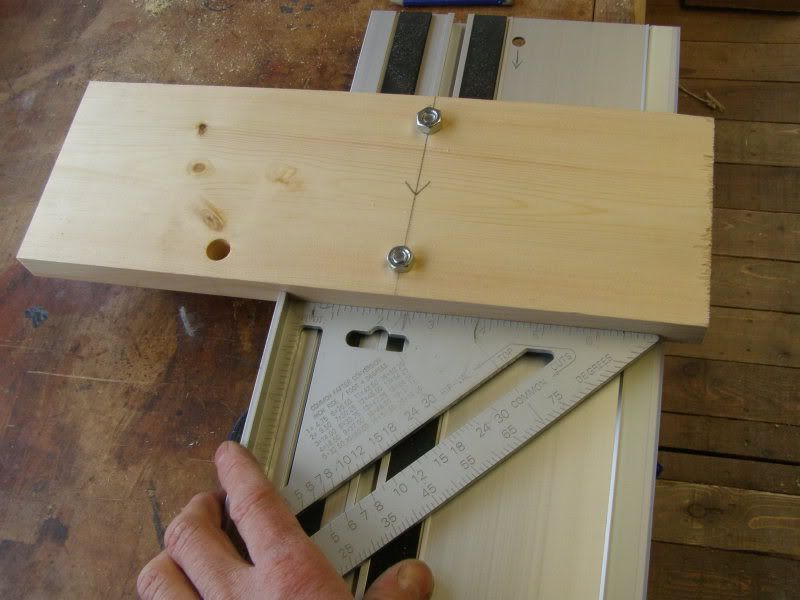
So loosen bolts slide jig bolts into bottom of rail, square as below and just nip up bolts so as non slip foam tape grips jig and you're ready to go.

045.jpg


051.jpg


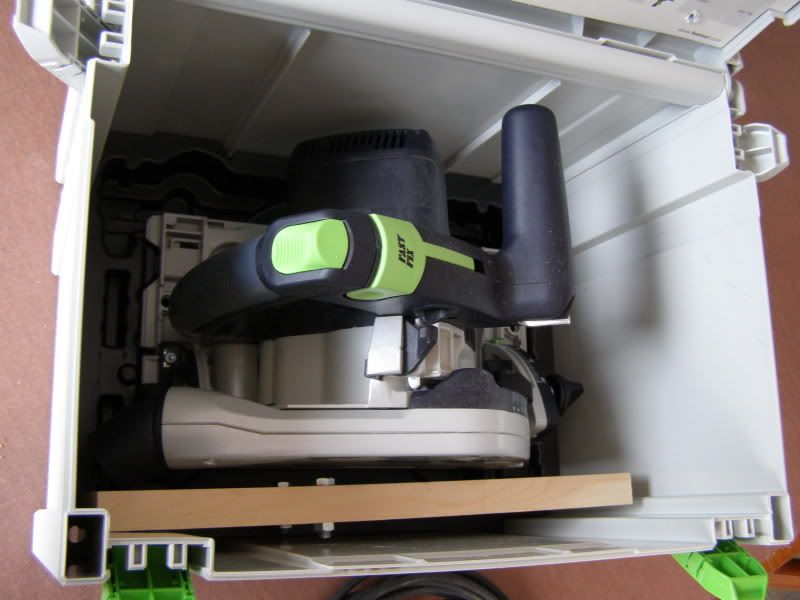
And it's custom built to fit in the box with the saw. [tongue]
I've used the jig quite a bit on site last week, really came into it's own and stayed 100% square even after a few knocks.

052.jpg


Improvements can definitely be made, I'm thinking 45 deg bolt hole maybe variable and definitely a longer ones for repeat parallel cuts with stops.
 
Alex

That's a nice little jig you have there, hope you don't mind if i copy it  ;)

Oh, Welcome to the FOG

Woodguy
 
I like shop-built jigs.  Over time, would there be any added value to using hardwood?  I'm thinking (maybe over-thinking) that in using pine, the through hole could open up just a bit, and introduce a bit of wobble to the jig?

Dan
 
Heck you could even use a UHMW (Ultra high molecular weight polyethylene) cutting board for added stability. I suppose you could glue strips of wood (or UHMW) to the top of the board that would just fit in the bottom slot, for easy square alignment.
Just thinking out loud.
JP
 
I was also thinking that a cleat added to the top could make for quick squaring of the jig.  But, rather than position a cleat to align to the bottom slot, I would assemble the jig onto the rail and add a cleat on the top tight against the backside of the rail.
 
Corwin said:
But, rather than position a cleat to align to the bottom slot, I would assemble the jig onto the rail and add a cleat on the top tight against the backside of the rail.

I was thinking a similar thing, but add the cleat to butt against the edge of the rail, perpendicular to the direction of the cut.  As far as I'm able to measure, Festool cuts the end dead square.

Regards,

John
 
Corwin said:
I was also thinking that a cleat added to the top could make for quick squaring of the jig.  But, rather than position a cleat to align to the bottom slot, I would assemble the jig onto the rail and add a cleat on the top tight against the backside of the rail.

An alternative approach with similar end result would be to cut a rabbet the width of the guide rail (maybe 3/16" deep?).  That would give you a readily accessible reference edge without anything projecting.

Using a square miter gauge to cut the rabbet's shoulder you would get an edge perpendicular to the "T-squaring" edge as shown above.

Terrifically bad mangling of OP's great picture:
[attachthumb=#]
 
John Stevens said:
As far as I'm able to measure, Festool cuts the end dead square.

Regards,

John

    I reckon that could be pot luck.I have at least one rail end that is'nt square.Try joining them to get a straight line.Then check the gap between across the width.
 
Thanks chaps.
I think with rebates and top cleats you're introducing a lot of room for error. The beauty of it is it fits anywhere along the rail. I was cutting down some 90mm oak Newel posts on site and I placed the jig and rail on the newel then used hand screw rail clamp through the hole in jig to clamp rail to newel post.
It's simple and works 100%. There is play in the bolts before tightening that's why i use a square every time before nipping up. The non slip foam bits work brilliant at holding  so don't bend your rails by over tightening.  KISS  [big grin]
The nuts on the underside of the jig could be rebated into the pine so the jig can sit on the work surface.
 
I don't know about suppliers for the UK, but here in the US, McMaster sells 8mm thumb-nuts that would make your process toolless. I have some of these stainless steel thumb nuts in the 1/4" version and they've got a nice weight / size / machining.

http://www.mcmaster.com/#thumb-screw-nuts/=6vawuw

They also have a big variety of M8 thumb screws if you want to put the nut on the other side and get a bigger knob for turning...
http://www.mcmaster.com/#thumb-screws/=6vays5
...obviously the problem with using a thumb-screw instead of a thumb nut is that you need to use exactly the right length screw (washers to get the spacing right).

What I did for the hinge-side of the rail support of my homemade MFT - and it would for this application as well - is to use one of the rail-joining bars (for connecting two guide rails) if you have one. Make the two holes in your wood block to fit M6 screws. Put them along your square line, but spaced apart so that they align with two of the holes in the rail-joiner. Then use M6 thumb-screws through the wood and into the rail-joining bar. Slide it on the rail, square it up by putting pressure on it the guide rail from the non-saw-blade side, then stick a little set screw into the wood - ON THE TOP - to keep the guide rail pressed tight against the joiner-rail and remove any play. Here's a quick autocad that will make it more clear... The pic shows the square slid half-way onto the rail. Again, the screws going into the rail guide should be thumb screws but I didn't draw it that way... In this way the "squareness" is mainly enforced by the placement of the two thumb-screw holes along your square line, and not by the set-screw.

Cheers,
Chris
 
No, Autocad. I don't know Sketchup, but I should learn it as I think it will be the future for collaborations like this forum. I only learned autocad last year, but after doing a full apartment renovation with it - including all the custom millwork plans - I've gotten pretty quick with it (i've dabbled in a lot of 3d packages, so I know what to expect). I did the drawing in about as much time as it took me to type the post - the measurements and things are all off and not to scale, and if you look closely at the rail profile you'll see it's a little wonky!

Cheers,
C
 
Here is my version

[attachimg=#]

[attachimg=#]

[attachimg=#]

its made from a shortened  shelving bracket

[attachimg=#]

To increase friction I feathered the bracket with a flapper disk and angle grinder.
Sticking sandpaper would have scratched the rail and work

I made a top and bottom version

[attachthumb=#]

with both attached i have a simple Parallel guide

[attachimg=#]

I find this gets me by for skirting and wide moldings  when I don't have my chop saw

The brackets are drilled for 45 degrees as well. I left a bit of slop in the holes so I can adjust for exact 90 and 45 with my framing square.

The bolts are dome headed with the sides ground to fit the rails

[attachimg=#]

Both are short enough to fit in my TS55 Systainer .

What do you Festoolers think ?, how can I improve these ?

 
FEStastic said:
...
with both attached i have a simple Parallel guide

[attachimg=#]
...

I fail to see how you could possibly call this a parallel guide.  Here, you are set up to cut perpendicular to the the edges you are locating from -- so, I don't see any difference between using one or two of your guides, you are still performing a crosscut operation.  Having said that, one can get parallel cuts from a fence set square (perpendicular) to the cut line -- but, that still wouldn't qualify the setup you are showing as a parallel guide.
 
Back
Top