Hi
I just want to share my custom remote control for my CTL26 vacuum cleaner.
I have seen various solutions, like the MAXSYS one and the new bluetooth remote control of Festool CT F I/M.
Remote control is very useful with a 10m suction hose when the CTL26 is far from job.
But the current remote controls (either MAXSYS or new Festool) use the accessory module slot and mine is already fitted with a second power outlet that I want to keep. (same as http://www.festoolownersgroup.com/festool-how-to/ct26-secondary-power-outlet-installation/
That why I looked for another solution. I share it now, as festool solution seems available, so if you don't feel confident in DIY electricity, you can buy some ready to use solutions...
First, I have tried to discover the functionality of internal connectors in module slot extension.
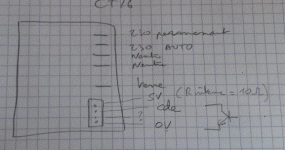
There are 2 connectors, at top a power connector, where is connected my power outlet and a bottom connector, 4pins with a 3.96mm pitch. On this connector, after experimentation, I discover we have from top to bottom:
1) 5V (internal resistance seems around 10ohms, so it could probably source some tenth of mA),
2) command input, with an internal pull-up. When this input is connected to 0V (pin 4, at bottom), my CTL26 (in Auto mode) starts. When this pin is released (disconnected), my CTL26 stops after a few seconds.
3) I don't understand the functionality of this pin. But I don't use it.
4) 0V, the reference ground.
[attachimg=1]
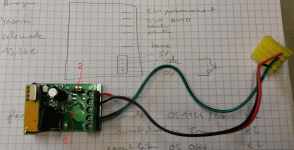
Secondly, I have to find a remote control. I use the "Yasorn Relay Switch DC 12V Wireless RF Remote Control Switch 433Mhz One 1-channel With Two Transmitters" from amazon. The design quality is not great, but it is OK.
The design uses 12V and I have only 5V in CTL26. But 12V is only used to power a relay, and internal RF transceiver uses 5V after a linear regulator. So I modify a bit the Yasorn Receiver...
[attachimg=2]
On top, 1) I remove the 12V relay and connect the relay command (an open collector output, exactly was is needed to drive the Festool command) to the connector. and 2) I replace the input diode by a small inductor (but just a wire should be enough too). I put a small inductor to add some filtering to minimize RF receiver disturbance. Probably not needed.
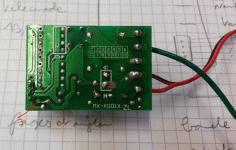
[attachimg=3]
On Bottom, I short-circuit the linear 5V regulator (a 3 pins 78L05 like). This regulator was used to produce 5V from 12V input, but as Festool directly provides 5V, the diode and the regulator shall be short circuited to still have 5V at the RF receiver.
The 3.96mm connector enables me not to modify CTL26, but the wires could be directly soldered on the Festool connector...
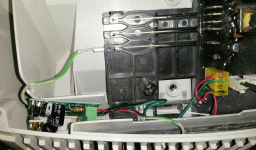
[attachimg=4]
Then I put all in CTL26, there just enough room, close the front panel, quickly fixed the remote control with tape...
[attachimg=5]
and it works !!! For less than 20$.
Surely, such DIY requires some electronics knowledge, and to be very carefull against dangerous high voltage.
But now I am happy to have 2 power outlets on my CTL26 with also a remote control.

