CT36 + Ultimate Dust Deputy not mounting?

MichaelTS

Member
Joined
Oct 7, 2022
Messages
4
Hi All,

I could have sworn I had a profile here previously, but had to create a new one. Either way, huge fan of the FOG and the wealth of festool information here.

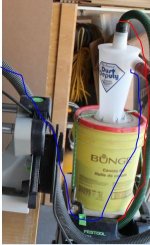
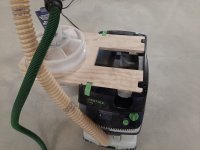
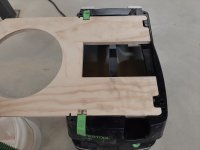
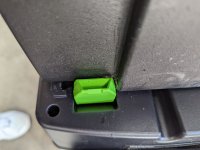
My challenge is this - I had a CT33 for many years, the ultimate dust deputy snapped in perfectly on the hose garage. The CT33 is sadly, no more due to an unfortunate incident last week (long story, brittle plastic, utter destruction.) So, I replaced it with the new model, the CT36. However, the systainer clips have moved and so too has the location I attached the Ultimate DD to the vac. I cannot see how the UDD attaches to these newer models, but there are no notes on Oneida, nor in my quick googling for others who have faced this issue.

Am I missing something? (probably) Is there an approach that works? (hopefully)

Thanks in advance!
Michael
 
Euh... the hose garage of the 26/36/48 got an update a while back and as a consequence Classic Systainers now sit 180 degrees rotated around the vertical axis compared to T-Loc Systainers.

Info on the two styles of hose garage here;https://www.festoolownersgroup.com/festool-tool-reviews/improved-ct-hose-garage-t-lock/

CT 11/22/33/44/55 both with and without hose garage (suffix 'SG', also sold as spare part CT-SG #494388) had the Systainer mounting in the same orientation as the original CT 26/36/48. With the introduction of the new-style hose garage on the 26/36/48 mounting a T-Loc Systainer has become easier, while Classic Systainers would sit 180 degrees rotated.

From what I see the Oneida DD mounts as a classic Systainer. No idea if that small hose that bypasses (?) the main hose can connect on either side, but if not that port [will be on the backside].

Local dealer says that for some types of Festool vacs you need to file off some things on the bottom near the sides of the DD.

Old-style 26/36/48 hose garage can be found in the used market... usually cracked  [tongue]. Untill I saw your question I never realized the new style means T-Loc and Classic mount 180 degrees rotated compared to each other.
 
Yeah, I suspect that's the route I'll need to go (filing.). I love the UDD as it's VERY effective and the CT vacs... well, they've earned their reputation - just didn't even consider that they may not snap together. lol.

I'll see if anyone else has clever solutions and if not, I'll need to buy a longer 1/4" bag hose (sucks the vac bag tight inside the dd) and file the nubs to permit locking on top.

If my CNC were already here and running, I'd have other options, but for now - just need to get the vac working once more w/ the Festool Fleet.

Thanks!

Michael
 
Hi [member=78749]MichaelTS[/member]

I have the same problem which I solved by using some of that open mesh non slip rubber matting used when routing - sorry I have no clue what it is called.

The UDD is not clipped to the CT but stays perfectly in place on top. I do not move it around at all so that helps.

Peter
 
I am not particularly familiar with the CT36 & Ultimate DD, but I'm sure bungee cords can somehow keep them together as they did when I had the CT26 & DD (disregard the color lines):
[attachimg=1]


Attachments

  • DD & CT26.JPG
    DD & CT26.JPG
    37.5 KB · Views: 292
You can make your own adapter plate to mount to the top of a CT36.   

That is what I did to mount my DD.  Actually, I cantilevered my DD to the side because the hose that Oneida supplied was a little too short to reach if mounted above.  Mounting the cyclone above would have been the preferred solution -- takes up less floorspace.
 

Attachments

  • DD installed.jpg
    DD installed.jpg
    350.1 KB · Views: 142
  • Adapter Top View.jpg
    Adapter Top View.jpg
    270.3 KB · Views: 112
  • Adapter Installed.jpg
    Adapter Installed.jpg
    301.6 KB · Views: 120
Thats pretty clever!  My issue was with the ultimate dust deputy, which is a roughly systainer footprint version expressly built for festool use.

I need to take pics, but the solution proved simple enough. Just needed to gently file recesses for the clips to secure it. While not as robust as it was previously mounted - it will work just fine.

I will follow up with a couple pics.

Michael

edit: alright, tried to add photos a bunch of times, read 3 of the 'quick how to' threads and there are either browser compatibility issues that aren't noted in those threads or something else is going on. After spending more time than I wanted trying to troubleshoot adding photos - I simply filed the 2 tabs on the longer dimension of vacuum to allow for the vac clips to clear and grab the remaining tab portion (approximately ~3/8" worth) With the lateral tabs on the back and the 2 side tabs now grabbing onto the tabs, the unit is pretty robust.


Attachments

  • PXL_20221009_215826813.resize.jpg
    PXL_20221009_215826813.resize.jpg
    337.1 KB · Views: 87
Possibly the photos were to large in file size. 
I find that I always have to shrink photos for this forum, particularly if you are attaching multiple photos.
 
Not according to the tutorials and helpful posts. 4 pics, the largest of which was 2.65Mb. I'm wagering that it's a Chrome/MacOS/FOG board incompatibility thing so just gave up. Not sure where the fault is, but candidly after 20 minutes spent a lot more time troubleshooting than I would have preferred, lol.

Hopefully my description suits for those interested.

Alright, so it would seem the guidance on the tutorials / submission forms are incorrect. The 1Mb suggestion above was a good one (vs. the 10Mb / 40Mb max for a post the board software guides for attachments.). Got a pic up now of the clip with the filed away tab permitting clearance now.
 
MichaelTS said:
Not according to the tutorials and helpful posts. 4 pics, the largest of which was 2.65Mb. I'm wagering that it's a Chrome/MacOS/FOG board incompatibility thing so just gave up. Not sure where the fault is, but candidly after 20 minutes spent a lot more time troubleshooting than I would have preferred, lol.

Hopefully my description suits for those interested.

I haven't read the tutorials recently, but I've never been able to upload an individual photo larger than 1 MB since I started posting 2 - 2 1/2 years ago.

Even at a reduction in L / W down to 25% of original, most modern pictures are plenty large enough to see detail online.
 
Back
Top