HowardH
Member
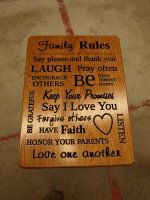
I have a project where I am using the Shaper Origin to engrave recipe's on maple, flat grained, cutting boards. I want to darken the letters so they stand out. I have a burning tool but I think that would be a bit tedious. Would a sharp-tipped Sharpie work where I could sand off any spillage, so to speak? Any other ideas?