Doing better at installing wall cabinets

Rick Herrick

Member
Joined
Feb 7, 2020
Messages
811
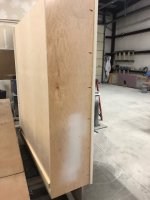
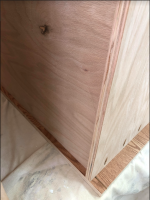
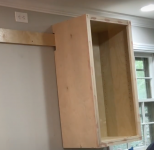
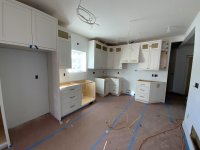
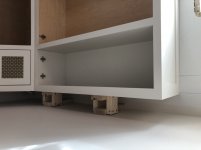
I have made several sets in the last year for my garage as well as my wife's sewing room.  I am almost done with another set of wall cabinets for her.  I have always had issues with the walls bowing, etc.  I don't have the experience to know what to do with each situation so I just sit and stare at it until a thought comes.  I remember reading an article over the last 6 months where an installer said he rips 1/4" ply into 1-1/2" wide strips and attaches them to the sheetrock, over the studs.  Usually that 'build-out' overcomes most of the wall bowing out.

Does that make sense?
 
One nice thing about using french cleats is that you can shim them out as needed to get them dead-straight cabinet alignment.  If you were doing base cabinets, I'd suggest using Space Plugs, but french cleats are great for hanging cabinets.
 
Do not make the cabinets with the back flush to the sides, if you do.

As Sparky mentioned, a french cleat.

We recesses the back 3/4", our uppers are 13-3/4 deep. You can see the recess and the cleat in the attached pic. Yes, the cabinet is upside down in the pic.

We use a 30º angle on the cleat rip instead of a 45.

Tom
 

Attachments

  • IMG_2479.jpeg
    IMG_2479.jpeg
    65.1 KB · Views: 745
If you put the french cleat on the cabinet, and the back is recessed 3/4" and the french cleat sits inside that 3/4" recess, does that make hanging a bank of wall cabinets problematic? Wouldn't you need to hang the mating pieces on the wall exactly where the cabinets need to go?

Do you just cut mating cleats undersized that are going on the wall to allow a little wiggle room for placement?
 
Thanks Willy, I jumped over to YT to look for more options.

Thanks Tom.  On my cabinets I always route a 6mm groove, 18mm inset from the back, which I think is what you are saying.  Picture below.  I use that space to mount my 'nailer'.  I assume that now I cut the angle on that nailer to use as my cleat?

I am doing 4, 30" uppers here.  It becomes obvious that I either need to hang 4 cleats (roughly 27" long), all in a straight line and hang each cabinet on its respective cleat.  I saw one video where the guy had 1 continuous cleat and he notched out the backs of the cabinet sides, on all but the ends as shown in the other picture.  Thats my next thing to figure out.View attachment 1
 

Attachments

  • back-bottom.png
    back-bottom.png
    1.3 MB · Views: 385
  • wall notch.png
    wall notch.png
    530.3 KB · Views: 1,178
tjbnwi said:
We use a 30º angle on the cleat rip instead of a 45º.

Tom, is the reason for using a 30º cleat because it will be easier to move the cabinet at a later date?
 
DynaGlide said:
If you put the french cleat on the cabinet, and the back is recessed 3/4" and the french cleat sits inside that 3/4" recess, does that make hanging a bank of wall cabinets problematic? Wouldn't you need to hang the mating pieces on the wall exactly where the cabinets need to go?

Do you just cut mating cleats undersized that are going on the wall to allow a little wiggle room for placement?

Expand the posted pic, you will see the mating/wall piece is about 2” short of the inside of the side cabinet panel for a total of about 4” short.

It’s not unusual for us to hang 12’ of wall cabinet as a single unit made in the shop.

Tom
 
Cheese said:
tjbnwi said:
We use a 30º angle on the cleat rip instead of a 45º.

Tom, is the reason for using a 30º cleat because it will be easier to move the cabinet at a later date?

The box slides around a little easier, it does not jamb as much as a 45º rip. Being a very lazy guy, the easier I can make it the better.

Tom
 
Tom, if my cleat is a little shorter than the inside of my cabinet back, how do you attach them to the cabinet?  Pocket hole them to the top of the underside of the cabinet?

I thought I had this figured out until I realize that when I use a regular nailer, top and bottom, they are cut exactly the width of the inside and I pocket hole them to the sides of the cabinet.
 
Tom's pic is a bit hard to see but I thought he cut the part of the cleat that goes onto the wall 2" short per side. The cleat that is attached to the cabinet is full width between the sides.

I would think in any situation, you'd want the nailers attached to the cabinet sides and not the tops and bottoms alone.
 
DynaGlide said:
Tom's pic is a bit hard to see but I thought he cut the part of the cleat that goes onto the wall 2" short per side. The cleat that is attached to the cabinet is full width between the sides.

I would think in any situation, you'd want the nailers attached to the cabinet sides and not the tops and bottoms alone.

Yep, as soon as I read this, I had the ah-ha moment.  So now I need to recut some material for the cabinet side... 
 
The cabinet piece is cut full width, it is screwed through the back and into the top of the cabinet with 3” GRK RSS screws, the ends are pocket screwed to the sides. The wall piece is installed with 3-1/8” GRK cabinet screws.

This is one the cleats did no good for long term support but allowed the working time I needed. The cleats were glued to the wall, then the cab to ceiling supports were fitted. My concern was not the construction adhesive letting go but the wall surface peeling off the wall substrate.

Imagine the second photo flipped over......

Tom
 

Attachments

  • 7CD04B1A-5048-41B6-84A6-967725C553A2.jpeg
    7CD04B1A-5048-41B6-84A6-967725C553A2.jpeg
    262.6 KB · Views: 450
  • C69A4AF4-EE50-4837-96A3-918D681857D0.jpeg
    C69A4AF4-EE50-4837-96A3-918D681857D0.jpeg
    133.3 KB · Views: 515
If all the faces are screwed together you can use shims to support the gaps if they're significant. Otherwise just tag it in and it'll be fine. The backside of cabinets are a little more malleable than the front, especially if they have some gaps between them. The most important factor is that the faces are are flush where ever they need to be. If you want to use cleats at the ends, that aren't different than the nailer go for it.

A cleat all the way across only works if it's straight, which means you might have to shim it. You can't scribe because then the cabinet would have to be scribed as well.

It's up to you to decide the tricky stuff like corner cabinets and which side might start floating farther and need some more/less shimming on the nailer.

I'm not sure I understand the cabinet hanger from Haffle. I'd like to see a photo or video. No matter what perfectly flush faces are the ideal and that's why I always do that before putting them up. (if they aren't built together, which makes all of this even easier except getting to location and needing two or more bodies at times)
 
I should have elaborated a bit more as the link I put up is one possible half of the cabinet hanging system.....
https://www.hafele.co.uk/en/product...il-galvanized-steel/0000003900011fc500020023/

This is one example of the possible other half that actually fixes to the wall and enables the cabinet to be lifted on and then the adjustable hangers hook onto it. There are loads of different options for long lengths, individual plates of even hooks that can be fitted with that funny looking hook driver attachment in the Festool Sys 1 CE Sort kit....

[attachimg=1]
 

Attachments

  • 492526__66232.1564595538.jpg
    492526__66232.1564595538.jpg
    42.7 KB · Views: 1,738
Rick Herrick said:
It becomes obvious that I either need to hang 4 cleats (roughly 27" long), all in a straight line and hang each cabinet on its respective cleat.  I saw one video where the guy had 1 continuous cleat and he notched out the backs of the cabinet sides, on all but the ends as shown in the other picture.  Thats my next thing to figure out.

I prefer to use single-piece, continuous cleats to keep everything properly aligned, and yes, cabinet sides are notched for the cleats, except for the end cabinets in a run.  The cleat is cut a bit short to allow for an uncut cabinet side.  I also use what I call lock screws that go through the cabinet back, just below where the fixed cleat is.  This screw keeps the cabinets from being accidentally bumped up and off the cleats, but allows the cabinets to be slid right and left as needed. 
 
Sparktrician said:
I also use what I call lock screws that go through the cabinet back, just below where the fixed cleat is.  This screw keeps the cabinets from being accidentally bumped up and off the cleats, but allows the cabinets to be slid right and left as needed.
Thank you Willy.  Do you have any more specifics on these screws?  Links or anything?  Appreciate it.

 
I like the lock screw idea Sparktrician. I will use that in the future.
 
We run the screw down through the cabinet mounted cleat into the wall mounted cleat. Obviously you need the clearance to the ceiling to make this work.

Tom
 
Back
Top