Bugsysiegals
Member
- Joined
- Mar 19, 2016
- Messages
- 908
I bought a DF500 today, figured I’d better test it before 30 days is up, and I really can’t believe my eyes ... I’ve not been able to make one flush joint yet!!
Here’s what I’ve done so far ...
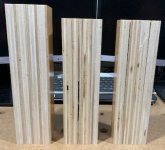
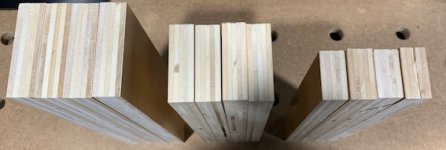
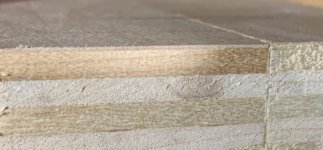
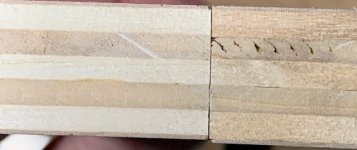
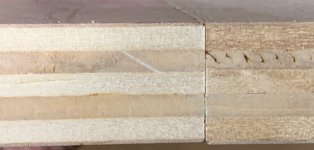
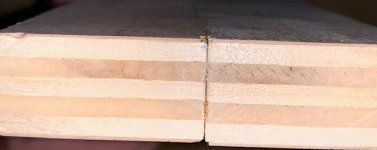
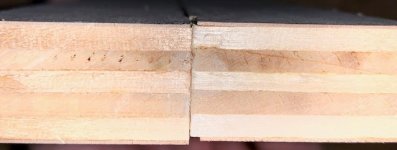
I pushed some strips of 3/4” Maple Plywood up to my bench dogs, clamped the wood, set the DF500 on top of the MFT/3 table, aligned the finger with the edge of the wood, the face of the Domino tight to the face of the wood, and plunged slowly (7-10 seconds). I repeated this on the other end and then on the other piece of plywood. Afterwards, I could see the surface wasn’t flush and my fingernail catches if I rub it across the pieces. When looking at the end, I can see the offset of the layers in which I’d be likely to sand through the thin veneer which seems terrible. How much variance/offset should be considered normal/acceptable?
I repeated the process above using different clamp pressures to ensure I wasn’t deforming the board, moved the clamp in different positions, and had the same end results. I then tried several tests with the fence in the down position, with the bottom not touching the MFT/3, and had the same end results.
At this point I felt like Deja Vu as this was the exact same experience I had with my DF700. I decided I better check the wood is flat before my next test since I’d not done that previously and to my surprise, the pair I was going to use next were not completely flat. I’m considering the previous tests inconclusive and confirming the wood is completely flat before all future tests.
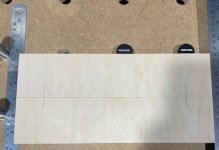
I couldn’t find any scrap Maple which would align perfectly but found some 5/8” Baltic Birch which did when checked on my table saw so I figured I’d give it a try; however, when I re-checked it on my MFT/3, I found it was no longer perfectly flush! While not terrible, it’s not completely flat, so I figured I’d need to eliminate the MFT/3 from the variables.
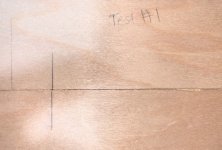
I then moved over to my table saw, locked the fence, clamped a stop block to it, wiped the table and plywood, put the plywood up to the fence under my JessEm Clear-Cut TS Stock Guides, and pushed it up against the stop block. I then wiped the bottom of the DF500, laid it on the table, ensured it was resting flat without any wobble, and plunged. The joined pieces were no longer precisely flush and actually have a slight bowing when joined. I thought perhaps the edges weren’t 90 degrees so I separated them just a bit but the pieces remained bowed. It seems either the Domino isn’t cutting parallel, I’m not holding it flat (definitely am), I’m plunging at the wrong speed and the bit is wandering, or the wood somehow lifted as I plunged. I’m going to test again but find a different method to clamp the wood so I know it’s not the wood lifting.
All that said, please help me understand the best way to test the tool to determine if it’s the tool or me...
What wood should I use to test with? Should I buy something like MDF, try to find some plywood that’s flush, or mill some hardwood?
Should I stick with the table saw surface to ensure I’ve the best flat reference for the wood/Domino or should this really not matter?
Should I continue to set the base on the surface, rather than using the fence, to ensure it remains parallel throughout the plunge?
Is there anything else I might be doing wrong or overlooking?
Here’s what I’ve done so far ...
I pushed some strips of 3/4” Maple Plywood up to my bench dogs, clamped the wood, set the DF500 on top of the MFT/3 table, aligned the finger with the edge of the wood, the face of the Domino tight to the face of the wood, and plunged slowly (7-10 seconds). I repeated this on the other end and then on the other piece of plywood. Afterwards, I could see the surface wasn’t flush and my fingernail catches if I rub it across the pieces. When looking at the end, I can see the offset of the layers in which I’d be likely to sand through the thin veneer which seems terrible. How much variance/offset should be considered normal/acceptable?
I repeated the process above using different clamp pressures to ensure I wasn’t deforming the board, moved the clamp in different positions, and had the same end results. I then tried several tests with the fence in the down position, with the bottom not touching the MFT/3, and had the same end results.
At this point I felt like Deja Vu as this was the exact same experience I had with my DF700. I decided I better check the wood is flat before my next test since I’d not done that previously and to my surprise, the pair I was going to use next were not completely flat. I’m considering the previous tests inconclusive and confirming the wood is completely flat before all future tests.
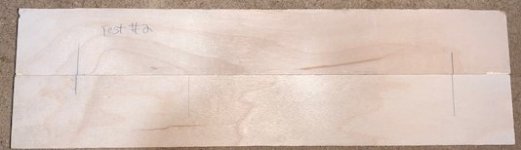
I couldn’t find any scrap Maple which would align perfectly but found some 5/8” Baltic Birch which did when checked on my table saw so I figured I’d give it a try; however, when I re-checked it on my MFT/3, I found it was no longer perfectly flush! While not terrible, it’s not completely flat, so I figured I’d need to eliminate the MFT/3 from the variables.
I then moved over to my table saw, locked the fence, clamped a stop block to it, wiped the table and plywood, put the plywood up to the fence under my JessEm Clear-Cut TS Stock Guides, and pushed it up against the stop block. I then wiped the bottom of the DF500, laid it on the table, ensured it was resting flat without any wobble, and plunged. The joined pieces were no longer precisely flush and actually have a slight bowing when joined. I thought perhaps the edges weren’t 90 degrees so I separated them just a bit but the pieces remained bowed. It seems either the Domino isn’t cutting parallel, I’m not holding it flat (definitely am), I’m plunging at the wrong speed and the bit is wandering, or the wood somehow lifted as I plunged. I’m going to test again but find a different method to clamp the wood so I know it’s not the wood lifting.
All that said, please help me understand the best way to test the tool to determine if it’s the tool or me...
What wood should I use to test with? Should I buy something like MDF, try to find some plywood that’s flush, or mill some hardwood?
Should I stick with the table saw surface to ensure I’ve the best flat reference for the wood/Domino or should this really not matter?
Should I continue to set the base on the surface, rather than using the fence, to ensure it remains parallel throughout the plunge?
Is there anything else I might be doing wrong or overlooking?