gnlman said:
I already have the festool 20mm bit so just have to get the copy ring and mandrel. If I find it does not meet all my needs, I will also buy the parf system...after all I think I have 3 or 4 shelf pin jigs, why not a couple dog jigs...lol
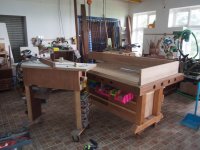
I would suggest that the Peter Parfet designed system should be a buy now, not wait.
[attachimg=3]
gnlman said:
Yes always use foam backing when I cut or drill. I use white panolam (melamine) for my shop cabinets it's pretty good stuff but you need sharp blades and backing to avoid chipout...it really does cut nice. I'm considering using laminate/arborite for my top..we'll see with this jig seems like it will be easy to just replace it if it gets damaged....
If you do that,
1) you may find that you may need replace your 20mm bit a little sooner, I guess that the laminate is quite abrasive.
2) you will need to chamfer or round over the holes as those edges will be sharp.
3) you will not easily have the advantage of using the top as a cutting surface unless you stop using a foam backing.
4) it will make a really nice looking top.
gnlman said:
sometimeswoodworker....I have looked at your site a few times over the years when looking for ways to make the dog holes but for some reason never saw the picture link...
Which one? If you mean the
20mmx96mm Grid link then thanks for reminding me of that album I need to go back and add a few more things to it.
[attachimg=4]
gnlman said:
now that I've looked at it, it is a very good idea?...I was thinking of it a bit differently though, and your method looks better/more accurate....I was thinking of drilling the 20 mm holes down both long sides of the top with lr32,and then using my Qwas rail dogs to move the rail along and drill the rest of the inside holes...not sure how accurate that would be, and if I remember the spacing would not be 96 mm.....your idea is much better...
I thought carefully before deciding on my method, I don't remember if the 3rd party dogs were available but even if they were it would have been a poor compromise. The grid would never have been perfect unless you made an over size top and cut off the alignment holes.
gnlman said:
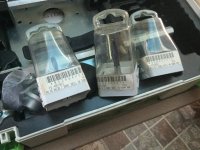
I see the pins on the edge stop are just shy of 6mm, so assuming you used a 6 mm drill bit?
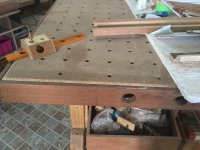
No drill was used in making the template or worktop, it was all router and LR32 all the time, using Festool bits.
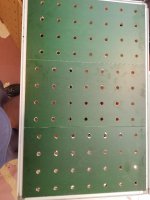
[attachimg=5]
However there is now a question you haven't asked. Would I make a template like that today? The answer would depend on my financial resources, time available and ability to get the current jigs and tools.
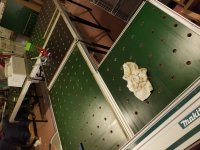
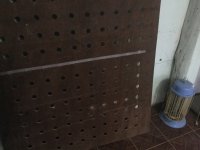
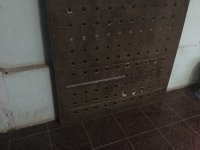
[attachimg=1]
[attachimg=2]
For me I definitely would not remake the template. You have to be extremely precise and as you can see there are two rows where I made a mistake, your template really needs to be bigger than the size of finished pieces, you need to need to make a few before the time making the template is cost effective. With a CNC or access to a CNC you could make a smaller template (Dominofix) but with a CNC or access just make the tops!
I do not have the free time although I've just retired
New house and workshop build this is why, unfortunately you will need to join the site (its free and non profit) to view all the pictures.
[attachimg=6]
[attachimg=7][attachimg=8][attachimg=9]
gnlman said:
Also, what did you set your edge stop scale to for the 96mm spacing.
I'm not clear what you mean by that question.
gnlman said:
I realize you drilled 30 mm holes to use as a template, but would spacing be same setting on edge stop when drilling 20 mm holes?
Sure no change for any size of hole
gnlman said:
I really enjoyed looking at your projects, very nice stuff!
Thanks it is always nice to hear that kind of comment SWMBO seldom thinks that those are interesting or good.