Cheese said:
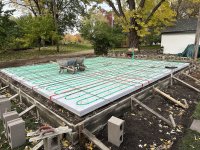
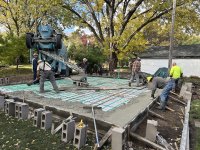
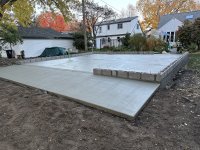
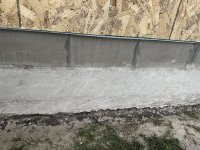
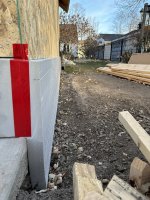
For the thermal mass you mention Mino, the garage floor is 26' x 28' poured concrete containing chopped fiberglass strands and 4" to 5" thick with a 12" thick footing and covered with a single row of concrete block around the perimeter. The garage floor is insulated/separated from the earth with 2 each layers of 2" thick 25 psi Styrofoam rated at R10 for each layer. All the seams of each layer of Styrofoam are taped to preserve the vapor barrier characteristics and each layer is offset by 18" so that none of the vertical seams line up.
On top of the insulation I stapled on 3 runs of 1/2" Pex tubing with each run being approximately 150' long. On top of the Pex is 1/2" tied rebar and on top of that is some square mesh reinforcement.
The footing contains both 1/2" & 5/8" tied rebar.
The exposed concrete block and footings are covered in 2" thick Styrofoam. Once I get the hydronic heat up & running, I think this slab will produce a lot of thermal emissivity.
Nice. Thanks for the pics!
As compared to how it is done "over here":
- the wall foundations would be deeper, below freezing depth which is about 1 meter over here .. but your is not a brick house, so not really applicable
- the slab would be poured onto about 6-8" of non-load-bearing insulation, the whole slab would "be one" with the foundation "rim" and stand on it, not on the insulation
- the slab and wall foundations would contain about 10x more rebar than your setup, needed as the slabs here are designed as "unsupported" in the centers
- the slab would be lower and, once completed, there would be below-floor-heating insulation - comparable to yours - with about 3" flooring concrete poured over it, the flooring concrete slab would be "floating" on the insualation inside the room, would not be connected to the walls
Rest would be mostly the same (assuming timber framing, over here we would use autoclaved concrete or hollow bricks).
As for your setup:
What I would do differently, assuming the general outline being same, is to take the concrete bricks to 3 or 4 layers high and use more insulation on the outside of them which would continue above the bricks level - 6" or so.
The wall insulation inside the cavities would use 6" or 8" walls or additional 4" of insualtion inside a secondary/supporting framing cavity.
But that is very climate-dependent. Over here we have - 20 C casually during the winters, so buildings are made to be heatable comfortably up to - 25 C.