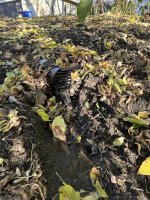
Michael Kellough said:
You forgot to mention that the drain pipe is heated. Good job!
Thanks Michael...typical practice locally, is to install/pull 2 heat tapes at the same time because they are known for having a short service life. Frost King heat tapes offer a whopping
30 DAY warranty. [blink] In most cases, the heat tape hasn't even been plugged in and it's already out of warranty.
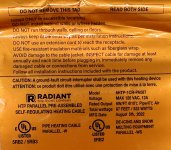
Because of the long 85' run and the interior corrugations inside the drain pipe, I was expecting the install to be difficult so I searched for an industrial/commercial heat tape so that I wasn't replacing it every year. I found a local manufacturer, Radiant Solutions, that produces their own heat tapes and they offer a
10 YEAR warranty. You register the tape online at their website and they send you an email confirming the warranty dates for your own records. Everything is up front and both parties know how long the warranty lasts...pretty slick. [big grin]
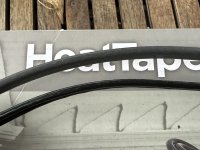
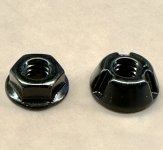
Here's a comparison between a Frost King tape and the Radiant Solutions tape. The differences in physical size and construction are stunning.
[attachimg=1]
[attachimg=2]
A couple of other nice features is that the RS tape produces variable heat by varying the current it draws so as the air temp increases the tape draws less current and thus the tape temp decreases thus lengthening the life of the tape. The traditional heat tape draws a constant current so as the weather warms the tape runs hotter and hotter...until it no longer does. [blink]
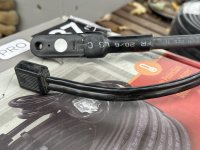
The RS tape also has an LED light at the end that lets you know if it's working. No more removing your mittens to grab the tape to see if it's warm or not.
[attachimg=3]
[attachimg=4]