Drilling MFT Holes

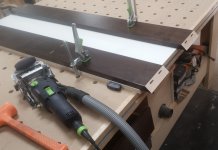
I made my own "super-sized" MFT-style top on a CNC router.  Anyone making a top should either measure existing holes, or if you do not own an MFT (as was my case), I measured my Qwas Dogs, and programmed from there.  I used a 1/2" spiral upcut router bit.  I did a couple of test holes, found the perfect fit, and then milled the sheet based on those settings.  It takes a few test holes, too, especially if your bit is ever so slightly undersized or oversized.  You definitely want to get them as close as possible, and a little upfront fine tuning can make a big difference.

When I set my Qwas Dogs (and now Parf Dogs, too) into the holes, they gently sink in.  Not too loose, not to tight.  Any CNC shop should do the same, and if not, I'd find another shop.  
 
After agonizing over the best (and also a reasonably cost-effective) solution for sizing holes for my new "MFT style" (3/4" thick MDF) workbench top- I finally made a choice, and it worked out brilliantly. I must confess upfront, that I did not build a "traditional" MFT on 96mm spacing. What I wanted was a solution that gave me perfectly sized holes, to exactly fit my new systainer full of dogs, clamps, and stops. The solution: I required 20mm holes (actually 19.81 mm) I drilled a series of holes using a 3/4" Forstner bit. I then used an adjustable 3/4 +- reamer, drilled a couple of 3/4" test holes, dialed in the reamer, and using my handheld drill (set on a slow speed) reamed the 3/4" holes out to perfectly fit the MFT Multi-Function Table Fastening Set inserts I purchased in advance of my build.
 
Julian Tracy said:
Why bother with expensive special bits?  If you already have a mft top - simply trace the holes with pencil and free hand plunge rough cut them with a 1/2" mortising bit in a plunge router, then clamp the two boards togther and use a 1/2" pattern bit on the same plunge router.  Perfect holes, perfect spacing, no worrying about bits/sizes/dulling, etc.

JT

I wanted my holes to be in perfect alignment so I could use dogs to hold pieces square.  My approach (which nearly worked) was to screw a sheet of pegboard over the 3/4" MDF.  I then used masking tape to mask off the holes I did not want to drill. 

I then used a Vix bit to make pilot holes.

Then I used a 3/4" bushing (from Amazon.com) mounted in a 6" x 6" piece of 3/4" flat stock to keep my holes vertical. 

I used a auger bit to drill the holes.

I made three table tops this way.  In each case one (1) hole was slightly out of alignment.  I cannot figure how that came to pass unless the holes on the pegboard sheet were not evenly spaced. 

In theory this should have worked perfectly.  In practice it worked slightly imperfectly.  I drilled 4" on center. 

I never actually used the dogs to hold anything square so I probably fussed for no reason at all.  The tables (one is an outfeed table) are all on locking casters and I can move them to suit the situation.

I approximated the MFT size, added a bottom shelf and have pegboard on 3 sides.  Very handy.
 
I did mine with the original Parf-guide system. 325 holes in 3/4 MDF.
My last one was made from 1 1/8" MDF and it took a very large chamfer on the under side to make the clamps fit through the holes. I liked the added weight/stiffness, but routing all of that took quite some time. It also made the clamps feel a bit springy because of the larger diameter on the bottom.
The whole top was more solid, with even fewer cross braces than I have now.
I found a pic of the old one, with the oak edge and T track, which I haven't done with the new one yet
 

Attachments

  • old mft.jpg
    old mft.jpg
    1.4 MB · Views: 476
I just did mine using the Parf System II. Pleasantly surprised how accurate it came out. Took a couple of hours to do but it was worth it. I did a 48" x 92" top
 
Back
Top