Floating Picture Frame

CeeJay

Member
Joined
Feb 18, 2020
Messages
439
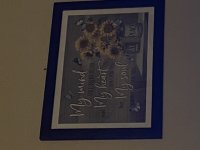
We bought a new painting by a talented local artist, Pat Hall. It’s pretty large (915mm x 915mm) and came as stretched canvas on a timber frame.

My wife wanted it framed but ‘floating’ eg the frame not overlapping the canvas at all.

I made a frame from Tasmanian Oak with a narrow (18mm) bullnose front profile to keep it from overwhelming the painting, and rabbeted a 6mm rebate into the rear. Then mitred and glued the frame. The inside dimension is 925mm.

Then attached some leftover 6mm x 80mm rosewood strips to the rear of the frame and fitted an 80mm wide strip to the inside rear of the frame. 

Sanded to 150 and finished with two coats of Osmo.

Then dropped in the painting, centring it with 5mm spacers all round. Then flipped it and screwed the painting frame to the picture frame through the 6mm strips on the back.

This way there’s no load on the very narrow and not at all strong 18mm x 943mm long mitred picture frame - the painting frame (40mm x 35mm pine) is taking all the load, and the light picture frame is just hung using the 6mm strips which also give it racking strength.

Anyway - a few hours work but came out real nice I think.

828d9000b568e4dfaa2953e519e36df6.jpg

beb1022dc1c5af08855677d2d7986128.jpg


Sent from my iPhone using Tapatalk
 
Nicely done!  Thanks for sharing. 

One of these days I need to do something similar for a painting I have.

Mike A.
 
Nice Tom!

It is that week about once a month in our house.

Happens when you’re married to an artist!

994c2f16389a4979b42e2a12bfd7519b.jpg

3ac6e1fa5831024f290787f86623f35d.jpg

a776901f501c663a9493d2a39b002ca8.jpg


Sent from my iPhone using Tapatalk
 
[member=72399]CeeJay[/member],

Nice artwork by your wife. My wife has to buy any artwork or pictures.

Tom

 
This is another I had to make this week. The wife bought this print and had no idea it had to be matted. This one is behind glass.

View attachment 1

(sorry about the sideways, postings from an iPad)

Tom
 

Attachments

  • FD69A747-2934-4036-8325-AF940D50463F.jpeg
    FD69A747-2934-4036-8325-AF940D50463F.jpeg
    68.4 KB · Views: 186
Did you do the matting Tom?

I’m hopeless at that part.

Sent from my iPhone using Tapatalk
 
[member=72399]CeeJay[/member]

I had it cold pressed at Hobby Lobby, the next one I’m going to do myself…just because.

Tom
 
Very nice work everyone.

If you are wanting to get into cutting mats, Logan Graphic Products makes a nice cutter. Reasonably easy to use and fairly intuitive. I've got a 301 model that takes up to 32 inch board. Does a good job and doesn't take up a bunch of room to store. For a production shop you'd want more bells and whistles but even the lower end models give great results.
https://www.logangraphic.com/products/mat-cutters/board-mounted/index_c_12.php

Hobby Lobby has the basic 301-1 for $70 which is a good price.
https://www.hobbylobby.com/Art-Supp...DjkOd_f-GBTQ8shrtB-skApb86o3fxhEaAiydEALw_wcB

Logan 350-1 runs around 150 at various outlets.

Ron
 
rvieceli said:
Very nice work everyone.

If you are wanting to get into cutting mats, Logan Graphic Products makes a nice cutter. Reasonably easy to use and fairly intuitive. I've got a 301 model that takes up to 32 inch board. Does a good job and doesn't take up a bunch of room to store. For a production shop you'd want more bells and whistles but even the lower end models give great results.
https://www.logangraphic.com/products/mat-cutters/board-mounted/index_c_12.php

Hobby Lobby has the basic 301-1 for $70 which is a good price.
https://www.hobbylobby.com/Art-Supp...DjkOd_f-GBTQ8shrtB-skApb86o3fxhEaAiydEALw_wcB

Logan 350-1 runs around 150 at various outlets.

Ron

That's what I have a TS-55 for..... [big grin]

Tom
 
Very nice, [member=72399]CeeJay[/member] !

I'd love to see some shots of the back/assembly, if you took them.

If it would require taking down the painting, don't worry about it, but I'm struggling to wrap my head around the mounting.  I probably should have gotten more sleep last night...
 
squall_line said:
Very nice, [member=72399]CeeJay[/member] !

I'd love to see some shots of the back/assembly, if you took them.

If it would require taking down the painting, don't worry about it, but I'm struggling to wrap my head around the mounting.  I probably should have gotten more sleep last night...
I don’t have a pic of the back of this piece but it’s a similar set up to the back of the mosaic pieces my wife makes, where the mounting is via an inner frame fixed to the ply substrate and the frame ‘floats’ around it and is lightly fixed using headless brads:

a53dad1cc9858208bd1c22a75f248f2c.jpg


Sent from my iPhone using Tapatalk
 
I would note that for art, and especially needle work, a plywood substrate is not really suitable.  The plywood contains tannins that can rapidly break down paper and fabric.

I used to have a frame shop and my mom brought me one of her needlepoint art pieces to reframe.  The original framer stretched the fabric over a piece of plywood.  Where fabric touched the edges of the plywood, it had turned brown and brittle.  It literally would pull apart at the brown line. 

I had my mom clean the piece and couch it onto a piece of freshly laundered linen.  "Couching" is simply stitching the art onto a backing cloth.  I was then to stretch the linen and get a reasonably good, tight surface for framing.

Ceramic tile, of course, does not care about tannins, but most other types of art do. 

As a rule of thumb, the hanging wire screw eyes are generally  1/3 of the way down the back and the wire length is such that it splits the 1/3 distance in half when the hook is applied. 

I try to make my wire tie-off look like a miniature hangmans' noose with tight spirals.  I think is looks more professional.

I always attached the hanging wire directly to the frame.  A dust cover gives it a more finished appearance.  Something to think about when the frame is a gift.

Craft paper is attached to the frame using adhesive transfer tape.  Which is like the adhesive on scotch tape, but without the tape, just the adhesive. 

Apply the paper smoothly, then trim the edges about 1/8" from the edge of the frame (use a straight edge and a fresh blade for this).

After the paper is in place, use a spray bottle and spray water on the paper and use a towel to wipe the excess off.  When the paper dries it will be tight as a drum head, and will make a very tidy appearance.

Apply your own label to the back. 

Nice job on the frames.  These are just suggestions to elevate the presentation.

 
Awesome tips thanks [member=74278]Packard[/member] ! I agree completely. For canvas, photographs, paper that's how I frame pieces. It's also important to use acid-free tape.

The mosaics my wife makes are from coloured glass. They need a robust substrate so it can't flex at all (otherwise the glass cracks or pops off) and as the glass is quite heavy (the largest so far is 1400mm x 650mm, weighs about 25kg) and they are often for hanging outside on decks etc, we use marine ply. Because the ply is actually the structural support, and the frame is decorative, we hang these off the ply not the frame - often using french cleats for the heavier pieces.
 
I love how you were able to create something custom while making sure the painting itself stayed the focus. I’ve done a similar project, though not quite as intricate, with an old print I had. I used a simple frame but added a couple of subtle decorative details to keep it from feeling too heavy. The satisfaction of seeing the finished piece on the wall is always worth the effort, isn’t it?

On a side note, if you ever want to display more artwork or rotate through different pieces without committing to a new frame each time, a digital picture frame from Nixplay could be a fun way to go. I’ve used one to showcase some of my favorite prints, and it’s neat how you can change the artwork with just a few taps.
 
Very nice. 

A small tip:  Almost everyone hangs pictures using a single picture hook.  But if you use two hooks 3” to 6” apart on the same elevation, it will almost never get askew.  And if it ends up tilted, you correct the tilt by sliding the frame either left or right. 

Of course you are not worrying about breaking glass with the oil painting, but when I was a framer and people brought damaged frames in for repair or replacement, the most frequent cause of the damage occurred when cleaning the glass while still on the wall.

The second most frequent cause, was straightening a tilting frame on the wall.

And when framing a picture that will end in a child’s room, or a room where children will be playing unsupervised, use shatter proof glazing (acrylic sheet instead of glass).  Children throwing things around a room can make a glass glazing over an image, a dangerous proposition.

Nice work.  By the way they make some fairly expensive molding to accomplish the same effect.  So you saved a bundle too.
 
Back
Top