Garage workshop makover

Vanquish

Member
Joined
Jan 8, 2014
Messages
55
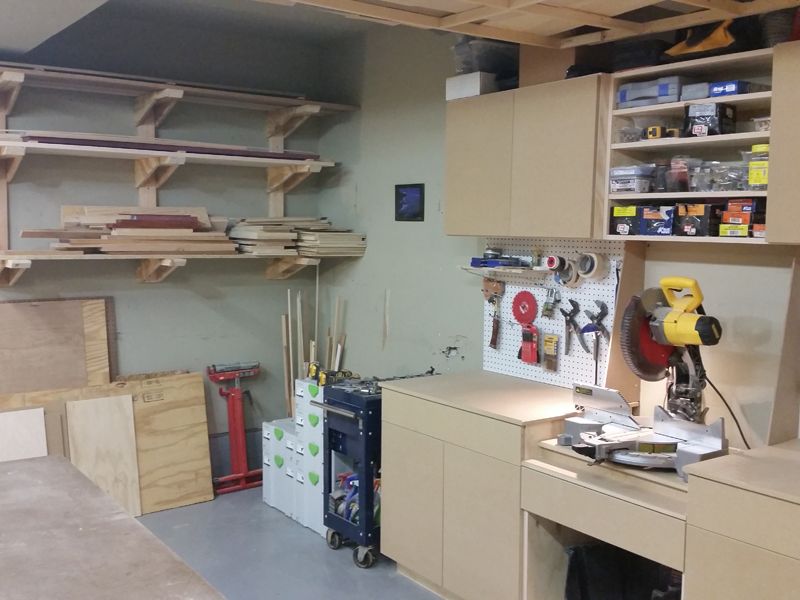
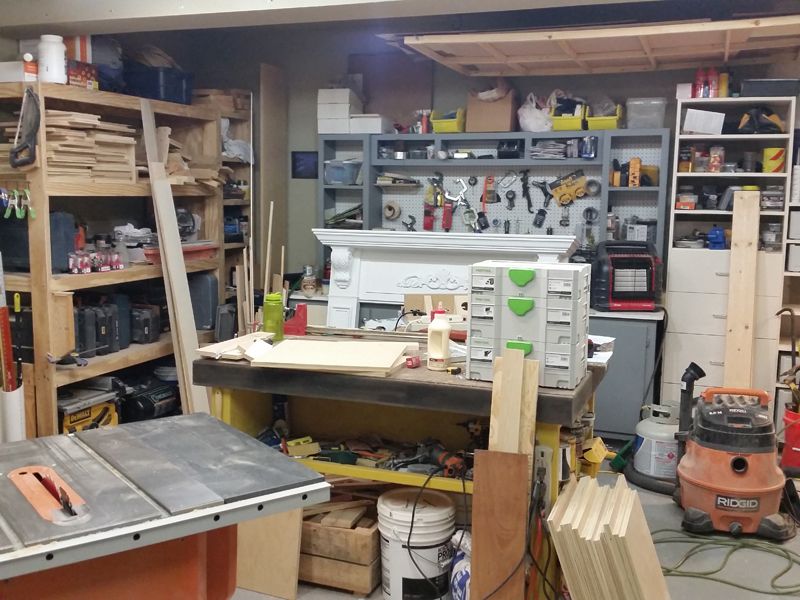
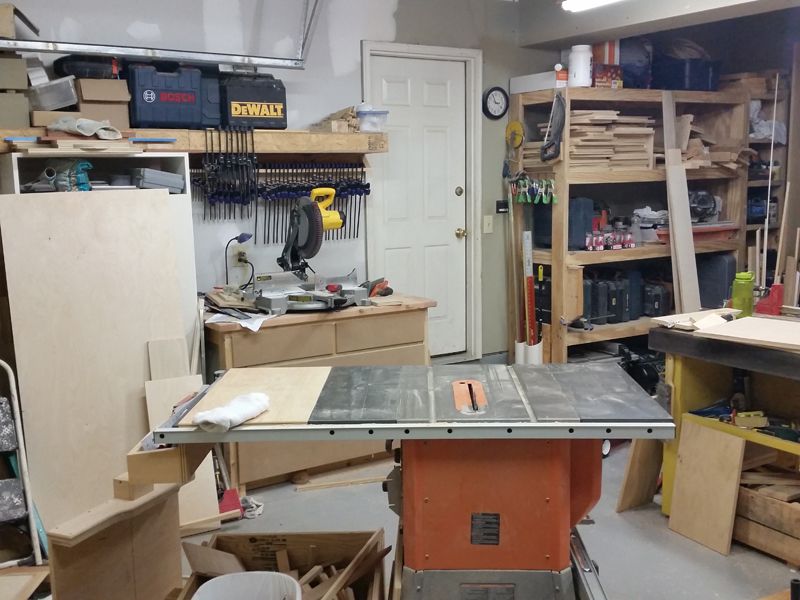
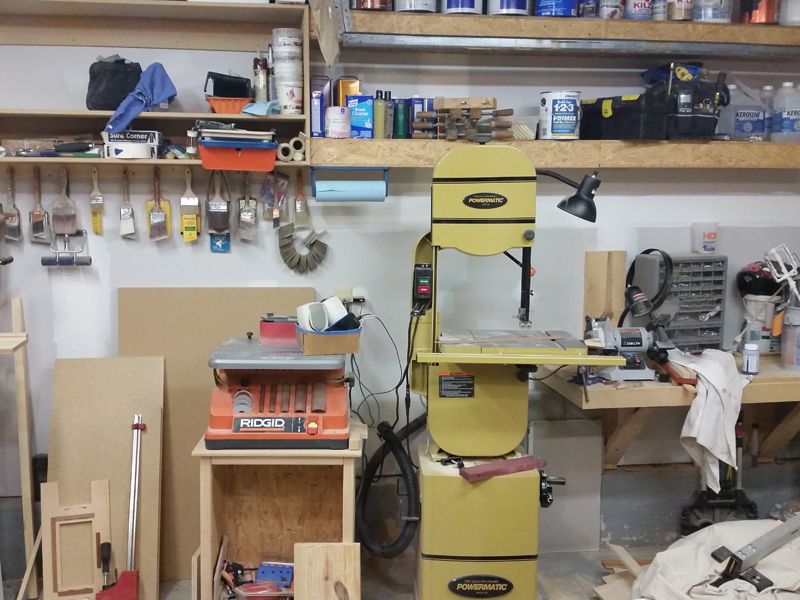
Hey guys, just wanted to share my little garage project with you.  [smile] Since I've been doing more and more woodworking recently, I have been really wanting to get my shop in order. As you can see in the before pictures, it was quite the disaster zone.

2015-01-25%2014.56.48_zpsuwdjgfdl.jpg


2015-01-25%2014.56.22_zpsca6jfebi.jpg


2015-01-25%2014.56.04_zpstbvppnav.jpg


2015-01-25%2014.55.56_zpsva6feiea.jpg


I gave away the larger shelving units and workbench to a couple of my neighbors and started over from scratch. I originally was going to use some nice plywood, but after comparing prices I decided to just go with some cheap "cabinet grade" stuff from Home Depot for half the cost. Although it's working fine for what I need it for, I'm not sure why anyone would want to use it for real cabinets.  [huh]

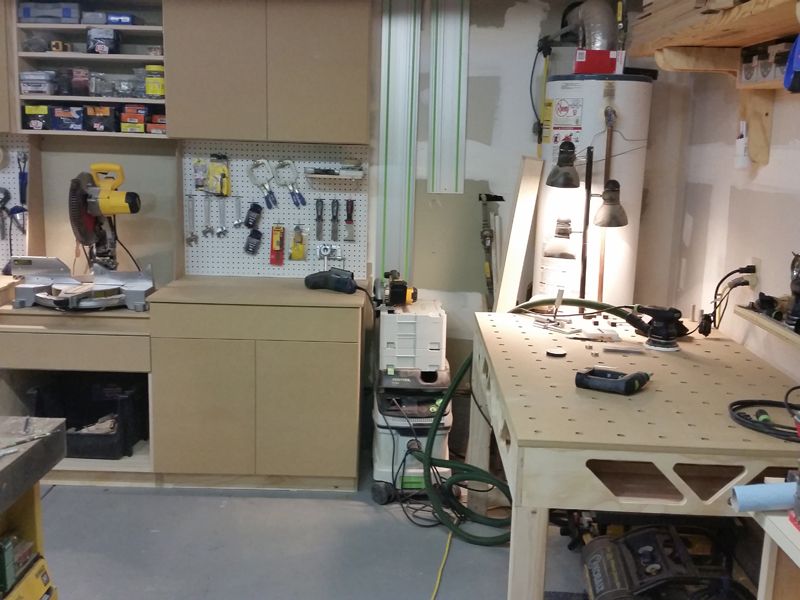
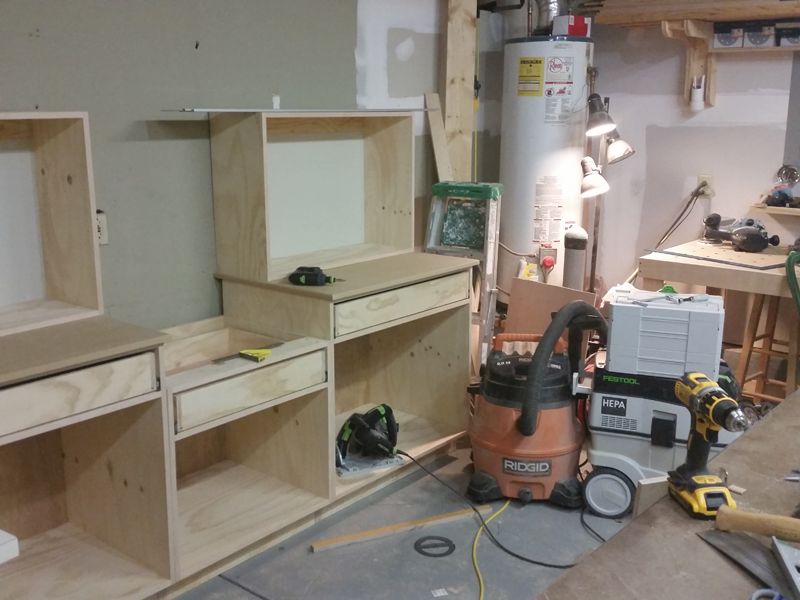
I've got the lower boxes built and two of the upper ones ready to hang on the wall. I'm by no means a cabinet maker, so I wasn't quite sure how to properly build the boxes. I ended up using a combination of pocket screws and dominos and that seemed to work pretty well.

2015-02-28%2021.53.48_zps8u3ul78m.jpg


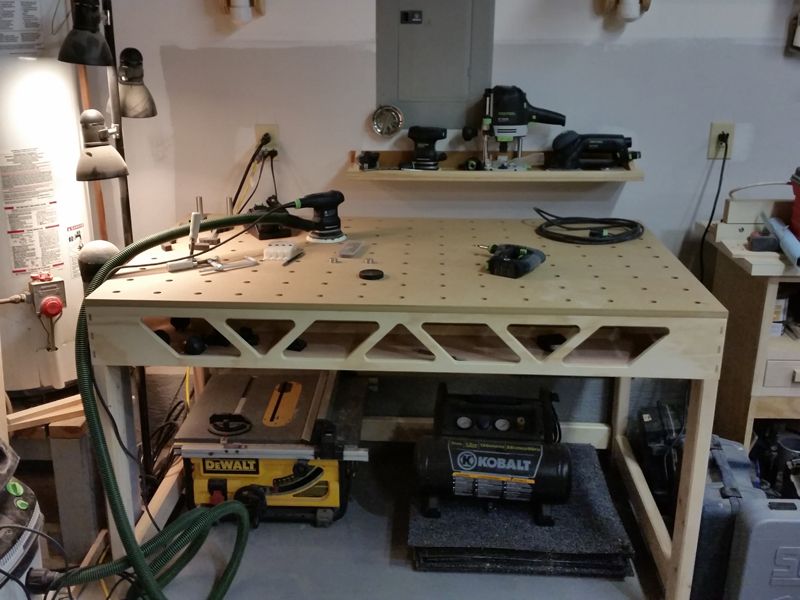
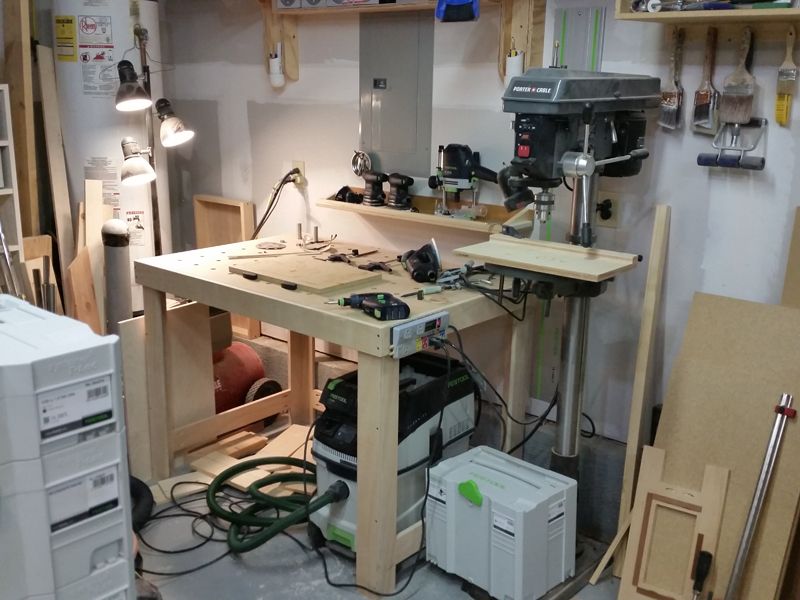
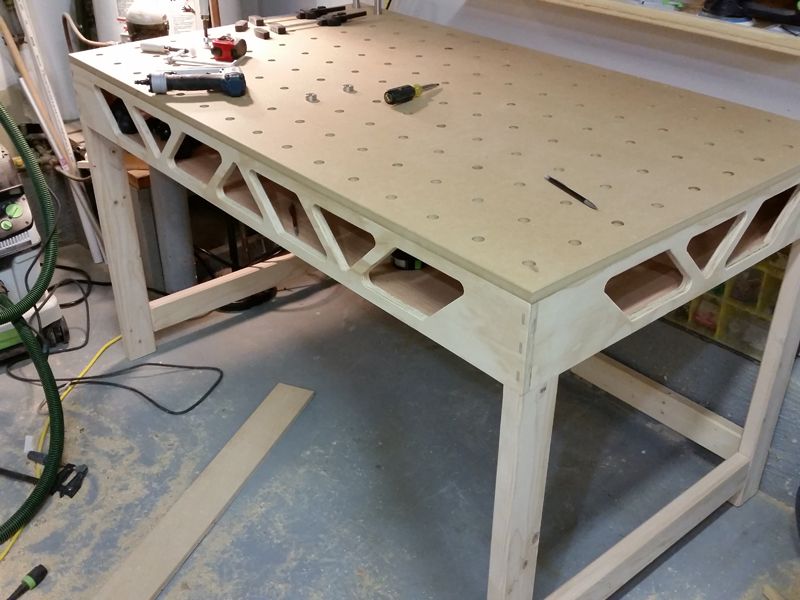
I also just finished my second diy MFT workbench. I made the smaller one a few months ago, but I wanted one a little bigger and with some storage underneath to place my tape measure, pencils and other small items.

2015-03-05%2017.05.53_zpsgyegzlpc.jpg


Looks like the weather is going to be decent tomorrow, so I'll try to get the cabinets done and my wood rack built. It's really exciting to finally have a bit more floor space and have a proper place for everything! 

 
If you think that was a disaster zone I'll never let you see mine!

[scared]

The end result looks great though. It feels really good to have a place for everything doesn't it?

 
wow said:
If you think that was a disaster zone I'll never let you see mine!

[scared]

The end result looks great though. It feels really good to have a place for everything doesn't it?

WOW, you are always encouraging newcomers to share photos.....  I think it's time you shared a few, particularly ones of your workshop.  [eek]  If nothing more, it might make me feel better with the present state of my shop....  :)

Oh, to the OP, nice progress, looking forward to the final outcome!
 
Baremeg55 said:
WOW, you are always encouraging newcomers to share photos.....  I think it's time you shared a few, particularly ones of your workshop.  [eek]  If nothing more, it might make me feel better with the present state of my shop....  :)

Oh, to the OP, nice progress, looking forward to the final outcome!

I encourage everyone (and especially newcomers) to post pictures so that they can brag a little, and also so others can live vicariously through them. For now, that will have to be enough. 

[wink]
 
I agree with the other guy about your original shop not being that messy compared to other shops I see but I really like your new cabinets and I want to see pictures of it completed. Is that workbench CNC cut or did you do that by hand. It looks great!
Walt
 
Thanks guys! I made some good progress today and the back end is mostly cleaned up now. Cabinets are up, just need to figure out some kind of knobs for all the doors and drawers.

Walt, the MFT was done by hand with my OF 1400, FS 2700, some Parf dogs and a couple of limit stops. I used a few blocks and a pair of calipers to keep the spacing right. Over all, it turned out pretty well. There are a few holes that are off by about a 32nd, but most of them are dead on.

Good point about the water heater, and I hate that it's there. I'm trying to get most of my tools that make the most amount of dust hooked up to my vacs.

Here's a few more progress pictures. It feels like I have so much more space now. [smile] 

2015-03-07%2023.05.06_zpsc0gxrbho.jpg


2015-03-07%2023.05.27_zps50q55bfy.jpg


2015-03-07%2023.08.49_zpsdmvqqvxa.jpg


2015-03-07%2023.10.10_zps9bfqm9di.jpg


Very slick bench, it looks very study.
When people think that your handy work was done on a CNC, you're doing pretty good!
 
Wow, can't believe the difference. Seems like you have a lot more room.

Love the bench. I noticed you used dominos for the bench top, #8's?
I assume you did the same thing to the legs. What size did you use?
Thanks
 
Cheese said:
Wow, can't believe the difference. Seems like you have a lot more room.

Love the bench. I noticed you used dominos for the bench top, #8's?
I assume you did the same thing to the legs. What size did you use?
Thanks

Thanks, I actually gained a good bit of floor space. The blue workbench was 36" deep and the new cabinets are only 24". Plus the wood that's on the racks was being stored on the floor, and that was constantly in the way. I've also thrown away a lot of stuff I don't use anymore, and a ton of scrap wood.

You are correct about the dominos, and I used 10mmx50mm for the legs. I was trying to figure out a good simple way to attach the MDF top to the frame so it could be changed out or flipped over if needed. I thought about running a ledger strip around the inside and screwing up from the bottom, but because the holes around the outside perimeter were rather close the edge, the strip would interfere with the locking knobs for the clamping elements. So I actually ended up using 4mm dominos drilled vertically into the top of the frame and on the underside of the MDF. Didn't use any glue, but they provided a very snug fit. It will be interesting to see how that idea holds up.

On a side note, I've been a big fan of pocket screws for years, but since getting the domino a couple of months ago, I've been using it a lot more instead of screws and I've been very satisfied with the results. I still have a lot to learn about how best to use it, but it's helping me put more thought into my projects instead of just pocket screwing everything like I'd did in the past. [big grin]
 
Back
Top