Guide rail carry case.

adcolor

Member
Joined
Mar 7, 2013
Messages
80
Not sure this is the 'right place' for this, but the description seemed to be the best fit.

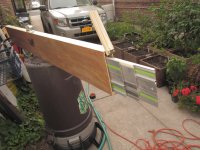
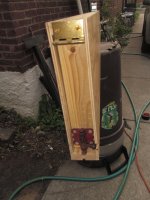
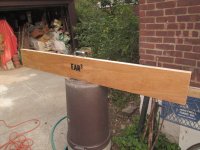
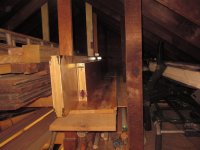
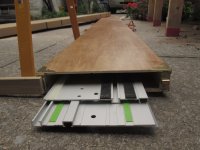
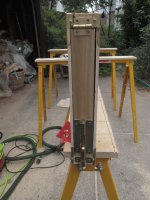
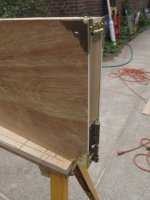
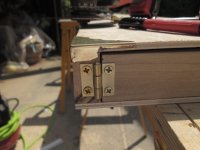
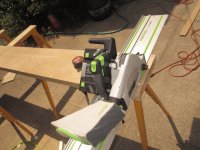
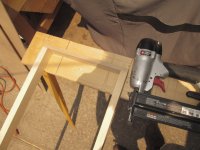
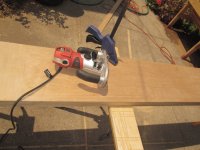
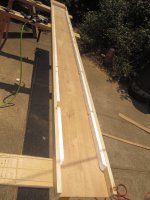
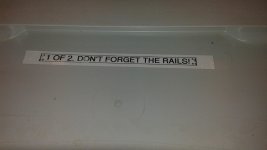
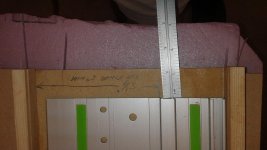
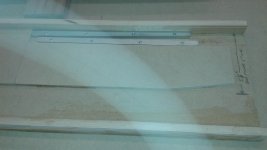
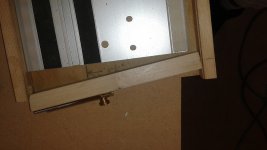
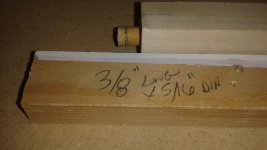
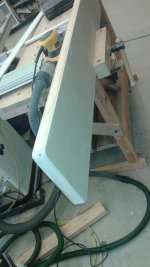
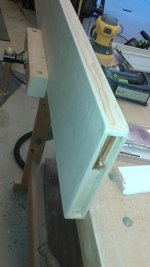
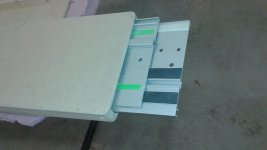
I occasionally travel with my TS55, and needed a safely move the tracks around (FS 1400 in this case).  One caveat of this project was to NOT leave the property to make the case.  That cuts out at least 1 hr of trip time to the hardware store, plus the actual 'shopping event' and aisle re-engineering/re-imagining.  So it was 'make do' with the design.  I think I could have incorporated a storage space for the joining rails, but they fit in the TS55 case as it is, so not a big deal.  The rails slide into the box from the end, with the face turned towards the outside, the back sides touching each other.  I used old door casing trim, 1/4" mdf, and some random stock I had laying around, plus a dowel and a sliding bolt for the latch.  It's all glued, as well as some 18 ga brads. No handle as it needs to lay flat in a crowded space (that may be reviewed after using it a few times).

[attachthumb=1]
[attachthumb=2][attachthumb=3][attachthumb=4][attachthumb=5][attachthumb=6][attachthumb=7][attachthumb=8][attachthumb=9][attachthumb=10]
 

Attachments

  • 2015-05-27_20-05-11.jpg
    2015-05-27_20-05-11.jpg
    170.1 KB · Views: 1,139
  • 2015-05-27_17-50-38.jpg
    2015-05-27_17-50-38.jpg
    266.4 KB · Views: 949
  • 2015-05-27_18-36-05.jpg
    2015-05-27_18-36-05.jpg
    209.8 KB · Views: 1,156
  • 2015-05-27_18-37-16.jpg
    2015-05-27_18-37-16.jpg
    179 KB · Views: 997
  • 2015-05-27_19-20-40.jpg
    2015-05-27_19-20-40.jpg
    670.1 KB · Views: 886
  • 2015-05-27_19-22-17.jpg
    2015-05-27_19-22-17.jpg
    761.3 KB · Views: 930
  • 2015-05-27_19-56-43.jpg
    2015-05-27_19-56-43.jpg
    203.8 KB · Views: 1,134
  • 2015-05-27_19-56-54.jpg
    2015-05-27_19-56-54.jpg
    187.1 KB · Views: 2,093
  • 2015-05-27_19-58-15.jpg
    2015-05-27_19-58-15.jpg
    546.7 KB · Views: 2,461
  • 2015-05-27_20-04-49.jpg
    2015-05-27_20-04-49.jpg
    537.9 KB · Views: 1,107
Well done. Nice and simple and looks stronger than the ones with an opening lid.
 
Nice job.  Is the top (with the brass locking mechanism) hinged in some way so it swings out?
 
Yes.  I made the fit work by trimming the dowel length a bit and I think I drilled the hole at a bit of an angle.
Also, I dimpled the dove tail of the sliding bolt to make it a more positive latch.  Probably better latches, but this seemed better than a conventional sliding bolt with detents (nothing to flop out and catch on something else). 
 
Thanks for the idea.  This is perfect for the upcoming job I have, where I'll have to have multiple rail sizes available.  The case fits up to 4 rails, max 75" length.  I recycled the 1x2s that came with the LR32 rail I picked up a few weeks ago, and then enclosed it in 5mm underlay.  I just used what hardware I had lying around, which is why the strange hinge and the bolt latch -- actually I was really happy I got to use the latch.  It was the original hardware on my house door from the 1930s, and it's probably been sitting in one of my plastic screw/hardware storage drawers for 25 years.  I put some foam on the bottom for the rails to rest softly on when the case is upright.

[attachthumb=1]

[attachthumb=2]

[attachthumb=3]


Attachments

  • IMG_5096.JPG
    IMG_5096.JPG
    3.3 MB · Views: 1,226
  • IMG_5094.JPG
    IMG_5094.JPG
    3 MB · Views: 1,293
  • IMG_5093.JPG
    IMG_5093.JPG
    3.4 MB · Views: 1,236
Double special thanks to OP adcolor for changing my transport and storage of rails with the nifty carrying case.  I decided to make another for my long rails.  The advantage here is that I can use it both when traveling to the jobsite, and also have it be their permanent storage case at home, since I now store my rails up in the loft with the long boards.

I took a slightly more care with the build, adding foam on all the inside walls.

[attachthumb=1]

If I were to do it again, I would probably use the pink or blue foam boards rather than the white stuff, since it's more prone to flaking.  I tried to minimize that possibility by lining the wall the full length of the case so the rail would not catch when sliding in.

This is not rocket science, but if anyone's interested in the build...The foam added a little more width, and so final dimensions were 11" x 118 1/2" x 1 7/8 (1 1/2 interior height).  I could have made it a tad thinner, as I'll only be storing 2 rails inside, but the hardware I got needed the 1 1/2" clearance. it helps to cut the plywood an 1/8th of an inch wider so that it can be flush trimmed to size.  When I don't care about DC, I just use my craftsman as a flush trim router, which has this great banana handle base. 

[attachthumb=2]

Also to ensure a consistent width, I temporarily added a piece at the front (where the opening would be) with the nail gun that I could remove after I had fitted the plywood:

[attachthumb=4]

I also made the case a bit long just in case, and so after I did a test fit of the 116 rail, I found that I could take off an inch and a half, which would make carrying the case and shoving it in the overhead loft marginally easier.  This was a quick operation with the track saw:

[attachthumb=5]

I actually went out and bought hardware for this case, including another bolt lock and corner protectors.  The corner protectors in the front unfortunately overlapped with the hinge and locking hardware:

[attachthumb=3]

But this is why on the fifth day God created the angle grinder:

[attachthumb=6]

Matching brass-plated hardware is making the luan and pine boards a bit jealous:

[attachthumb=7]

[attachthumb=8]

Final product, also with the 116" and the long holey rail:

[attachthumb=9]

[attachthumb=10]

And here is now the simplified rail storage in the loft:

[attachthumb=11]

Meaning I can now throw out the original cardboard boxes that I was using:

[attachthumb=12]


Attachments

  • IMG_5110.JPG
    IMG_5110.JPG
    2.7 MB · Views: 567
  • IMG_5109.JPG
    IMG_5109.JPG
    2.9 MB · Views: 1,408
  • IMG_5106.JPG
    IMG_5106.JPG
    1.3 MB · Views: 607
  • IMG_5107.JPG
    IMG_5107.JPG
    3.4 MB · Views: 504
  • IMG_5108.JPG
    IMG_5108.JPG
    2.7 MB · Views: 715
  • IMG_5105.JPG
    IMG_5105.JPG
    2.4 MB · Views: 644
  • IMG_5102.JPG
    IMG_5102.JPG
    3.2 MB · Views: 558
  • IMG_5099.JPG
    IMG_5099.JPG
    2.8 MB · Views: 485
  • IMG_5103.JPG
    IMG_5103.JPG
    2.6 MB · Views: 476
  • IMG_5101.JPG
    IMG_5101.JPG
    3.1 MB · Views: 542
  • IMG_5100.JPG
    IMG_5100.JPG
    3.2 MB · Views: 874
  • IMG_5113.JPG
    IMG_5113.JPG
    3.2 MB · Views: 632
Nice to protect our investments -- and not spend a lot of time on something that is intended to get beaten up.
And a big plus to challenge ourselves to use what we have.  Adds to the challenge of creating a solution.

Too late to save the cardboard for finishing underlayment..... [crying]
 
Back
Top