How best to cut this cabinet part

ReneS

Member
Joined
May 22, 2024
Messages
138
Location
Central New York State
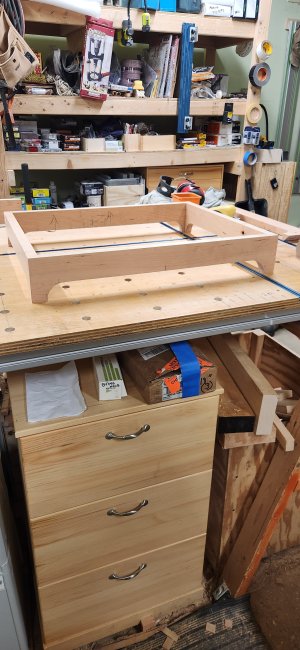
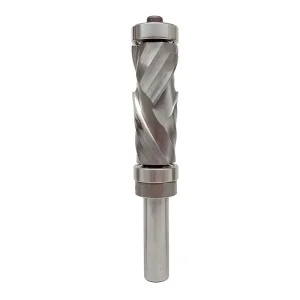
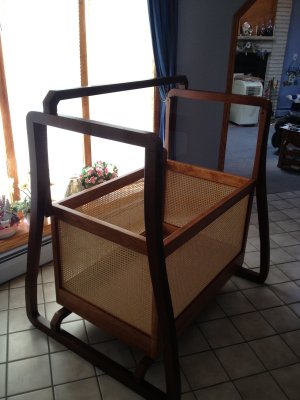
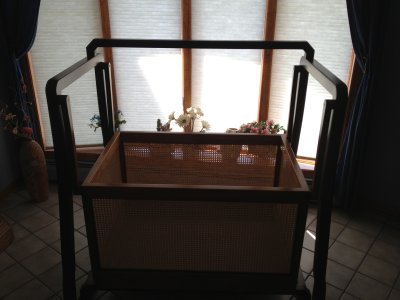
I have been adding a simple cut out to the bases for my freestanding cabinets. After trying a few different approaches, I am now drawing the cut out on each part and cutting close to the line with a jig saw. Then to get a nice clean, straight line, I use a mortising bit on my router table and set the fence back the needed distance. The two feet run on the fence. I only take off a 1/32 or less with each pass. I finish the curved part on an oscillating sander.

It works pretty well and seems to be similar to using a template and a flush trim bit, but I am wondering whether it is a reasonable way to do this. Earlier today, one of the parts was giving me trouble and ended up being pulled out of my hands and then got gashed by the bit. (I think I was trying to take off 3/64. Since then, I have switched to using grip paddles and am more conservative with the depth of each pass.)

Previously, I tried cutting the straight line with a track saw, which was okay but not great. I have also tried using a template and a flush trim bit, but that wasn't working wonderfully either. Of course, that could by my lack of experience.

I would appreciate any comments that might help me with this.

Thanks
 

Attachments

  • 20260102_175703.jpg
    20260102_175703.jpg
    1.2 MB · Views: 41
If I was making just one base, I wouldn't go with a template because creating the template itself would take some time. I use templates only when multiples are to be made.

Since the inside of the base is not seen (or hidden from viewing), I'd cut the straight line on the table saw, stopping at the two end points (on the show face). This method is for the experienced table saw users and to be done safely (clamping the board down and raising the blade gradually). Ideally, perform the table saw cut before the board is trimmed to the final size of the part .
 
I do loads of this sort of thing on my charcuterie boards and other products, and will cut a few mm outside of the lines, and then use a beefy flush trim router bit with a template.

The less you take off with the router the better the finish will be. A lot of people try to remove a large amount of material with the flush trim, that's generally when you'll likely get terrible results.

Using a small trim cutter can also give less than desirable results. If you do a lot of these cabinets, I would suggest investing in a spiral insert flush trim from CSP Tooling or similar:


The above is one I use and it is hands down worth every cent, amazingly useful!
 
Last edited:
Agree with lmt, a big diameter up/down shear cut (compression) flush trim bit is your friend for this work. If not the one above, check out the new bits Woodpeckers is producing.

While a larger bit may be intimidating, thanks to the larger diameter it pulls at the work less than small diameter bits. It cut more like a plane and less like a pry bar.
 
Thanks guys. I appreciate all the ideas. At this time, the beefy router bit looks good to me, but I prefer not to buy from China. How does this look? It's by Whiteside.


Attachments

  • 192066_000_001.webp
    192066_000_001.webp
    18.1 KB · Views: 29
This is an economical version from Woodpecker. Made in Ohio. Jeff says it works very well despite its more conventional construction compared to the fancy solid carbide bits. The 1-1/4” diameter bit cuts stock up to 1-1/2” thick and is $80. If you expect to do a whole lot of this work there might be a domestic made replaceable insert cutter.
Thanks, Michael. That looks good. I just ordered it.
 
Thanks guys. I appreciate all the ideas. At this time, the beefy router bit looks good to me, but I prefer not to buy from China. How does this look? It's by Whiteside.

If it's purely because of quality worries, I can absolutely attest to the power, performance and incredible level of balance the CSP ones have. I've now bought 3 and a mate has bought a couple, and they are just unreal quality.
 
Oh, I believed you and had no doubts about the bit. My concerns were shipping time, USA tariffs, and preferring to support local businesses. The USA has been rough on its manufacturers, and when I can, I prefer to buy from them.
 
Oh, I believed you and had no doubts about the bit. My concerns were shipping time, USA tariffs, and preferring to support local businesses. The USA has been rough on its manufacturers, and when I can, I prefer to buy from them.
Supporting local definitely is a good attitude to have!
 
Last edited:
Thanks guys. I appreciate all the ideas. At this time, the beefy router bit looks good to me, but I prefer not to buy from China. How does this look? It's by Whiteside.

I have the Woodpecker Ultra Sheer bit. Great bit, very clean cuts. I’m pretty sure I posted cuts with it in the thread that introduced it.

@ReneS, I changed the link, this is the bit I got.


Tom
 
Last edited:
I haven't used that particular WP bit, but a very similar design from Infinity tools works very well. The shearing, rather than hacking, action gives a much better cut. There are situations where that extra bearing does get in the way though, and I have never seen a brazed style without one.
For that I use Amana 57176
Whichever bit you end up with, minimize the amount that you have to take off with it.
Personally, I would use a template, no matter how many I need. It is the safest and most accurate.
On a part this relatively small, I would do it with a sled style fixture, to have a better handhold. Then cut it with a router table. This makes it easy to flip the part over and only cut the radius downhill with the grain. This not only cuts much smoother, it essentially eliminates grabbing and tearout, keeping your hands out of range too.
 
Last edited:
I would note that I ignored the direction of the grain while cutting some toys out of pine and trimming with a router bit. The bit dug into the grain and tore the edge ragged. I posted here on that problem. I will look and see if I can find it.


Addendum:

Found it. Here is when I ignored the direction of the grain. I had to trace the part in two directions by flipping the part mid-way. You can see where the cut is smooth and where it climbed the grain and was ragged. You may have to do the same by flipping the part mid-way.

Note: I did this on the router table and the chatter was aggressive enough to pull the part from my hands if I did not have a firm grip. The blue tape represents the section that had to be cut by flipping the part.

1767472538238.jpeg

For reference, this is the finished part:

 
Last edited:
I would note that I ignored the direction of the grain while cutting some toys out of pine and trimming with a router bit. The bit dug into the grain and tore the edge ragged. I posted here on that problem. I will look and see if I can find it.
That kind of ragged tearout is far less of a problem with a spiral insert cutter.
 
This is a video of how I routed the 4 link suspension for my grandsons cradle. By using a top/bottom bearing pattern I was able to avoid tear out in the Leopardwood. The new Woodpecker Ultra Sheer bit cuts much smoother than the CMT bit I used in the video.


Tom
 

Attachments

  • IMG_2551.jpeg
    IMG_2551.jpeg
    1.2 MB · Views: 12
  • IMG_2550.jpeg
    IMG_2550.jpeg
    1 MB · Views: 17
Back
Top