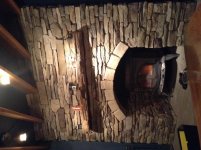
As John mentioned always read the manufacturer's installation manual for info.
Beyond that, thinset should work fine for this type of application; all I've ever used but I have not used this particular stone. If you mix your thinset properly 'stick' should not be a problem. A couple layout thoughts that I use to help with setting and appearance.
- Dont' install the bottom row unless you are sure about level and position. I typically screw or clamp a straight edge at the level of the bottom of the 2nd row and start up from there. That way my tile has a stable base to set from. Any variations at the hearth, floor or stone can be dealt with by cutting the bottom row as needed; rather than those deviations transferring through the entire wall
- Check layout prior to starting; depending on fireplace opening and tile heights you may want to adjust install; i.e. under one set of measurements you may be able to start from the bottom, work up and everything will look fine; in another set of measurements you could end up with a 1" wide piece running along the top of the firebox which would look like crap, in this case it might be better to start at the bottom with a 1/2 stone/tile so that the row along the top of the firebox has some body to it to look good
- depending on install I have also started with a full row along the top of the firebox and then cut everything else from there
The bottom line is do some dry fit layout prior to actually setting tile. Spending time on layout is the difference between a 'oh that's nice' job and a 'wow that looks awesome' job.
- Have a good sponge and clean water with you to immediately wipe up a thinset spooge; much easier than scraping off once dry
- I prefer interweaving corners; straight corner seams can look good or bad depending on product; 45 corners usually don't work well but are feasible; I did a dry stack fireplace surround in an office only a few years ago where the client demanded 45 corners; fairly stupid since the stone sheets were designed to interweave; have to say it looked better though
Hope this helps somewhat


