Grasshopper
Member
- Joined
- Oct 6, 2014
- Messages
- 595
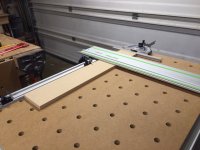
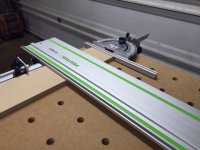
As the title suggests, I wanted to see what your workflow is for making repetitive cuts on the MFT/3, taking into consideration blade kerf thickness.
Typically, I like the off cut (always marked with little x's) to be on the right side of the blade. In this setup, I don't have to worry about the kerf, i simply drop the guide rail/splinter guard right on my line and make the cut knowing that the kerf line will fall on the off-cut side leaving me a dead-nuts cut.
I am still trying to make good use of my MFT/3, and I can't help but notice in everybody's setups that I have seen, the guide rail is on the far right side of the table. If I wanted the off-cut side to be to the right of the blade, I'd have to locate the full sheet (5' baltic birch) to the right side, which would either really hang off without any fence support, or I'd have to bring the guide rail to the left side of my table.
I must be missing something pretty obvious, so I thought I'd pose the question to y'all regarding how you use the MFT for cuts of sheet goods, taking into account the kerf (as I assume most MFT setups cut the "keeper side" to the right of the rail/blade.

")
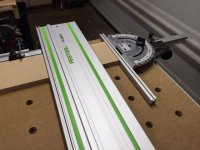
 . the miter gauge contraption is garbage to me as im always using the mft holes for 90s and 45s. the mft fence is ok for the flag stop.
")