How to make a wood draining board - wood questions

Intex

Member
Joined
Aug 16, 2016
Messages
168
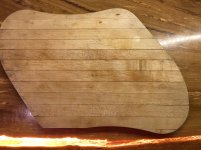
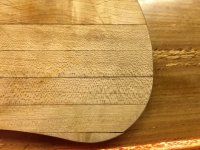
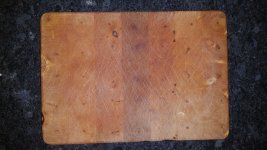
I am making a wood drawing board similar to ones sold by makemesomethingspecial.com

I am getting the Trend DG/Pro router jig for the drains.
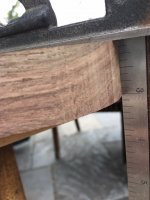
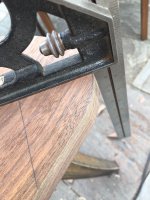
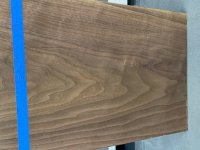
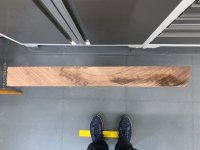
I am using 2” thick kiln dried walnut 15” wide. I was going to glue up 5 boards 3” wide each, but the lumber I bought is already 15” wide. My question:

Is there any advantage of gluing up the 5 boards to make 15” width or just use it as is. The ones I saw with boards glued up did not alternate the grain (right side up, then upside down, etc...). So I don’t see that much of an advantage in the glue up ???

Any comments appreciated

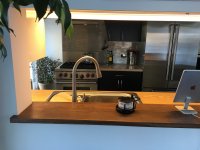
Ps: this will not be wet all the time in the sink, but on the counter top and dried after use.
 
My personal advice is to not use full width.  If you look at cutting boards and other stuff like that, the real reason decades ago they were put together the way they were was to combat the whole cupping and expansion and contraction issues.

Just my 2 cents.

Peter
 
The wood cutting boards we have are endgrain but when I clean them off after each use I clean both sides so the water exposure is equal. This helps to minimize the cupping. It used to drive me nuts trying to use one with it spinning on the countertop.
 
I suggest you do laminate the boards and try to orient the grain to minimize expansion/contraction issues.  The main challenge with this is going to be preventing cupping.

Using a single board, I'd predict that it will probably cup quite quickly.

Are you going to put any finish on it?  I can tell you from experience that penetrating epoxy will help prevent water damage, but osmo top oil also does a pretty good job, although prone to spotting a bit.

 
This is a very timely question as I'm trying to figure the same thing out.

Traditional thinking would deem that the laminated wood strips would be your best defense against twisting and cupping. However, it's also not your best defense against individual strip delamination.

Kohler produces this cutting board to accessorize their sinks. However, this is the 3rd cutting board I've gone through in the last 10 years. All the failures have been because of wood strip delamination. None of these cutting boards have been put into the dishwasher and none have been subjected to excessive exposure to water. When they're cleaned, they're wiped with a damp towel and then immediately wiped with a dry cotton towel. Notice the chunk missing from the LH side.  [mad] [mad] [mad]

[attachimg=1]

And these pieces will be jettisoning themselves soon...

[attachimg=2]

I decided the time had come to try something different.

About a year ago I made a walnut countertop with built-in LED lighting. I finished it with Surfix and have been very happy with the results. I decided that with the lack-luster results I'd had with the factory Kohler cutting boards, a new method needed to be introduced or at least investigated. Here the dratted delaminating cutting board is seen in the background.

[attachimg=3]

My solution has been to use an off-cut of the walnut countertop, let it condition for the last year and then finally machine it to the required specifications. After thicknessing it to 1" about a year ago I've just let it be so I could evaluate the results. It was still absolutely flat when I decided that today was the day...

The walnut is cut to size with a TSC and then further reduced with a P1 cc. This is a shot of the perpendicularity attained using a P1 cc on 1" thick walnut on a radius. The radius is usually the problem because as you're making the turn, you're unknowingly bending the blade.  [eek]  This was using the standard W5 Mafell blade, no blade guide adjustments...because they're aren't any...[thumbs up]...just take it easy.

[attachimg=4]

[attachimg=5]

And this one's for Peter [member=1674]Peter Halle[/member]...where did she come from? Oh...that's the dog that chews on the walnut wood scraps...and also moves rocks when she's bored.

[attachimg=6]

So this is where we're left at, the final form minus the rebate on the underside that will allow it to nestle within the colander. Tomorrows project.

[attachimg=7]


Attachments

  • 7377.jpg
    7377.jpg
    424.9 KB · Views: 2,171
  • 7379.jpg
    7379.jpg
    445.1 KB · Views: 2,009
  • 7376.JPG
    7376.JPG
    1.1 MB · Views: 2,002
  • 7373.JPG
    7373.JPG
    804.4 KB · Views: 2,070
  • 7371.JPG
    7371.JPG
    995.5 KB · Views: 2,085
  • 5027.JPG
    5027.JPG
    497.3 KB · Views: 2,040
  • 7378.jpg
    7378.jpg
    410.3 KB · Views: 2,033
Thanks for the detailed explanation [member=44099]Cheese[/member] .  You keep on inching me closer towards getting the pc1cc.

[member=62093]Intex[/member] What's the grain/board section of the walnut board you have?  Can you tell if the board is flat sawn, and if so, at what point of the tree?  This will make a difference over time for how it expands/contracts and resists warping or not.
 
Would an end grain cutting board resist cupping better?

If you took that walnut board and make multiple crosscuts that are spaced at the desired thickness of the board, then rotate them 90 degrees so the end grain is on the face side and glue them together the grain will be running from top face to bottom face. Then trim to size/shape and round over the corners and edges as desired.

Do cutting boards of this type have cupping problems and if so are they worse or better (as in less or no cupping) ?
 
You mean something like this?

View attachment 1

This cutting board is about 10 years old now. No cupping at all. The only surface treatment is a good soaking with oil from sunflower seeds about once a year. Recently a glue line at one of the long edge has started to open up ever so slightly. That's it.

During the first year it did have a small tendency to cupping, but that was easily solved by letting it lie on a damp towel for a night with the concave side down.
 

Attachments

  • 20190707@230325.jpg
    20190707@230325.jpg
    3.4 MB · Views: 337
Yes, that is what I am talking about. With Walnut it might look nice.

edit: DOH !  I just read this thread over again and see I was thinking cutting board but the OP was asking about a drain board. My apologies.
 
ear3,
I am attaching pictures of the end grain and face of the 8/4 thick board.
I will be putting on 10-15 coats of Liberon finishing oil when done.
 

Attachments

  • walnut2.jpg
    walnut2.jpg
    85.2 KB · Views: 358
  • Walnut1.jpg
    Walnut1.jpg
    55.1 KB · Views: 334
I have been spending TOO MUCH time reading about this subject. I am going to go ahead with this one piece of wood and see what happens. Worst case, if it cupps (hopefully on the bottom, I will plane it down, and give it to someone in the family and start again.

I went ahead and purchased a TREND Drain Board jig, to be able to give the interior of the board a slight drain downwards (5 degrees?), and also use the jig to route trhe drain grooves.

I am also going to put a horizontal 1"x1" piece on the bottom of the front of the board, that will hold the drainboard in place as it is on the edge of the countertop/sink. Also I am thinking abhout routing out a 1x1" groove at the back/bottom edge of the board, then epoxy in a piece of 1x1" walnut, but on edge (90 degrees to the grain on the board) hoping that this helps with cupping, sort of like CAULS.
 
Here's one I made earlier:

6c977b859020866a46adeca23345ec3b.jpg


It's 3 ~19mm boards making up the width. 3 years on and there's only the slightest of cupping with 2 stretchers screwed in underneath. Expansion across the way has been surprisingly non existent (mitred corners are still nice and tight). It's ash, which was completely the wrong wood to use, but it's what I had at the time and it was just an experiment born from necessity... so no biggy.

2 design elements that proved a winner:

1) Having a means to keep itself in place and draining over the edge of the basin courtesy of the hooks at the front.

2) and air gap underneath allows the inevitable spillages that escape cleanup (the better half can treat washing up like a water party!) a chance to dry without going yucky. There's 4 rubber ball shaped feet doing that bit of magic.

The Osmo PolyX has worn in places and the big wide open grained ash has blackened at various spots. We started of drying it every time but that likely accelerated the demise of the finish. When I do it over I'll be looking at an epoxy finish or something similarly bombproof. Finding the right time to take it out of action to re-coat the Osmo just never happened :/
 
Just be aware on these cutting boards that all woods are not created equal when it comes to wood.  Some hard woods are prone to harboring bacteria from foods.  When deciding on a wood to use, do a quick Google search as to whether it's a good choice.  There's a lot of work and time involved in some of these boards, make sure you aren't building a trap for all of the little bacteria from your foods.
 
Roachmill
Thank you for the picture and recommendations. The ones made in the UK that I have seen use a new finish that they call Diamond Coating, that they say works fantastic. It uses a catalyst, so maybe it’s a conversion varnish.

I noticed that you are from Shetland, a coincidence since we do a lot of business there, and go there often. There’s a Ram that lives in the hills above the B&B there that has it in for my son. Has ran him down twice so far.
 
^Small world! A ram with a bone to pick is pretty scary indeed. I've not had first-hand experience of this myself... but ken a few who have. Can't complain too much though as there's not much in the way of dangerous wildlife up here. Motorists going either too fast or too slow are about the most deadly thing you'll come across most of the time ;)
 
It was in Lerwick, just go up the hill and look for the only Big,Black,Mean ram.
 
Intex said:
It was in Lerwick, just go up the hill and look for the only Big,Black,Mean ram.
They've not long started carving up the big hill up the back of Lerwick for new housing... so your favourite ram may have moved on. Or they may have drafted him in to help break up rocks?
 
I decided to go with one piece of walnut. I started to route it with a Festool 1010, but found that this router is too lightweight to adequately route out so much material, so I have ordered a 1/2" shank router just for this job, we'll see how it goes.

As for the jig, I am using the TREND DG/Pro jig, evidently there is a learning curve to this, since my results so far have been less than successful.
 
Back
Top